TL;DR // summary
Native payments are a train wreck waiting to happen: broken transactions, failed renewals, and users who get pissed off and leave bad reviews. Adapty lets you handle iOS and Android subscriptions in one Dart codebase, kills the backend chaos, auto-manages every edge case, and gives you clean dashboards without the headaches. I went through the native nightmare first so you don’t have to. Yes, you pay them a small fee but in exchange you get peace of mind and go live in a day or two instead of a week+
Lets be honest from the beginning. Payments are not easy to integrate when building apps! Handling correctly every possible edge case of a client's transaction is VERY difficult to implement And they are one the most critical parts of your app! No payments, No revenue!
A lot of beginners that start working on payments choose native libraries to handle payments without realizing that there are solution that make the whole experience much easier. That's how I discovered these solution... by first integrating payments using native library and handling all edge-cases myself... I even almost finished this blog post on how to make payments with native Android library and then by accident discovered much easier way. I've gone through all of the pain so you don't have to!
Want to integrate payments using native libraries for your low-budget start-up? Forget about it! Save your time. You might be tempted to build your own integration and save that 1% revenue cut that external providers will take once your revenue is above their threshold, but you'll also have to invest a lot of time that could be used much better elsewhere!
So why use Subscription Management Platforms?
- Cross-platform magic without the mess - These platforms let you write your subscription logic once in Dart, and boom, it runs flawlessly on both Android and iOS. Ditch the ugly if/else platform switches and separate code paths; it's a dream for Flutter devs juggling multiple stores.
- Backend? What backend? - They take care of all the gritty stuff like secure receipt validation, tracking renewals/cancellations/grace periods/billing retries/refunds, and seamless cross-device syncing. Just query a simple entitlement check (like isActive on 'pro') instead of hacking together your own server, webhooks, or Pub/Sub chaos.
- Platform quirks? Squashed - Whether it's Android's background purchase fails (easy fixes like launchMode tweaks), iOS's finicky sandbox testing, or auto-handling trials/offers/prorations, these tools smooth it all out and keep up with Apple/Google's constant API updates so you don't have to.
- Dashboard that's a game-changer - Get real-time insights into revenue, churn rates (often sneakier on Android due to payment glitches), LTV breakdowns, customer histories, and built-in A/B testing for paywalls/offers. No more cobbling together third-party analytics or spreadsheets—it's all in one spot.
- Dev time slashed, sanity saved - Flutter folks on Reddit, Stack Overflow, and dev blogs rave about going from "months of billing hell" to "launch-ready in days." One indie dev called it a "lifesaver for solo projects". another said native IAP is "a dumpster fire" compared to this plug-and-play bliss.
- A/B testing magic for more $$ - These platforms let you run easy experiments on paywalls, prices, offers, or wording (e.g., "Premium for $4.99" vs "$9.99 with 50% off") without redeploying your app, test what resonates with users in real-time. Devs report 10–30%+ conversion boosts by spotting winners (like shorter trials converting better on Android), turning guesswork into data-driven revenue growth that pays for itself fast.
So now another dilema. Which Subscription Management Platform?
There are multiple options on the market. The most popular are:
- RevenueCat - the most popular on the market.
- Adapty - rising star.
- Qonversion - generous free tier.
- Apphud - niche.
- IAPHUB - lightweight.
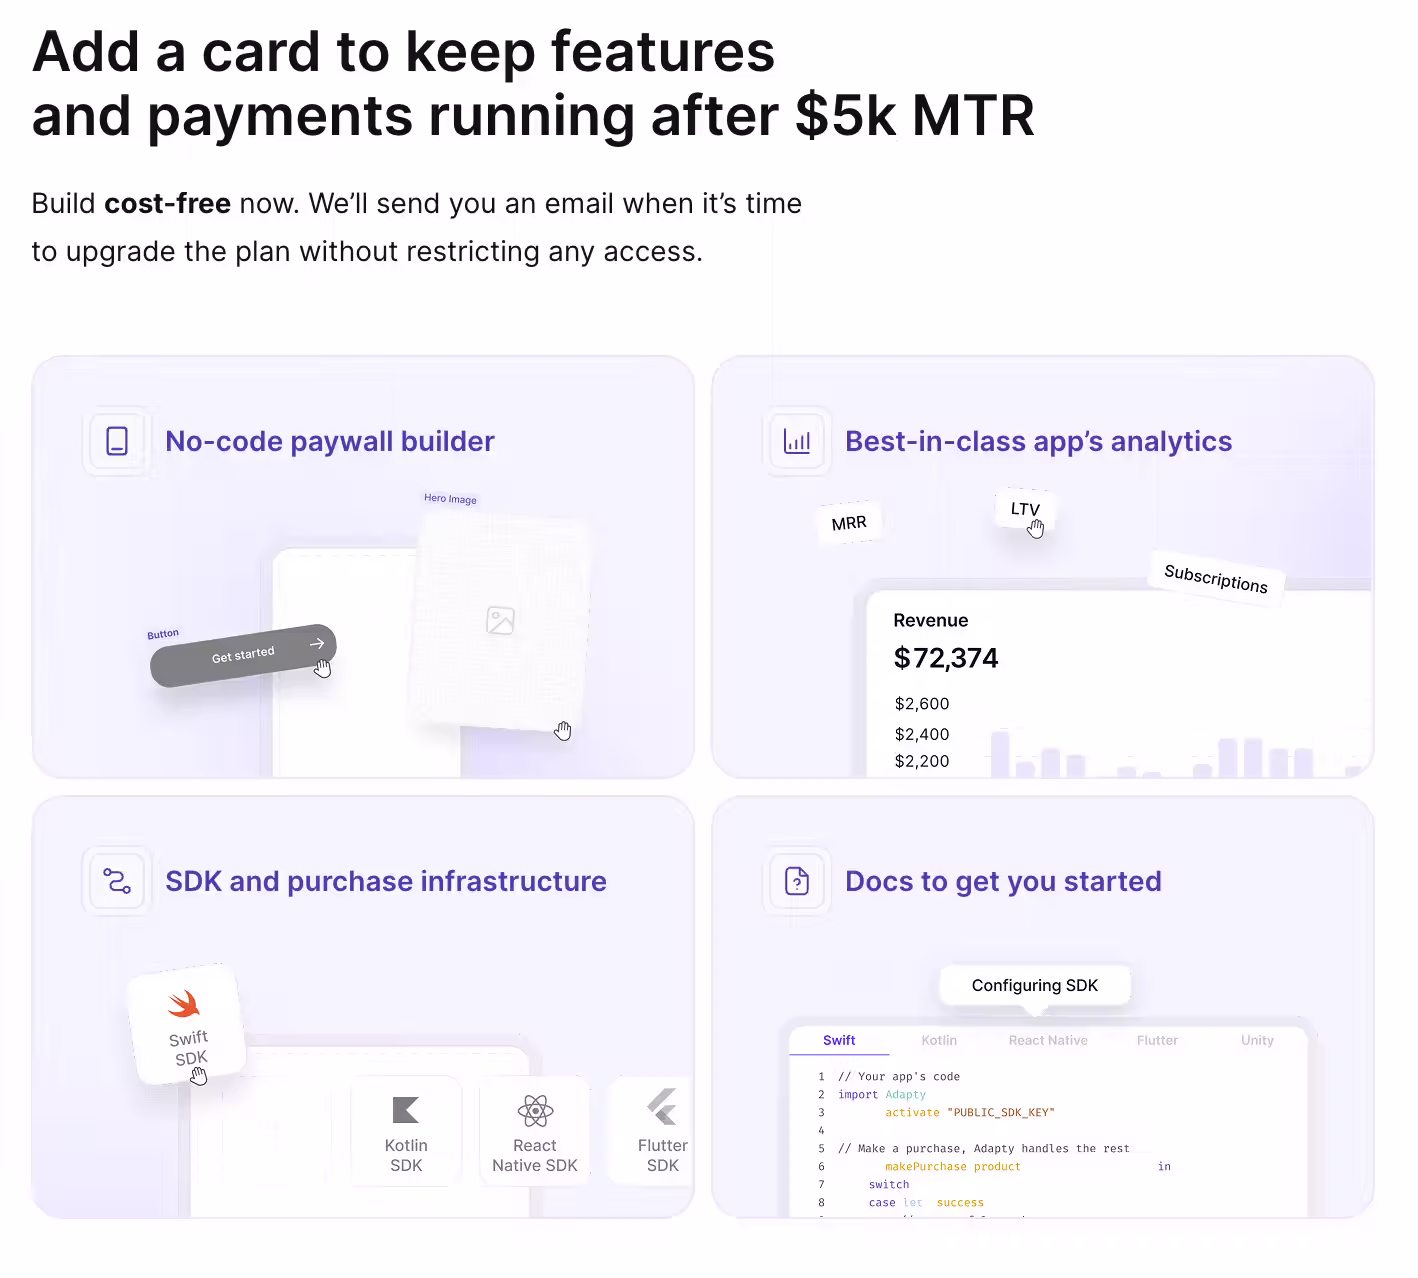
Most platforms charge percentage of your revenue after you reach MTR (Monthly Total Revenue) threshold. RevenueCat charged 1% after $2500 MTR. So if you monthly revenue is below $2500, you pay nothing. Great for start-ups! If your monthly revenue for example reaches $5000 you'd pay 1% only on excess over $2500, so $2500 * 1% = $25.
All of these tools offer easy integration with Flutter, but because RevenueCat and Adapty are the most popular it's much easier to find guides and docs for them. And I guess because of this it will be easier to integrate them with AI or patch any issues.
No matter which one you choose, you should be saving a lot of times on integrating and managing payments. For small start-ups there would be big noticeable difference between them. I ended up between RevenueCat and Adapty and in the end decided to go with Adapty, mainly because of more advanced conversion tools that in the long-run could pay off. Their more generous free tier was another reason.
Adapty setup
First, create a new account here. You can finish account creation without card details, but some features stay locked, no-code paywall builder being the main one.
After creating the account, you'll get prompted to connect App Store and Play Store.
App Store setup in Adapty
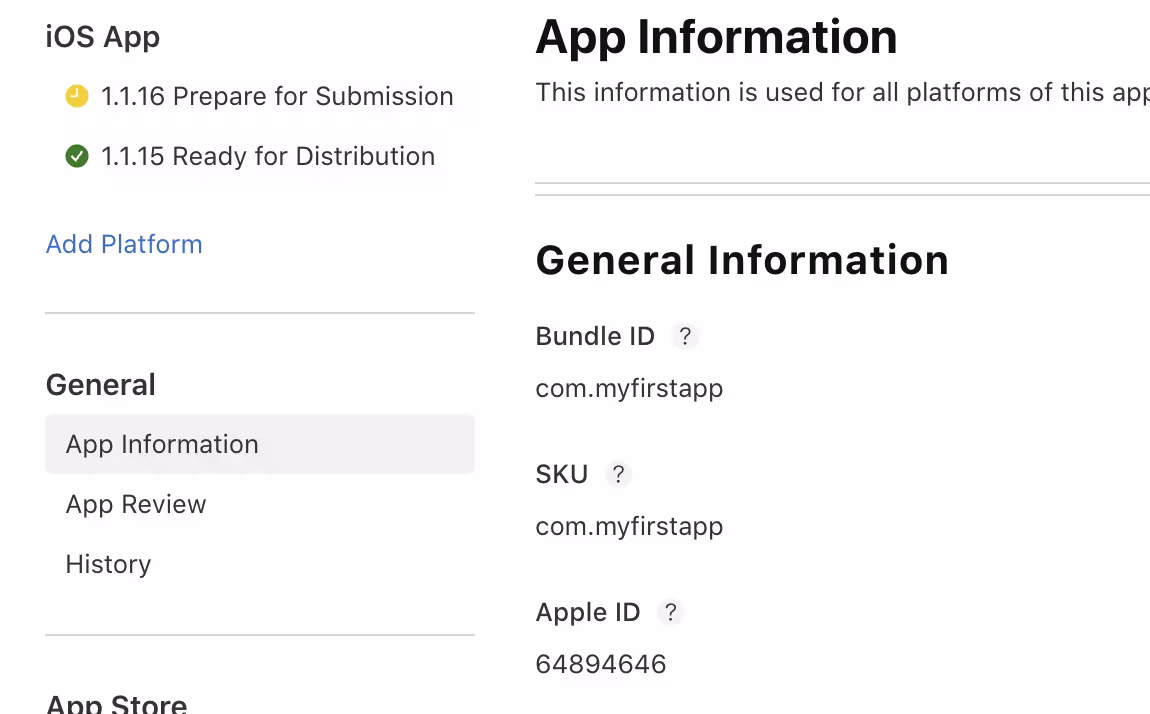
In contrast to Google Play setup, this part is more painful and takes longer. In Adapty go to App Settings > iOS SDK. Open App Store Connect, go to App Information, grab Bundle ID and Apple ID.
Paste them into Adapty's iOS SDK settings.
In Adapty copy the App Store Server Notifications URL.

On the "App Information" page look for "App Store server notifications" and click Set Up URL on the Sandbox Server URL section.
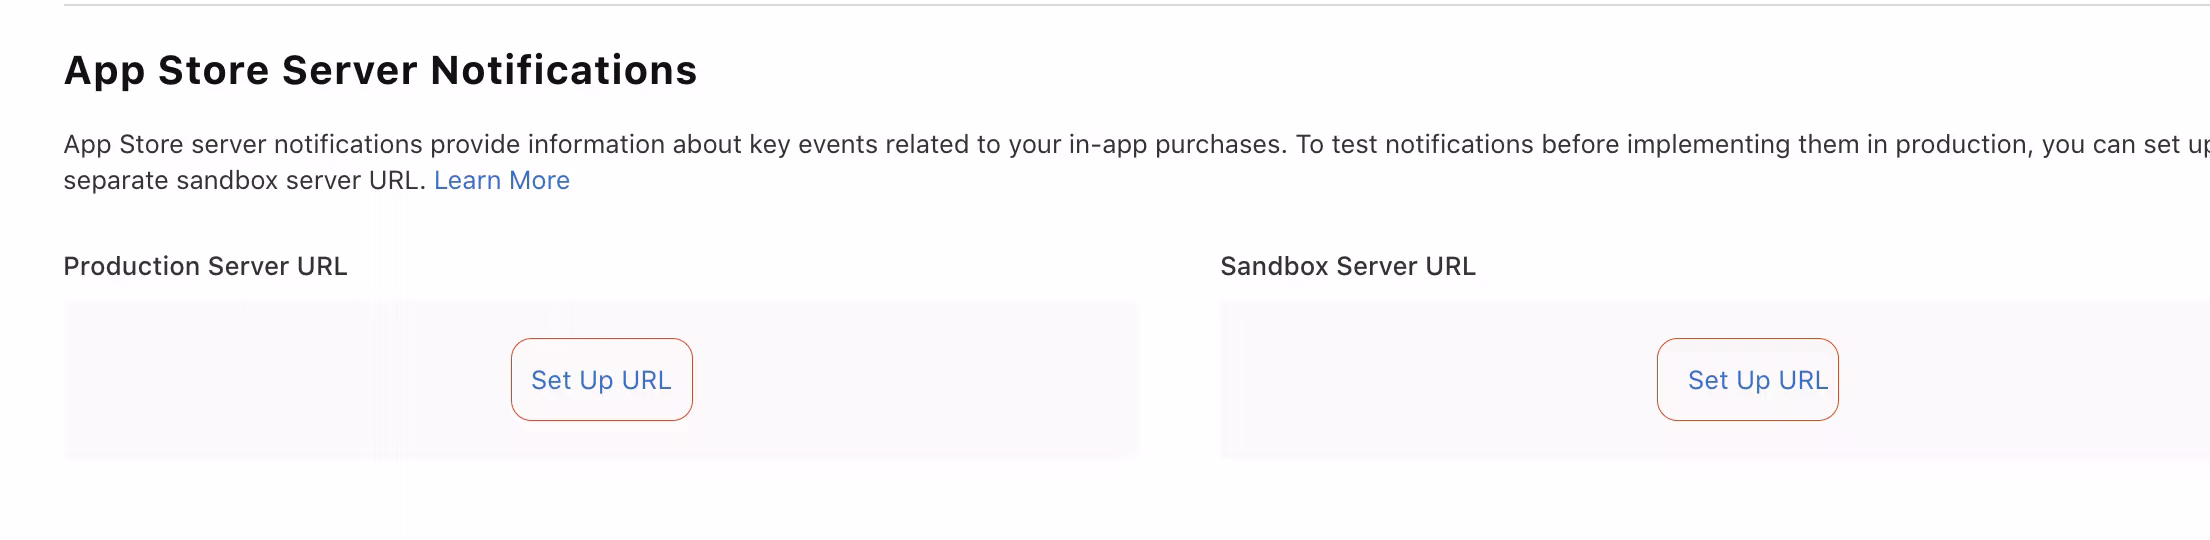
Paste that same URL into both Production Server URL and Sandbox Server URL.

In App Store Connect go to Users and Access > Integrations. You might need to request access for App Store Connect API.
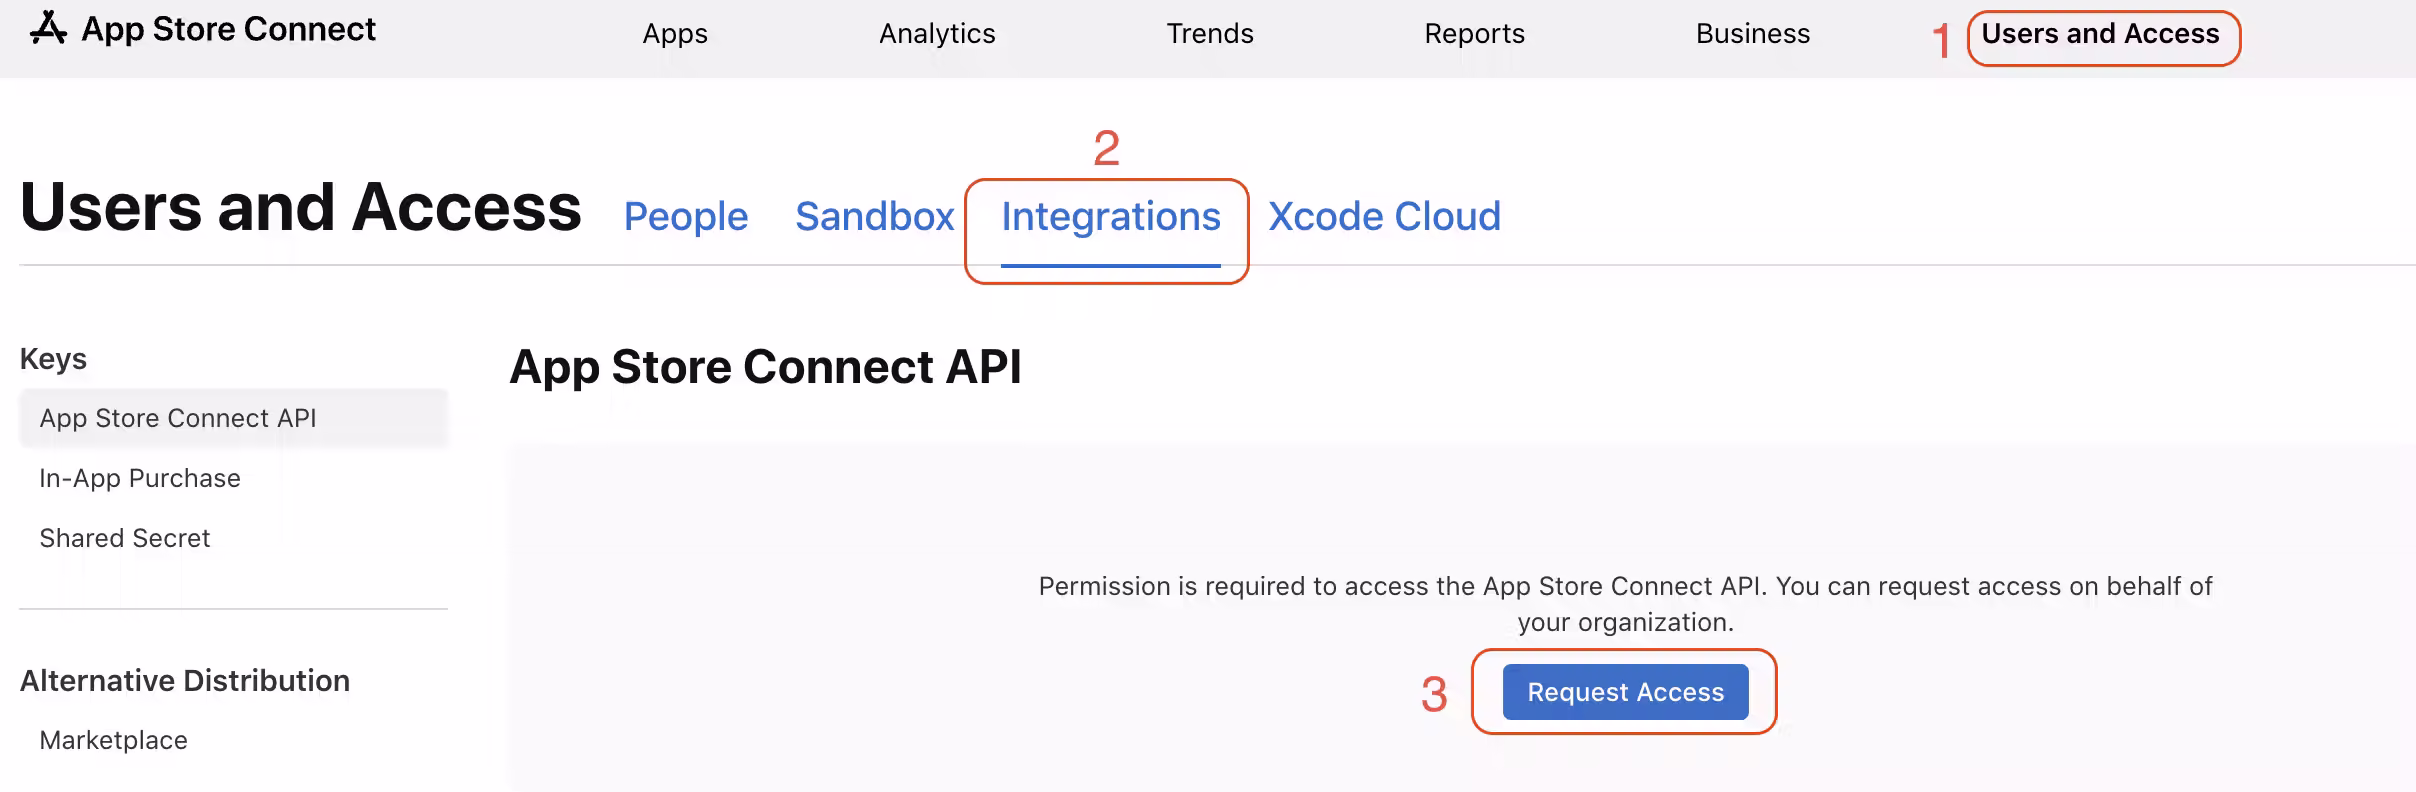
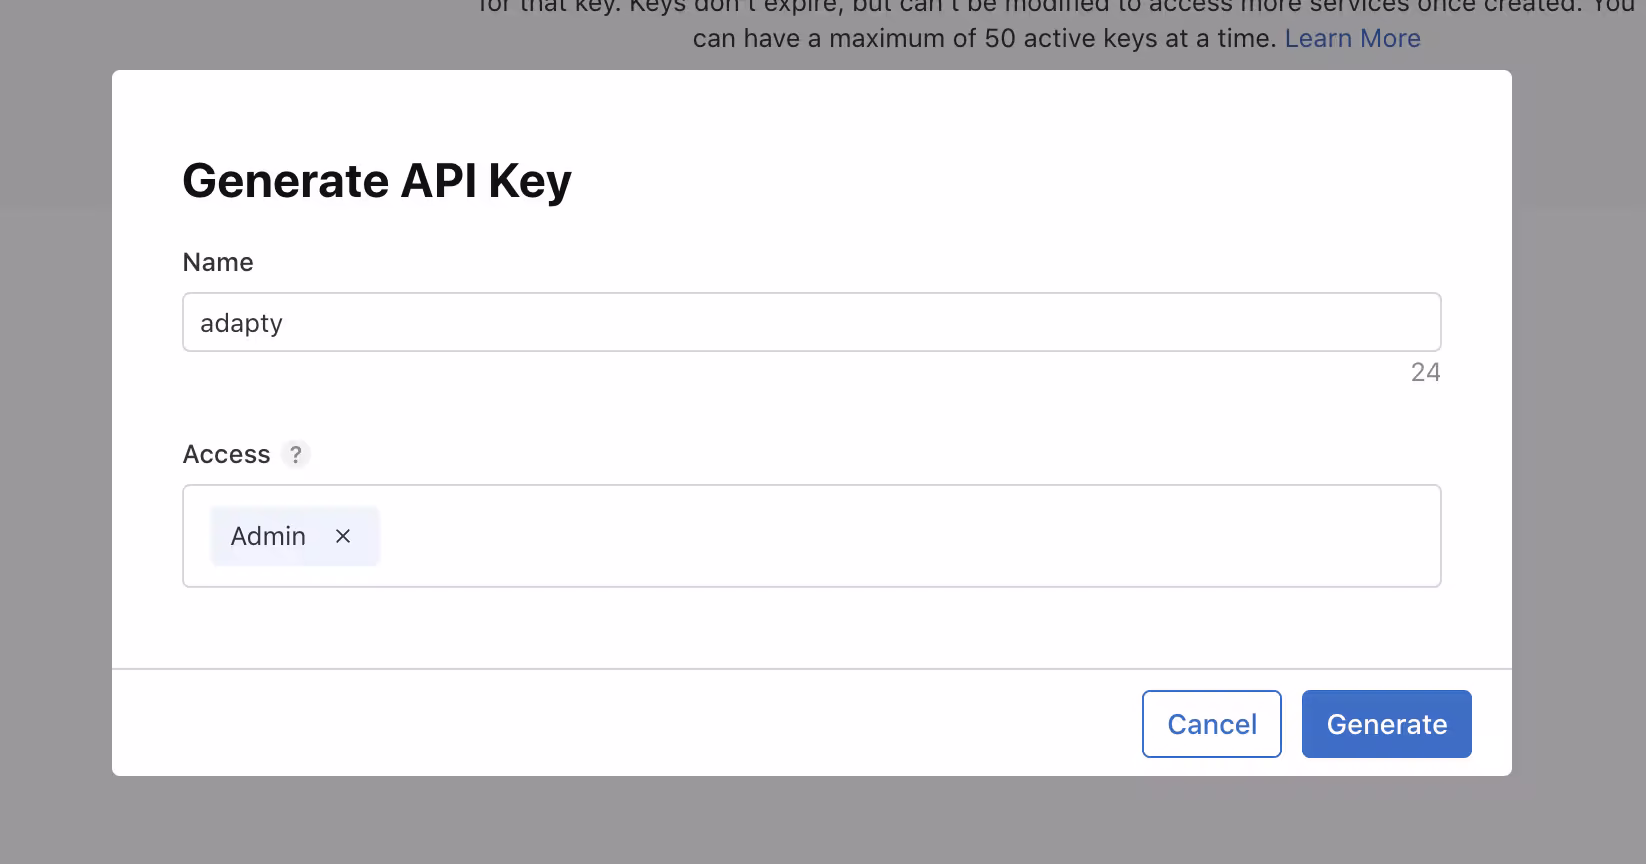
Generate a new API Key with Admin permissions.
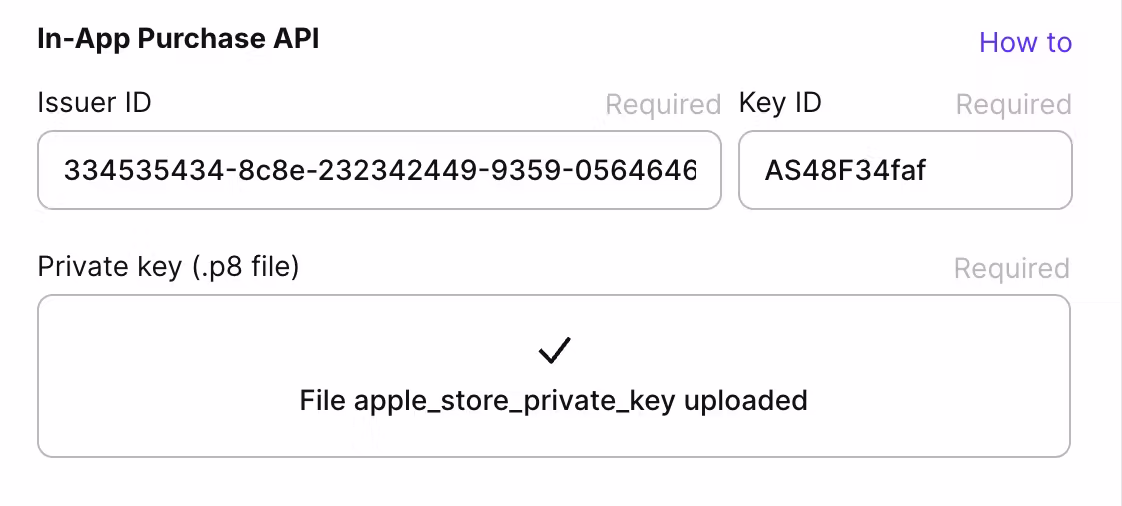
Copy the Issuer ID.
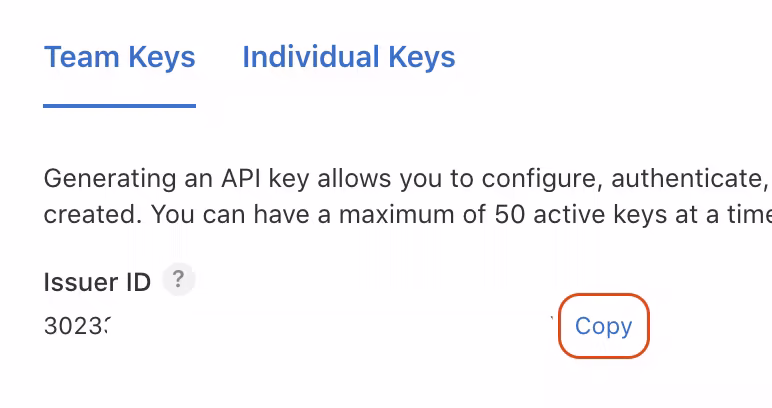
Download the API key. You can only download it once. Save it somewhere secure or you'll lose it forever.

Back in Adapty paste the Issuer ID, Key ID and upload the previously downloaded API key.
In App Store Connect, go to your app > App Information, scroll to App-Specific Shared Secret, hit Manage > Generate.
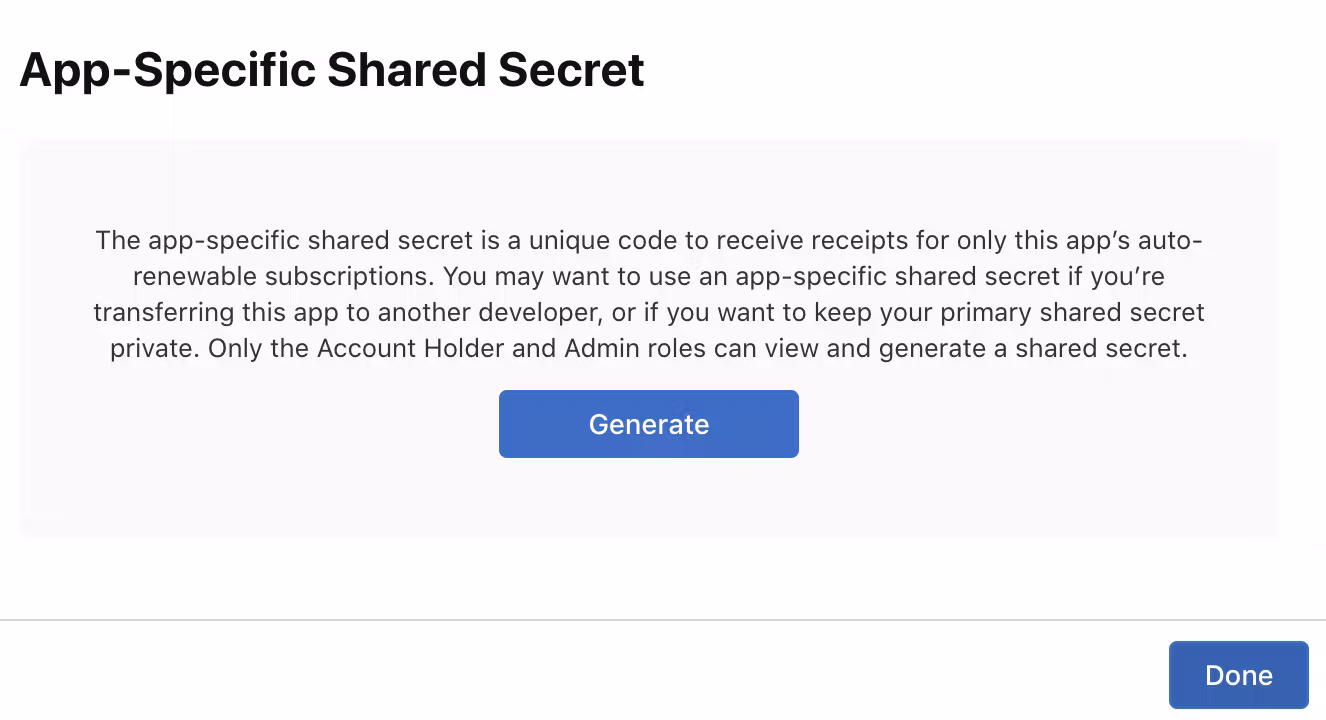
Paste the generated secret in Adapty.

Make sure to toggle App Store Small Business Program if your app is eligible. This will reduce Apple's standard 30% commission rate to 15%!
Google Play Store setup in Adapty
Enter your app's package name and upload the Service Account key file. Adapty's guide for this is solid - hit "How to" and follow the screenshots. Make sure to follow all of the steps there!
Input your app's package name and upload the Service Account key file. Adapty provides an excellent guide explaining how to get the Service Account file for Play Store. Just press on "How to" and follow their guide with screenshots.
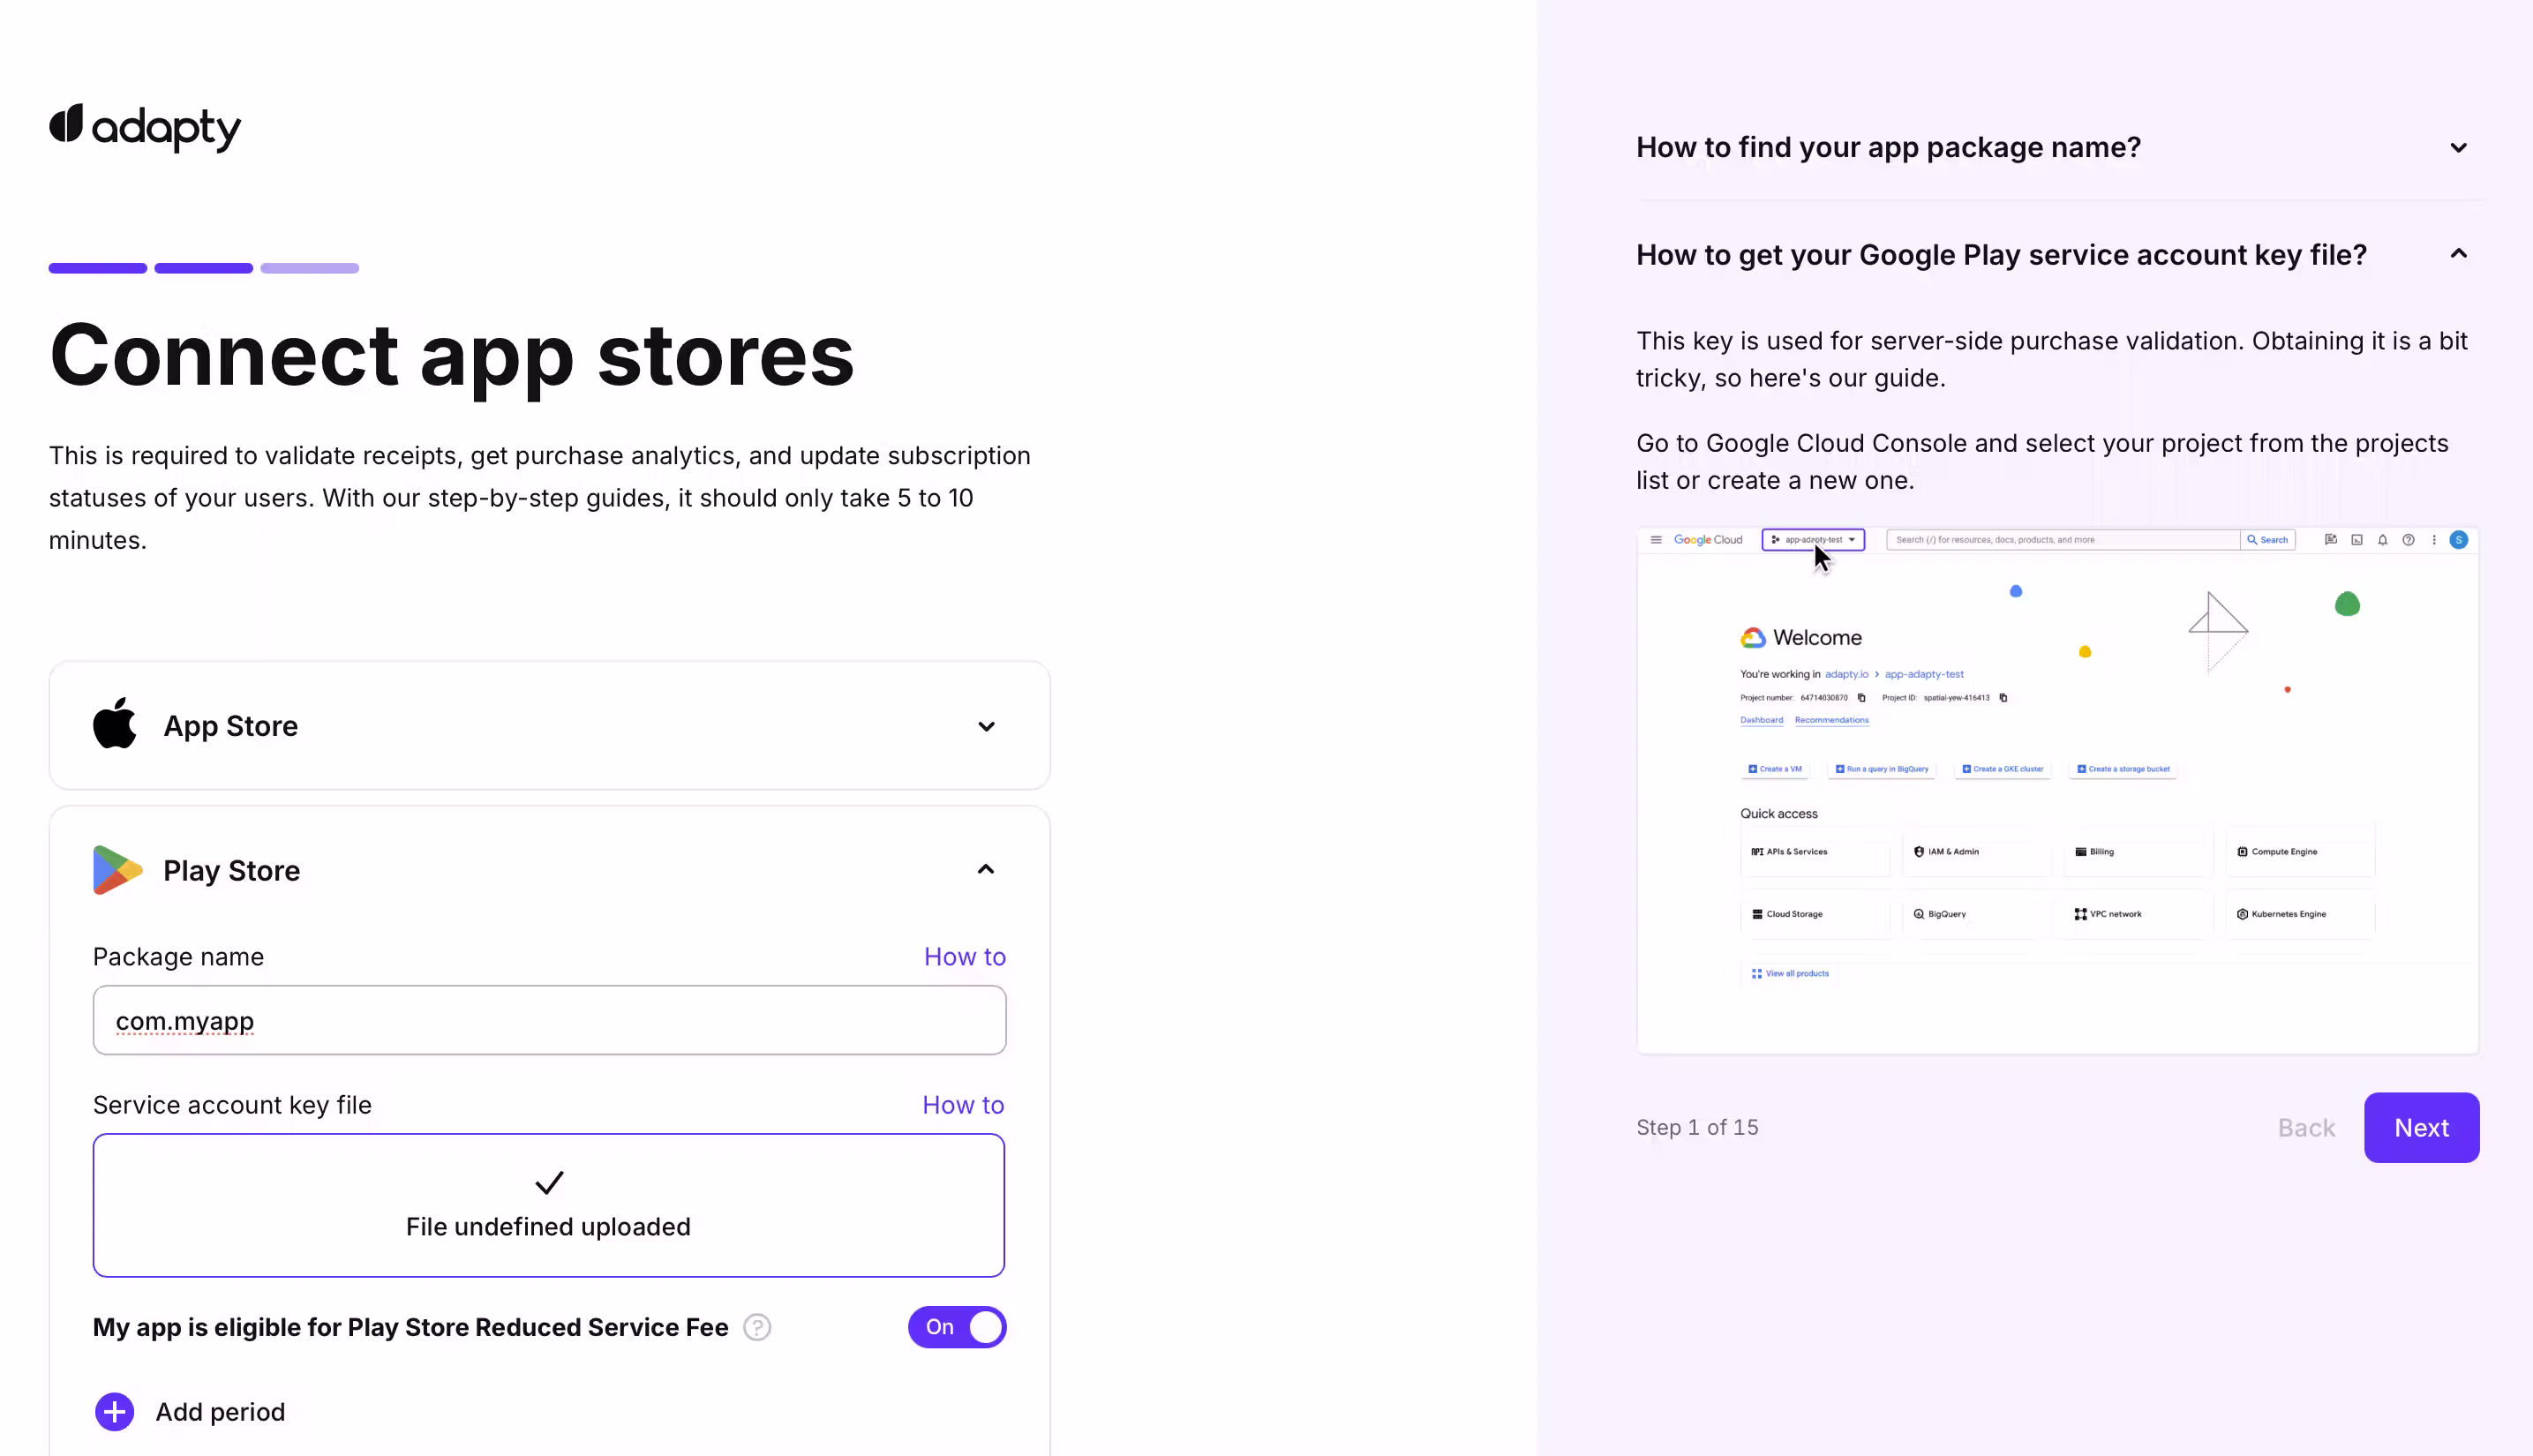
Tick Play Store Reduced Service Fee if your account is under $1M/year. You're eligible.
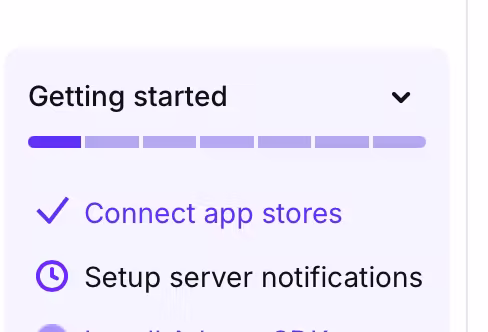
Now enable server notifications. In the dashboard, hit "Setup server notifications."
Copy the link, open it, and make damn sure you're logged into the right Google account.

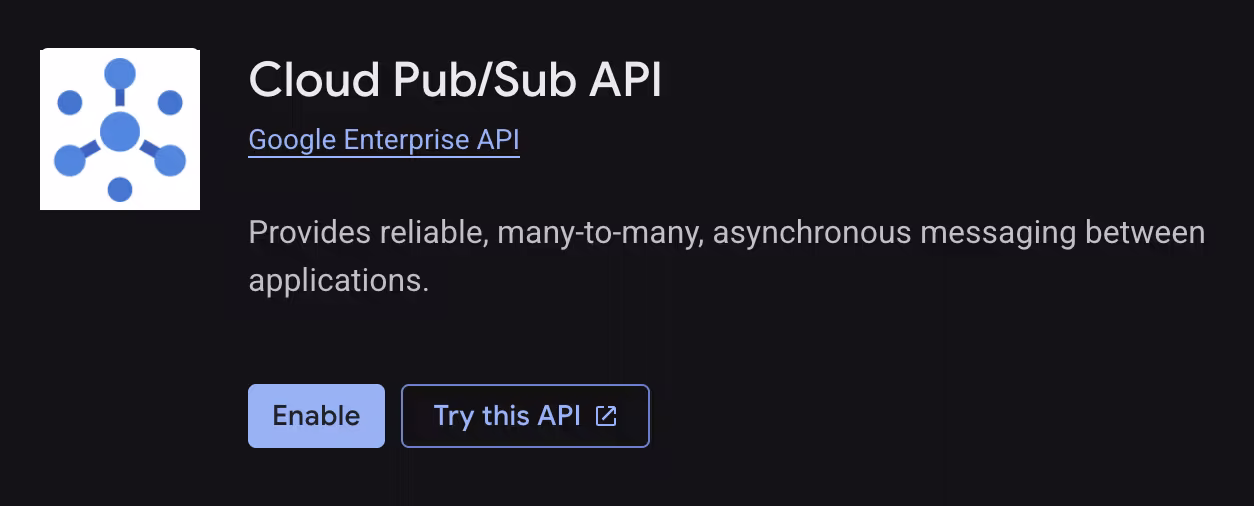
Just enable Cloud Pub/Sub API.
Now once you've completed all fields for App Store and Play Store in Adapty, press Continue.
Create a product in Adapty
Create products in Adapty that match your subscriptions in Google Play and App Store.
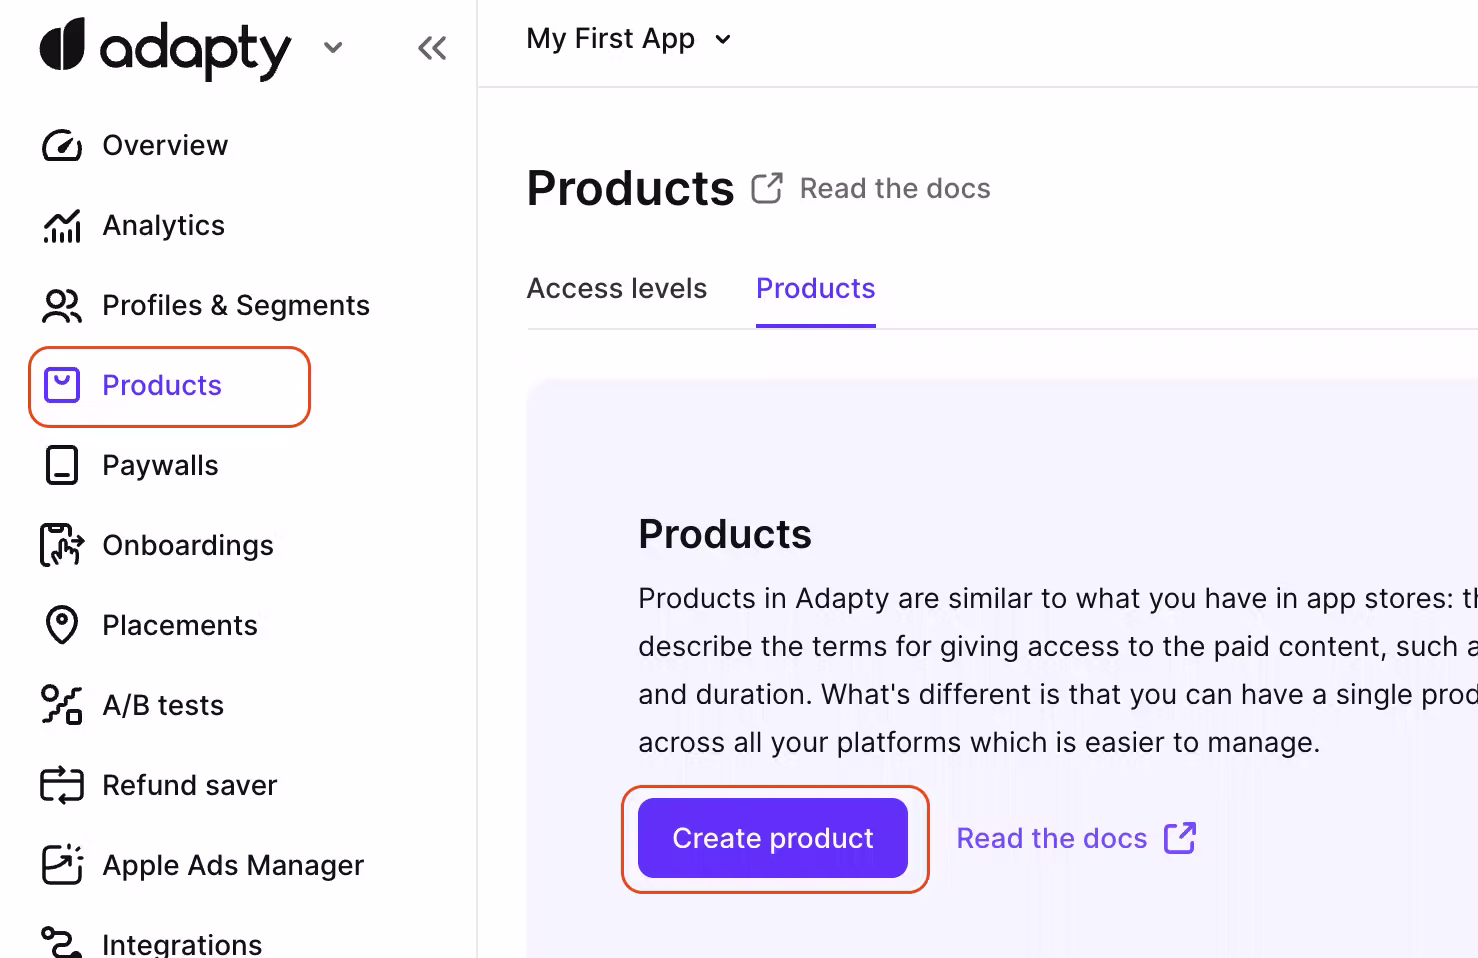
Go to Adapty's Products page and click on Create product.
Monthly subscription setup
Even if you already have the subscription in the stores, you can connect it here. Otherwise create new.
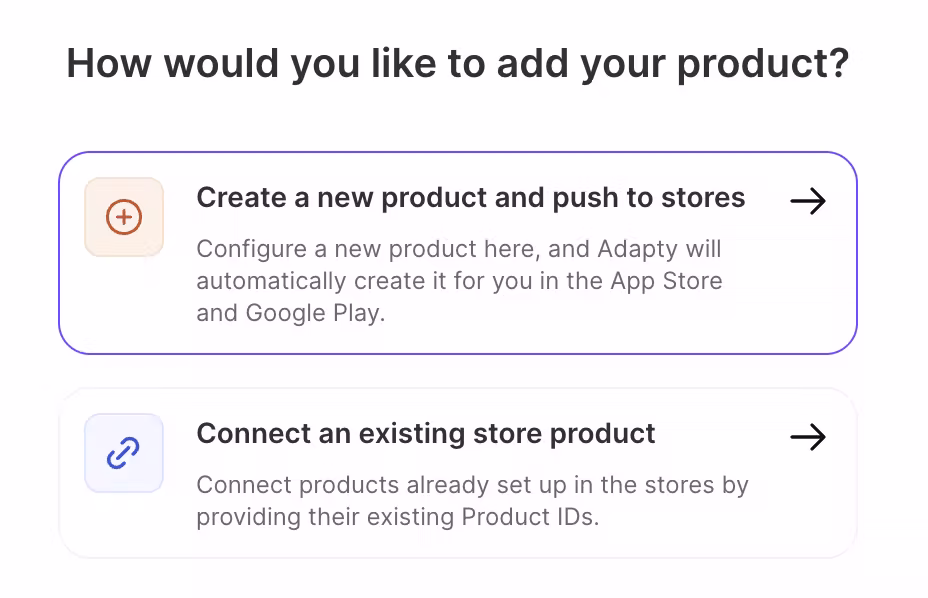
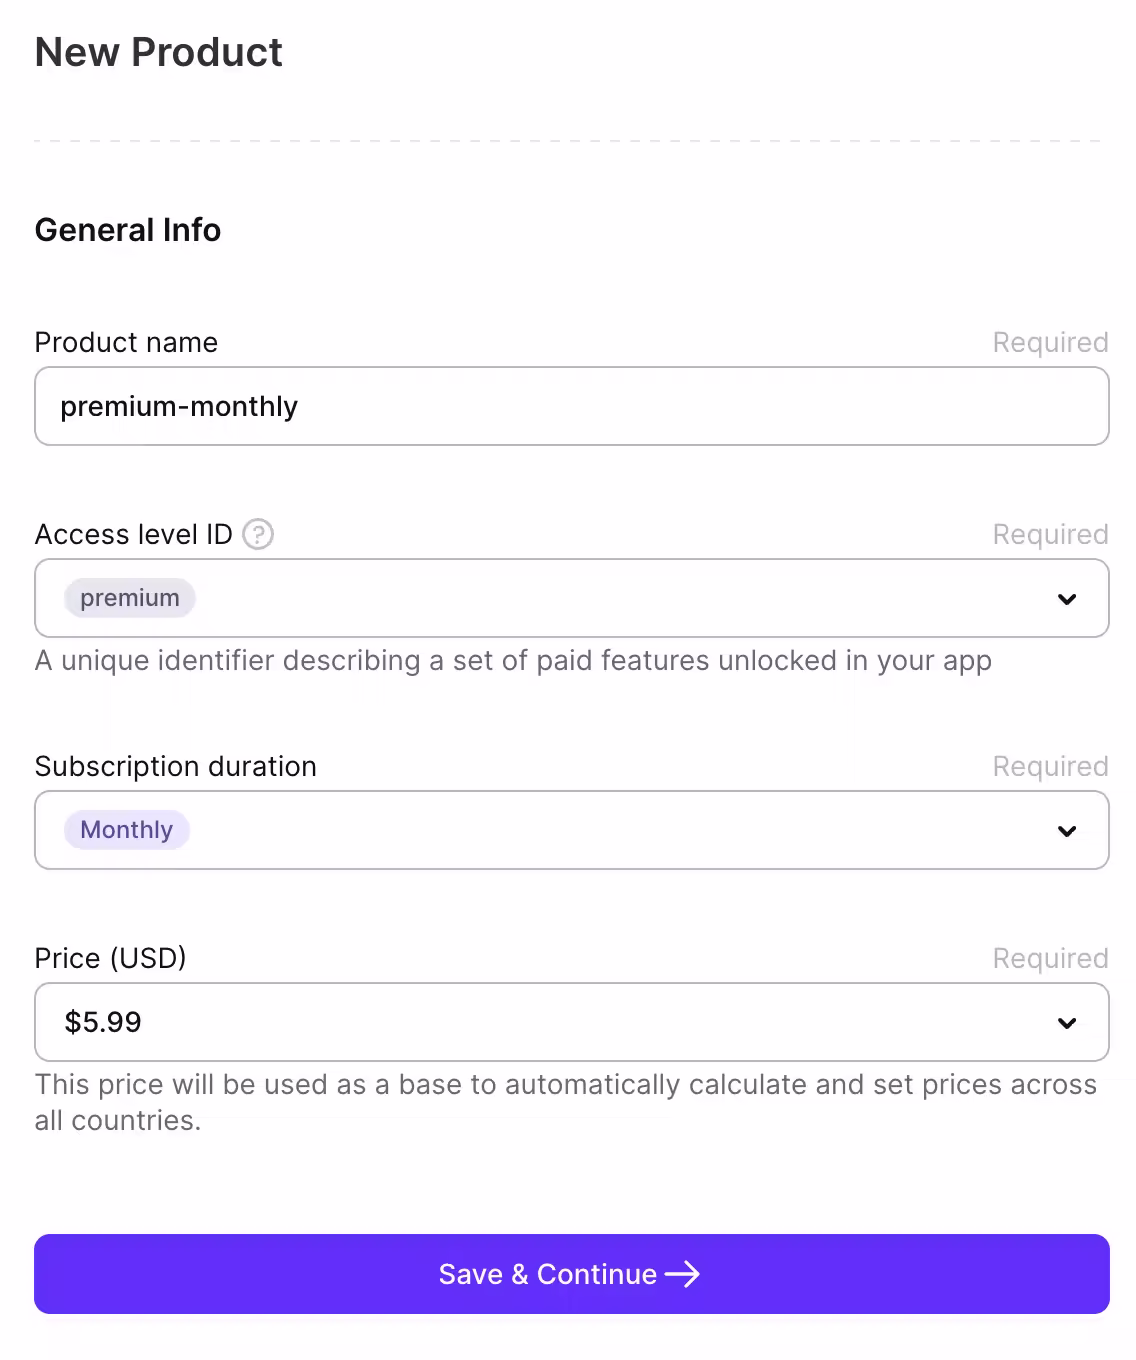
In the example below we will create a monthly subscription for a premium plan.
Let's start with an access level which lets you bucket plans (silver/gold/etc.). Create more levels as needed. Go to Access Levels page and create a new access level e.g. "premium".
- Product name = reference name in Adapty.
- Access level = lets you bucket plans (silver/gold/etc.). Create more levels as needed.
- Subscription duration = obvious. You can do lifetime too. Consumables for credits (buy multiple times). Non-consumables = buy once.
- Price = base price. You'll tweak per region later.
App Store product configuration
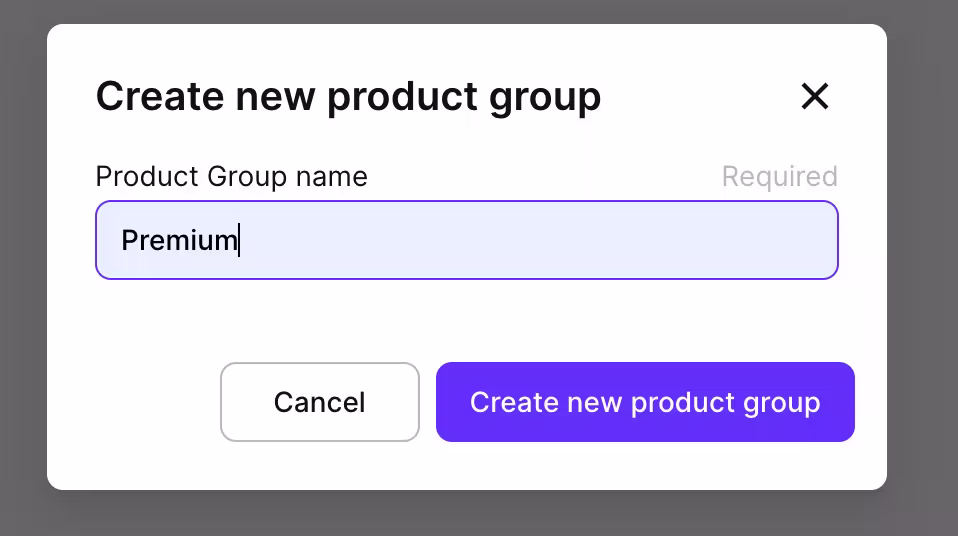
You should see the screen below, press on Create new Product Group.
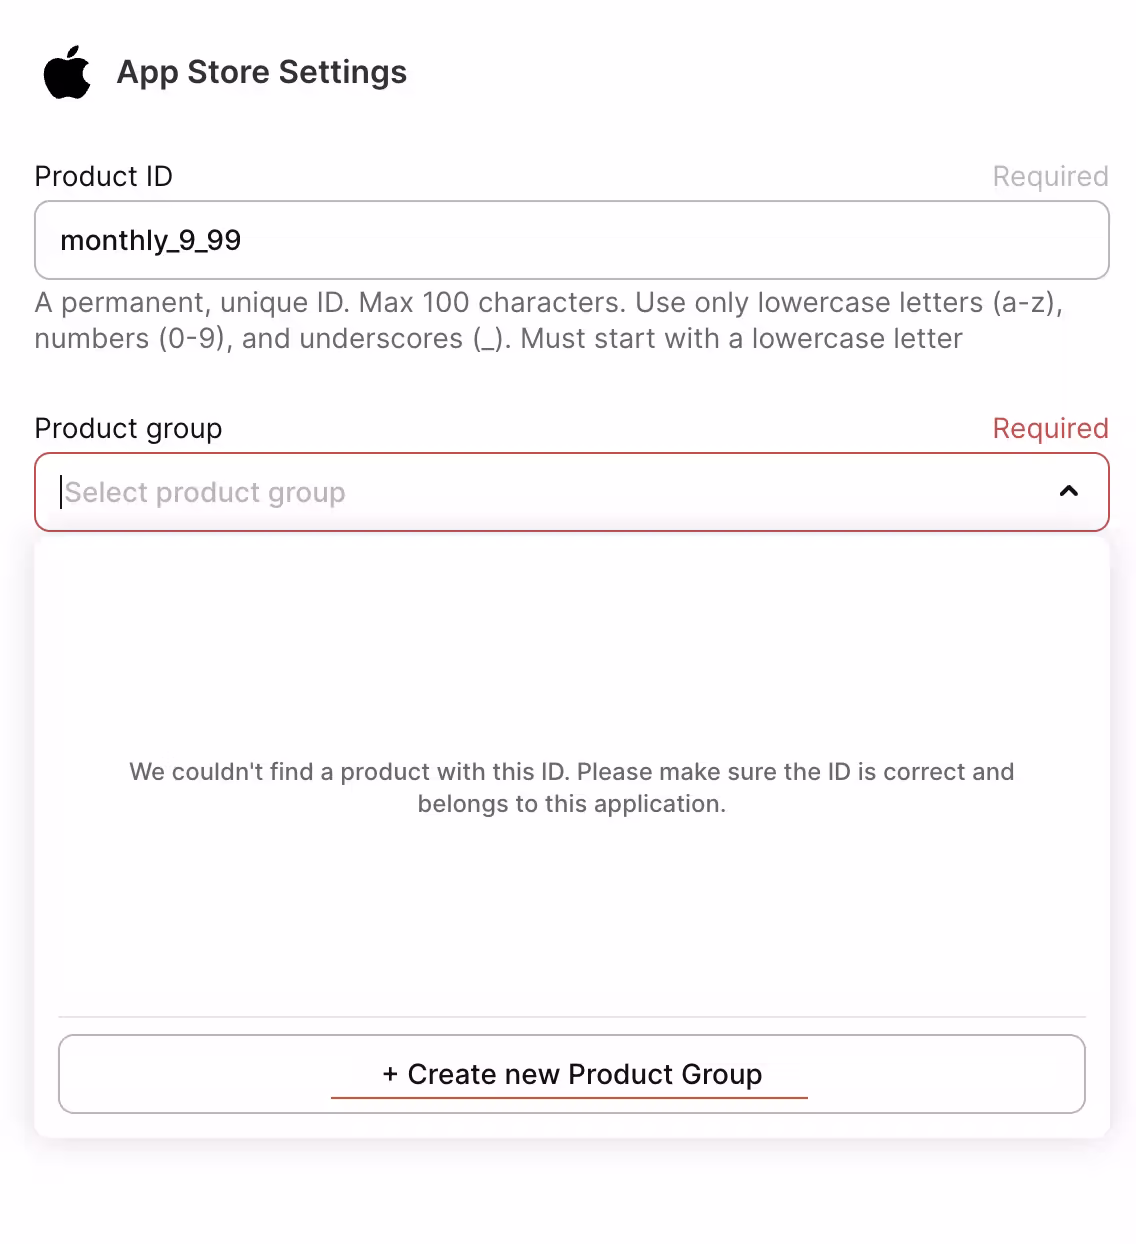
Product Groups are mainly used as a way to organize related subscription products together. If your app will have only one plan e.g. Premium, then you should group monthly and annual Premium subscriptions into the same group.
Now what's App Store Review Screenshot? It is basically a screenshot of our paywall. It is sent only to Apple's review team so they can clearly understand what the subscription offer looks like to users inside your app, helping to speed up the approval process.
If you already have a paywall ready then upload it here and press on Push data to App Store, otherwise press Skip App Store and wait until we create a paywall later in this guide.
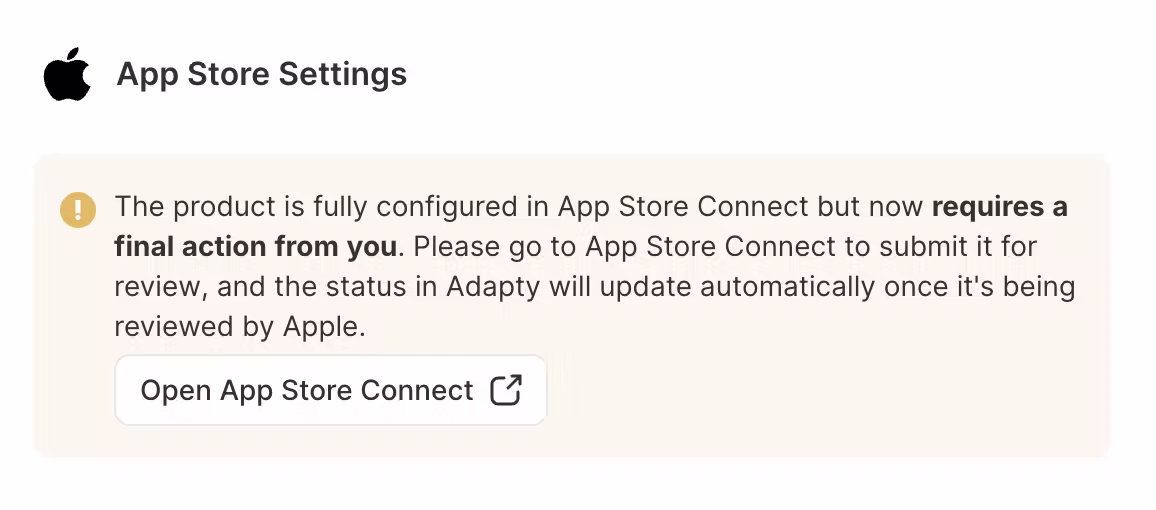
Now you should see a warning like the one above. Don't request a review yet if you're planning to add more subscription plans like an annual plan. It's better to do it in one go. Let's now repeat the previous steps to create an annual plan.
Let's create an annual plan. Go back to the Products page and create another product the same way but select the subscription duration as Annual and choose an appropriate price.
Google Play product configuration
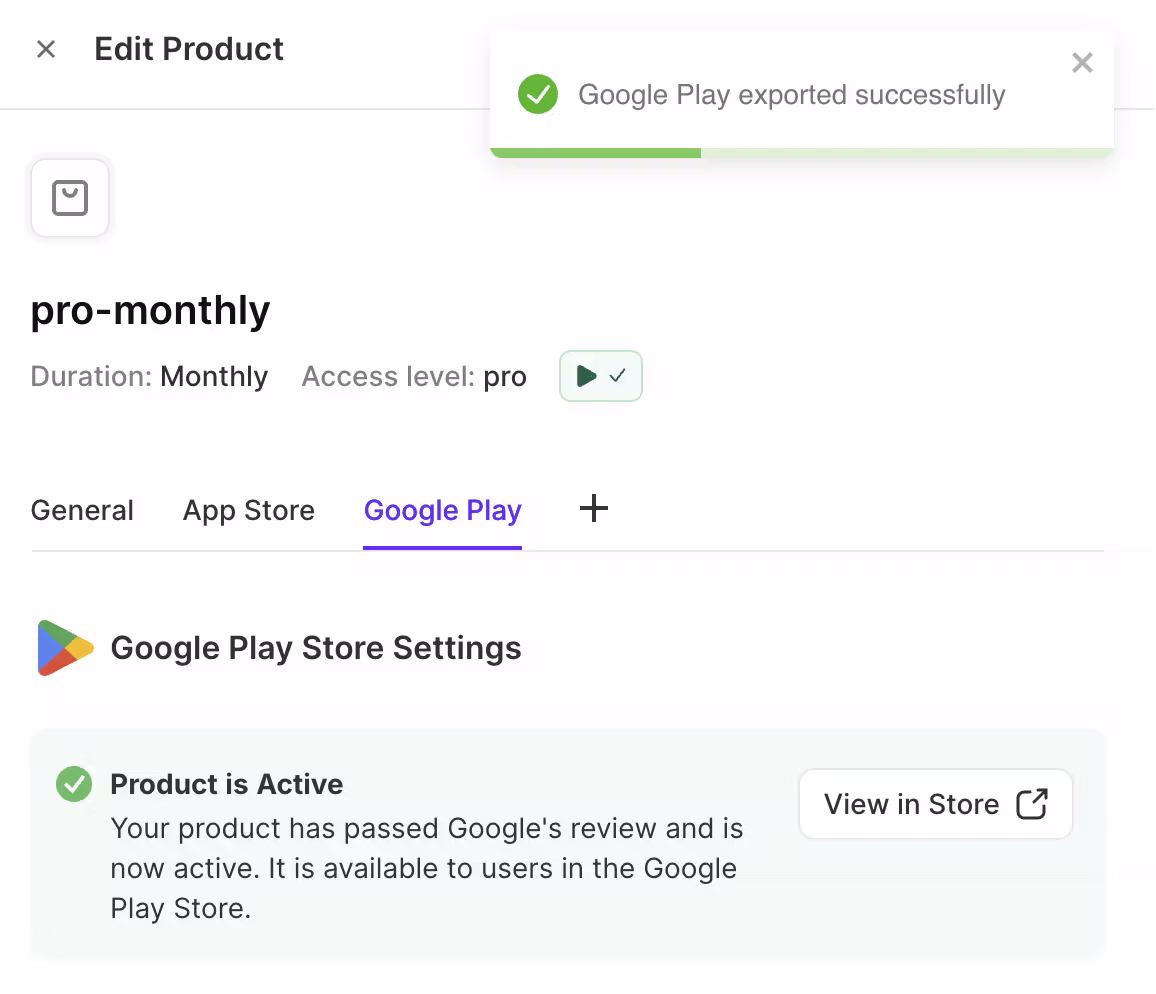
Now go to the Google Play tab, put Base Plan ID. Even though we already created a product group when setting up the App Store subscription, we need to once again create a product group dedicated to Google Play subscriptions.
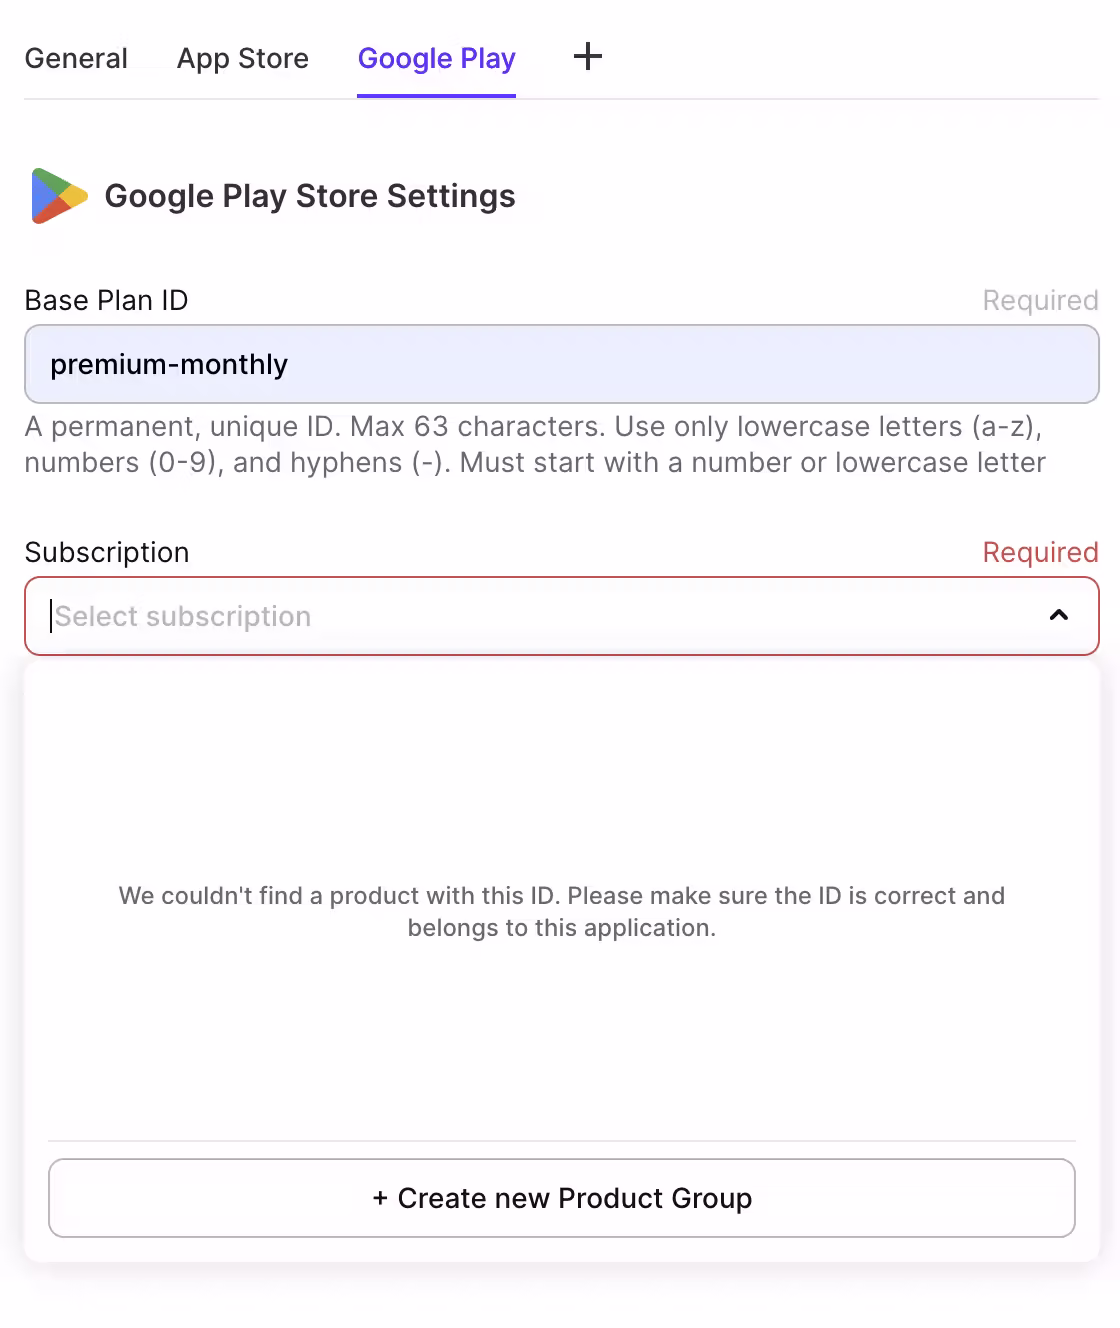
Now press on Push data to Google Play. You should see a confirmation.
Now repeat the same for an annual subscription.
Time to build a paywall
Now it's time to build a paywall. With Adapty you have two options:
1. Create a Paywall Using Adapty's No-Code Builder
Pros:
- Build a paywall in minutes without touching code
- Apply changes instantly to your live application! — this is a game changer. Before, for every change to the paywall we would have to deploy a new version of our app.
- Straightforward A/B testing — we can test multiple variants of a paywall and then for example 50% of users will see variant A and 50% variant B. This way we can determine which paywall brings higher conversion.
Cons:
- Limited customization
- Setting up a multi-screen paywall requires a hack
2. Integrate Your Existing Paywall
Pros:
- Highly customizable paywall: You can create a stunning multi-page paywall. This can increase conversions greatly.
Cons:
- Takes a lot more time to develop.
- Any change to the paywall requires deployment of a new version.
- A/B testing is still doable but will take more time to set up.
In my honest opinion you should start with a no-code paywall and later in the future build your own paywall in Flutter. Don't try to be perfect right away! Save time now and come back to this later if there will be a reason.
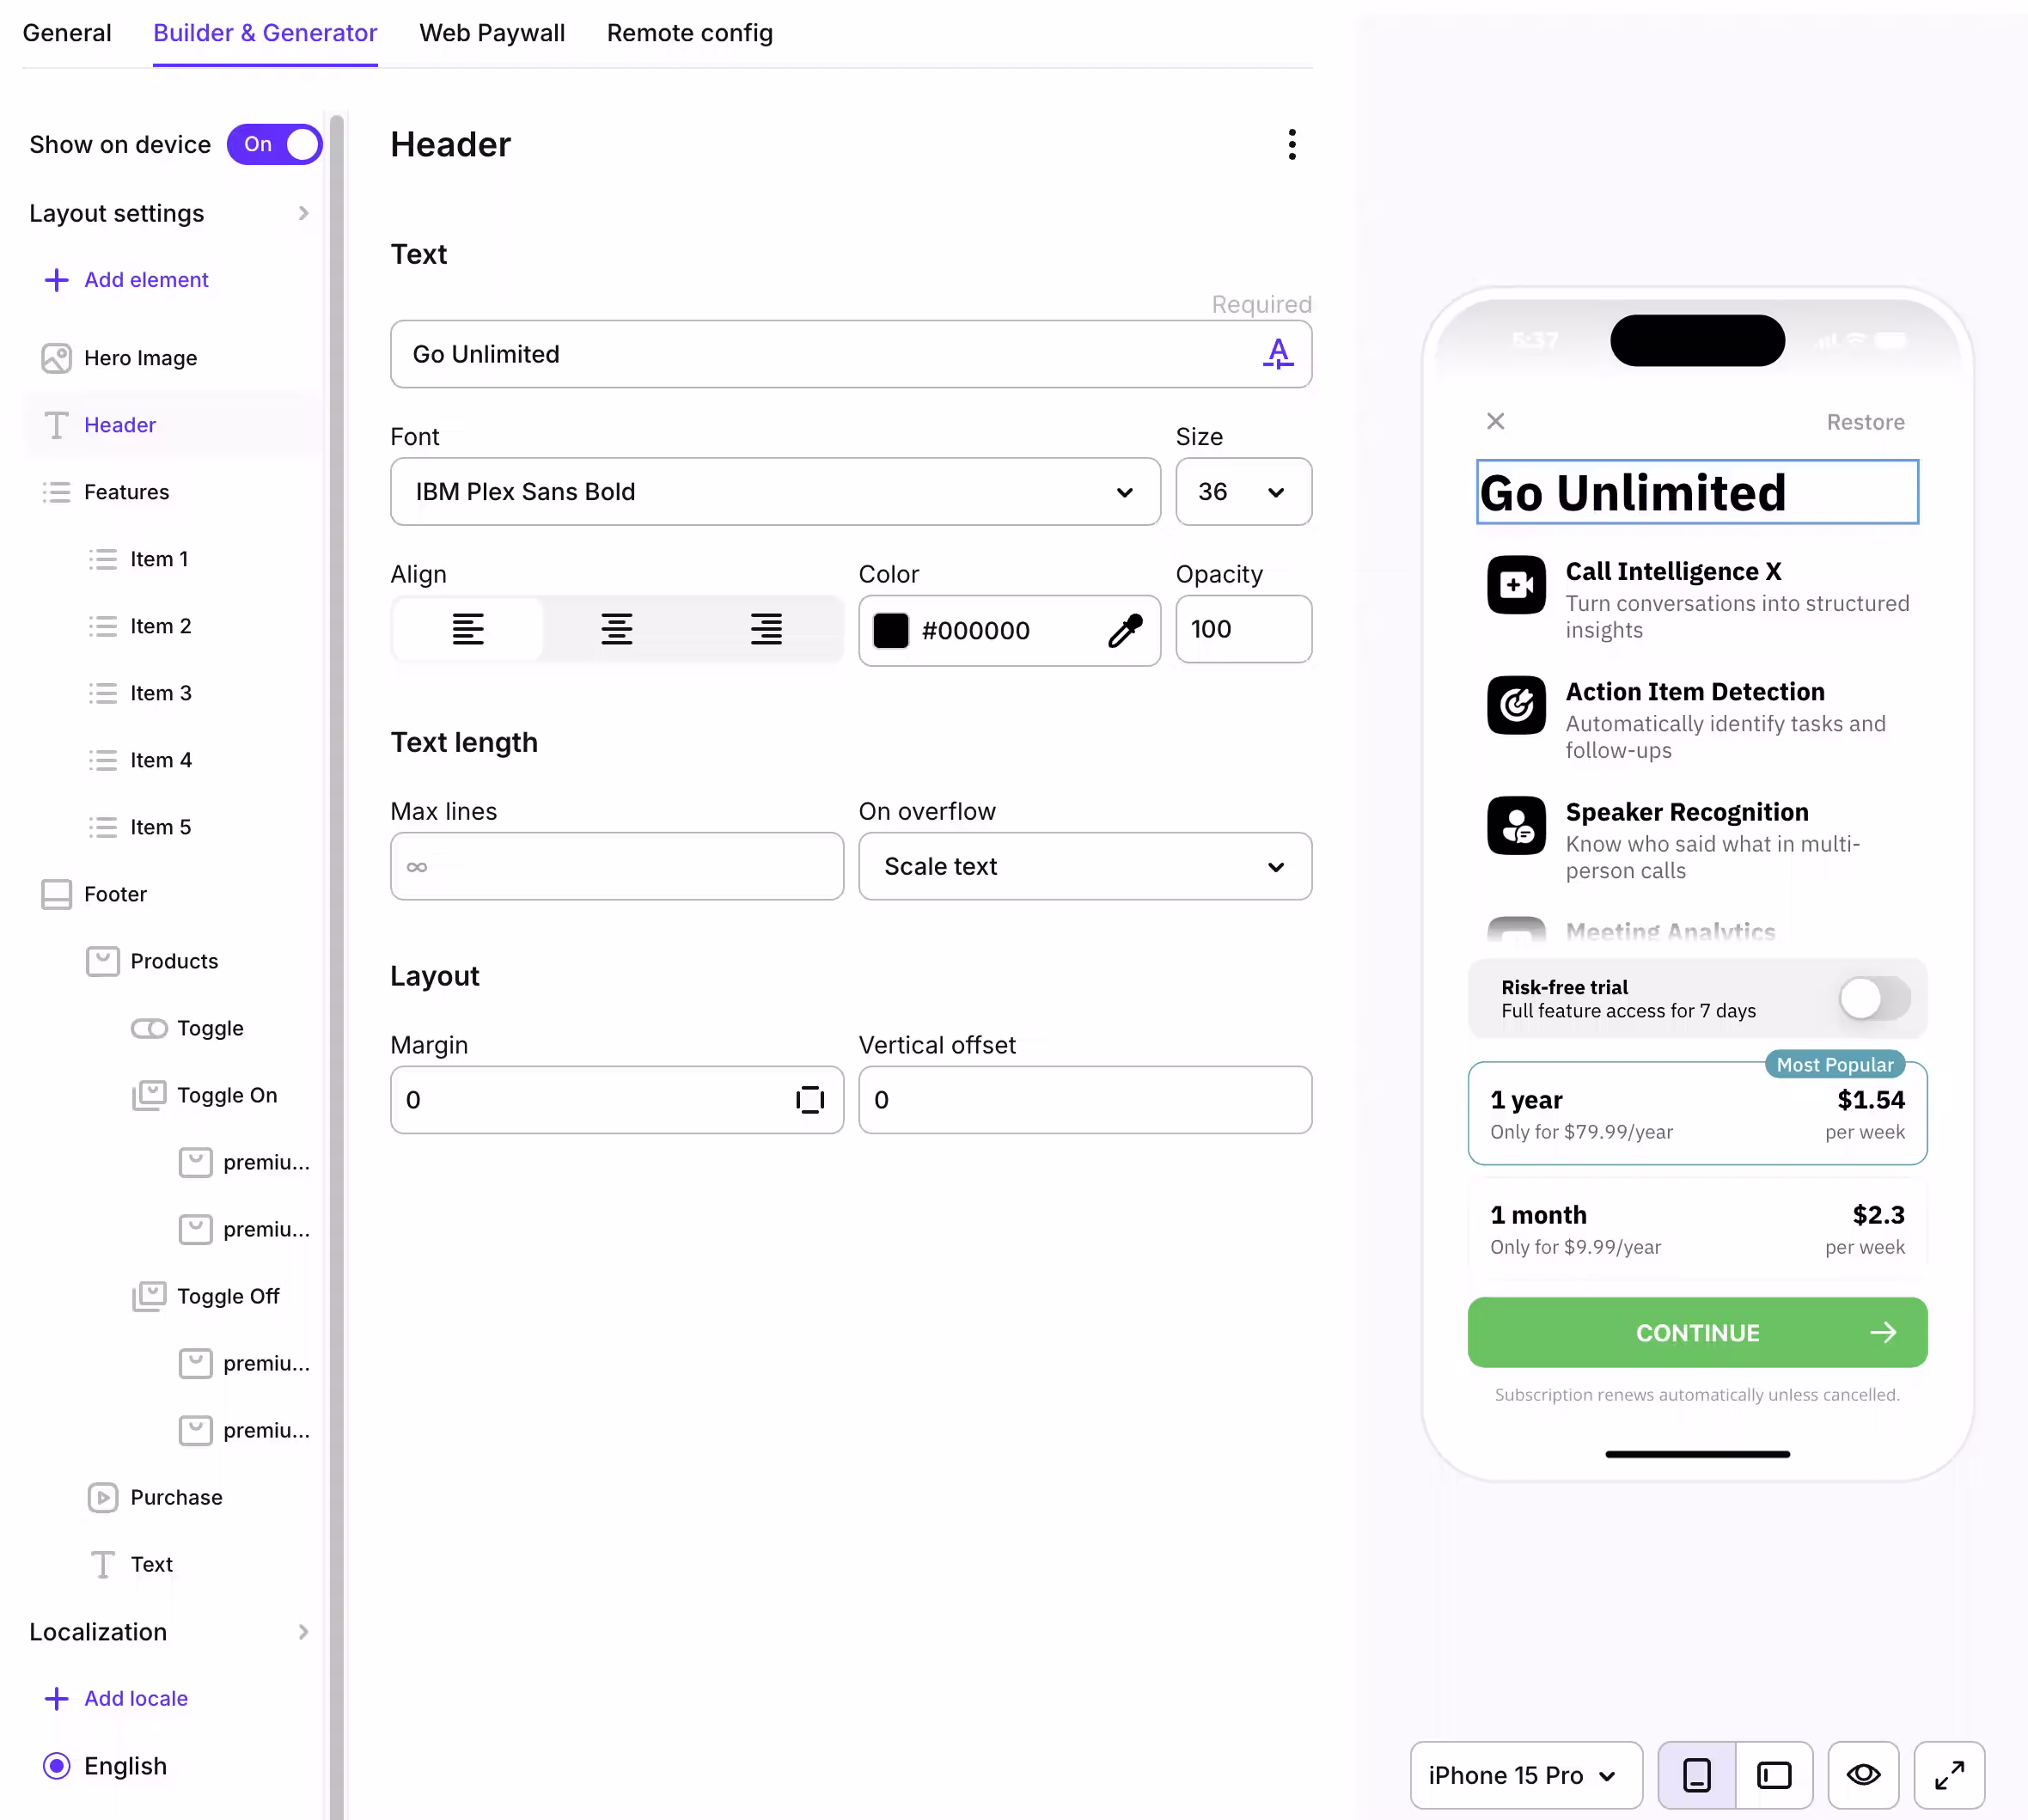
One of the selling points of Adapty is their no-code builder for paywalls. What is it for? It lets you build a paywall without coding on the Adapty website. Why would that be useful?
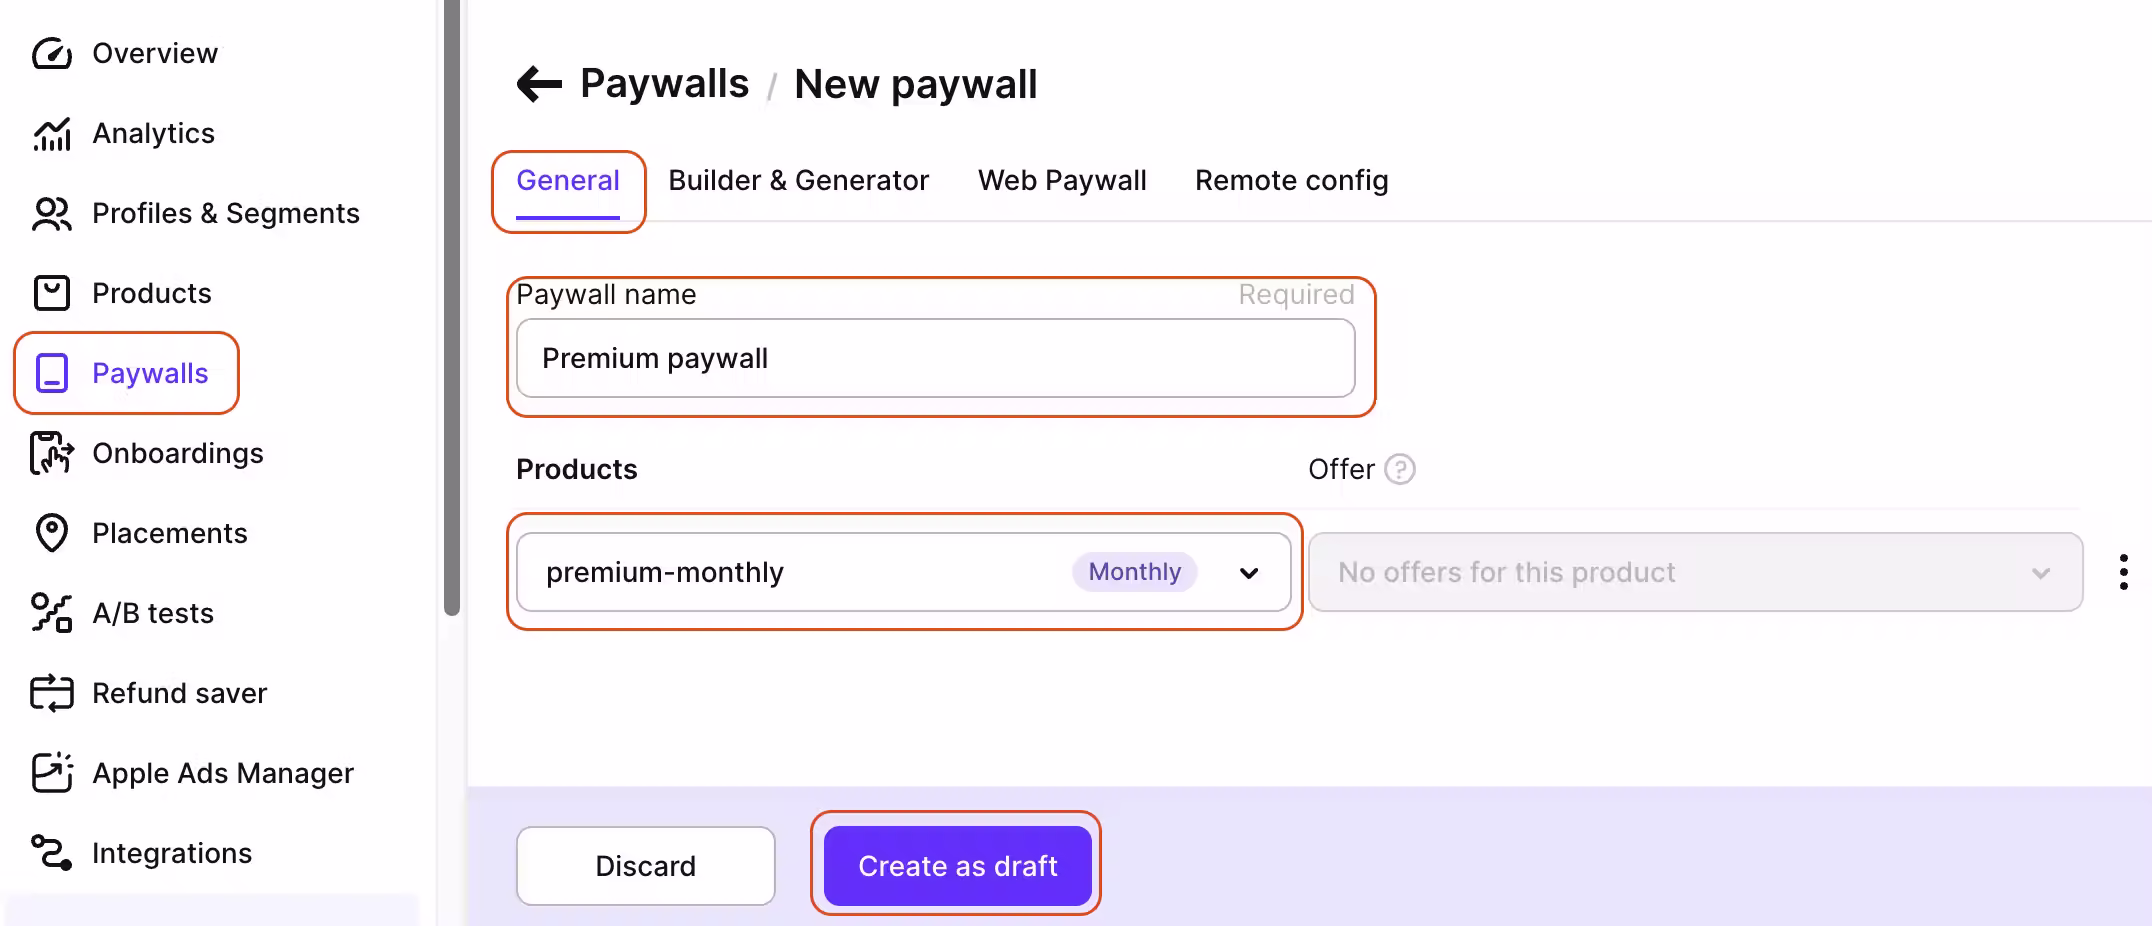
Let's start with adding the previously created product to our new paywall. In Adapty go to Paywalls > Create Paywall > General and press "Add product". You can add one or more subscription plans.
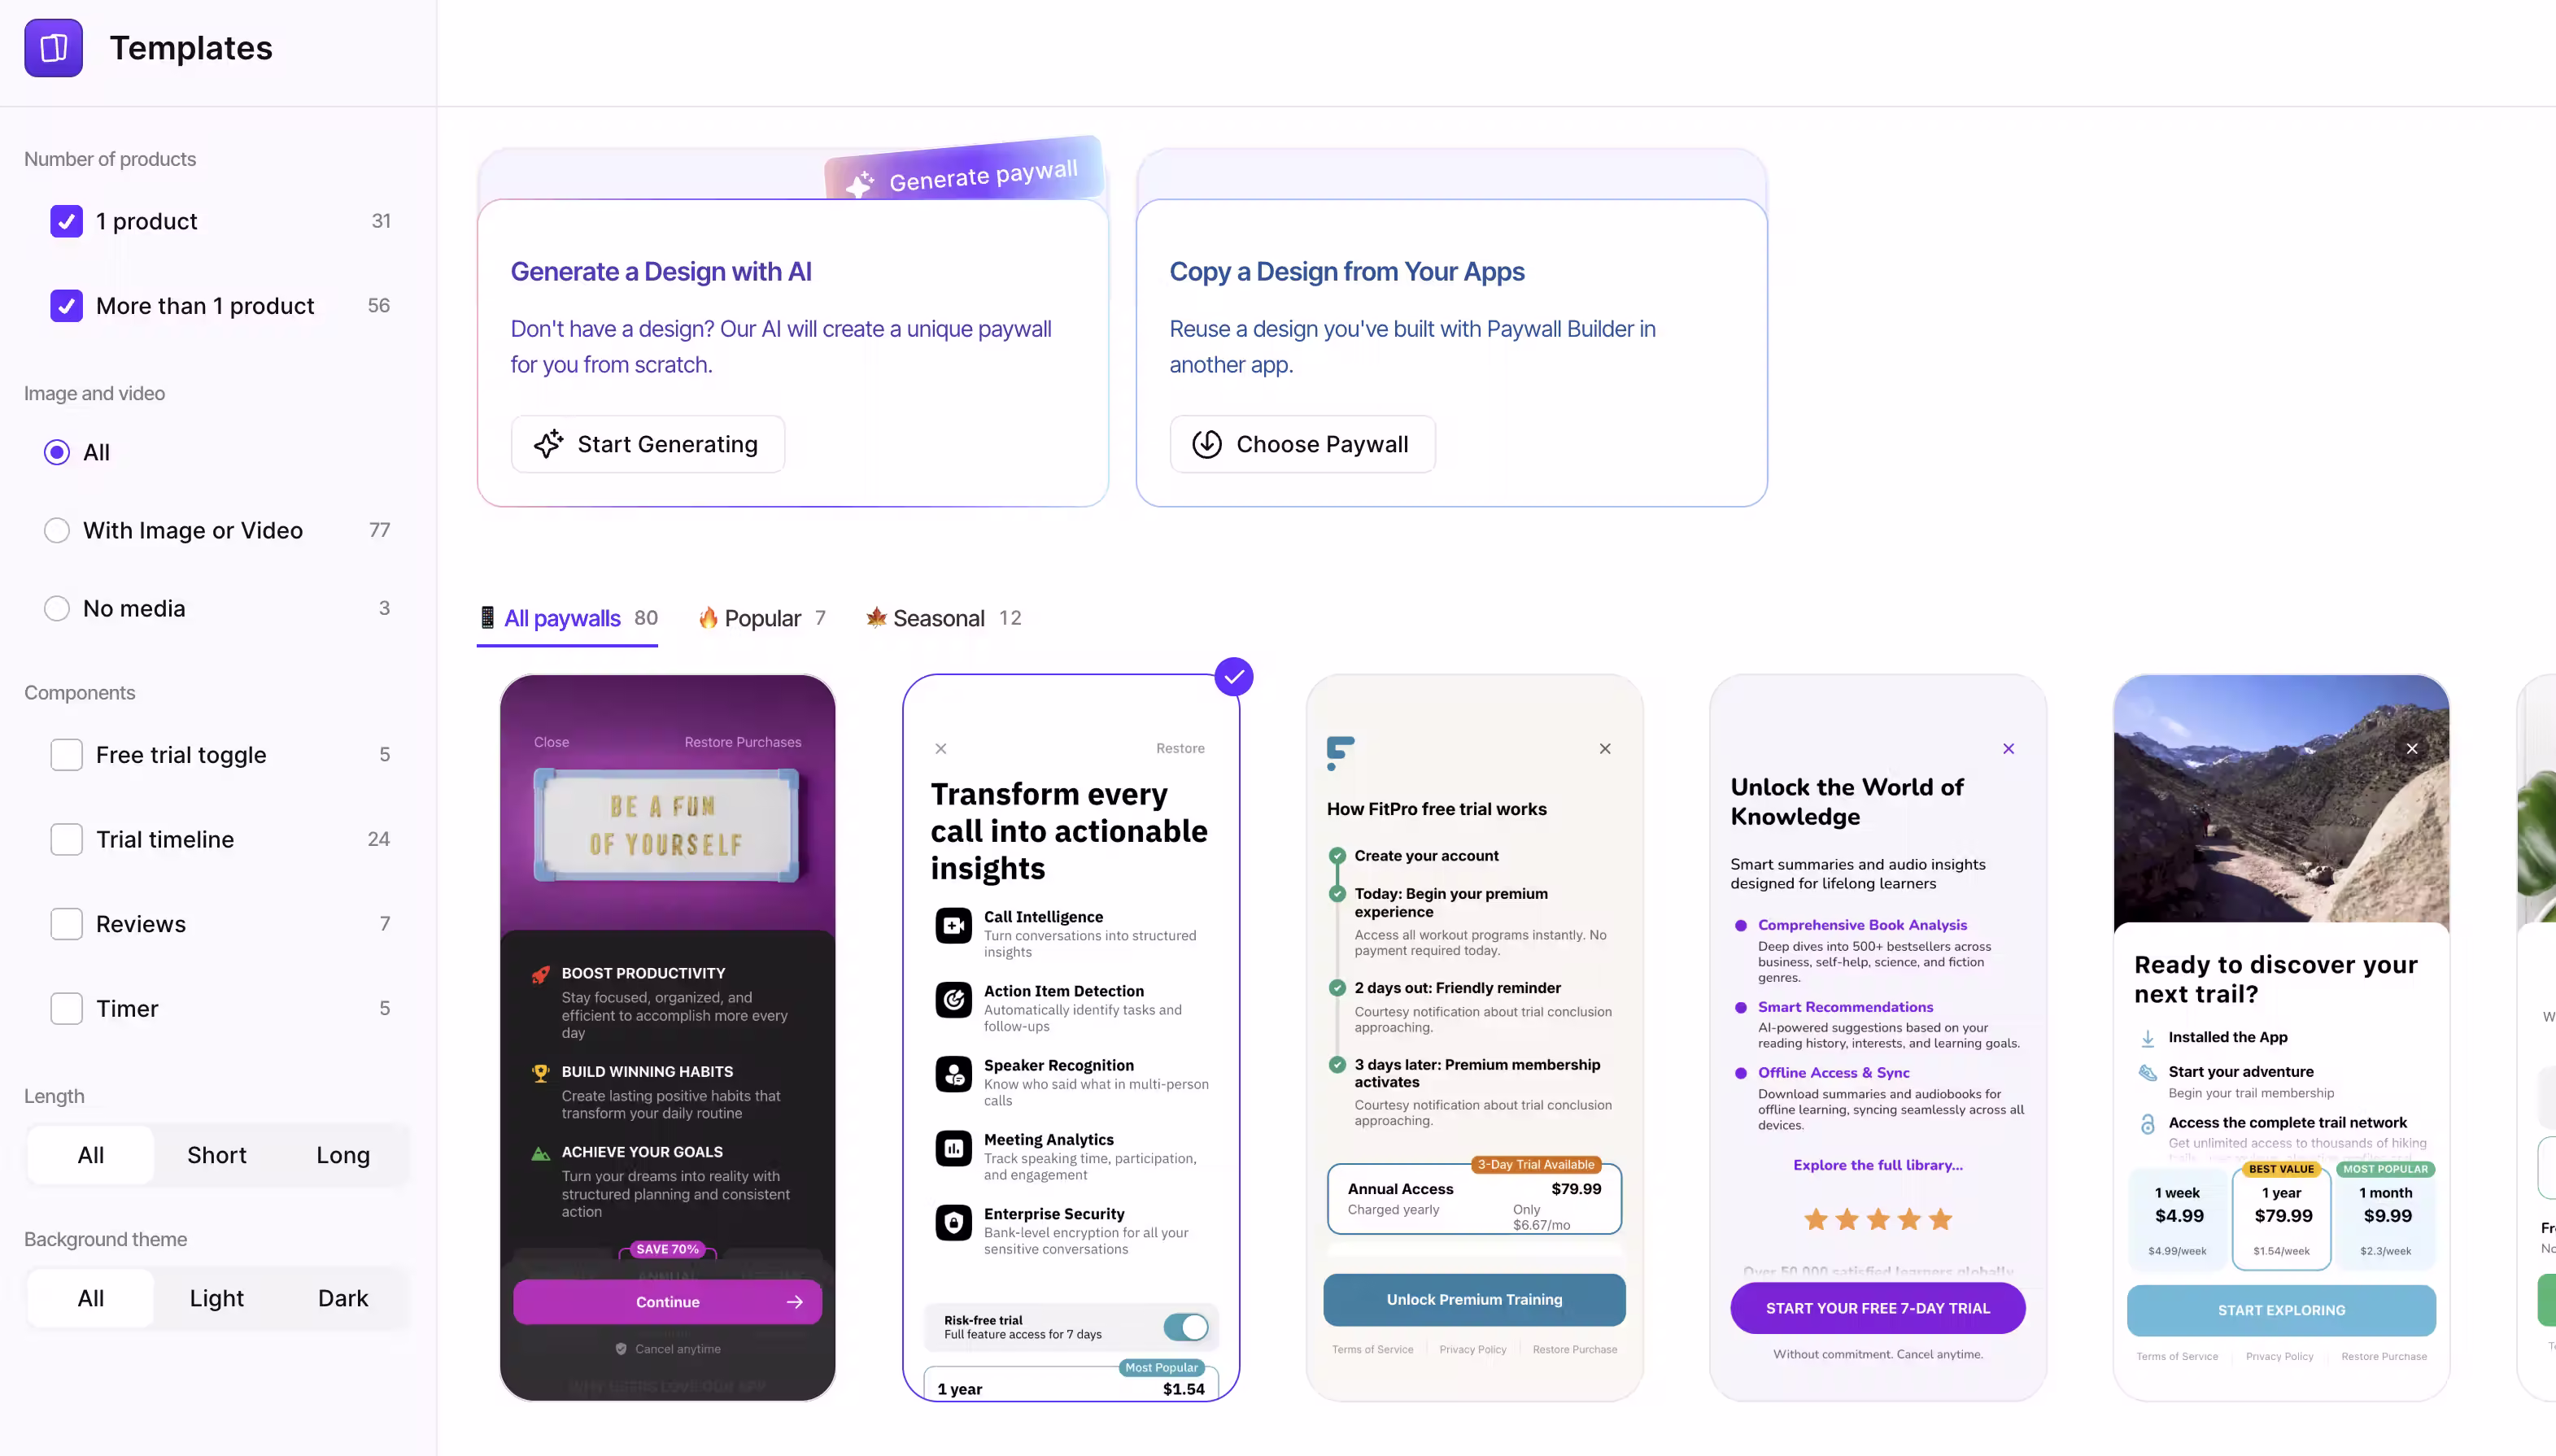
Now you have multiple options to create a paywall. The quickest and simplest is to generate one using their AI.
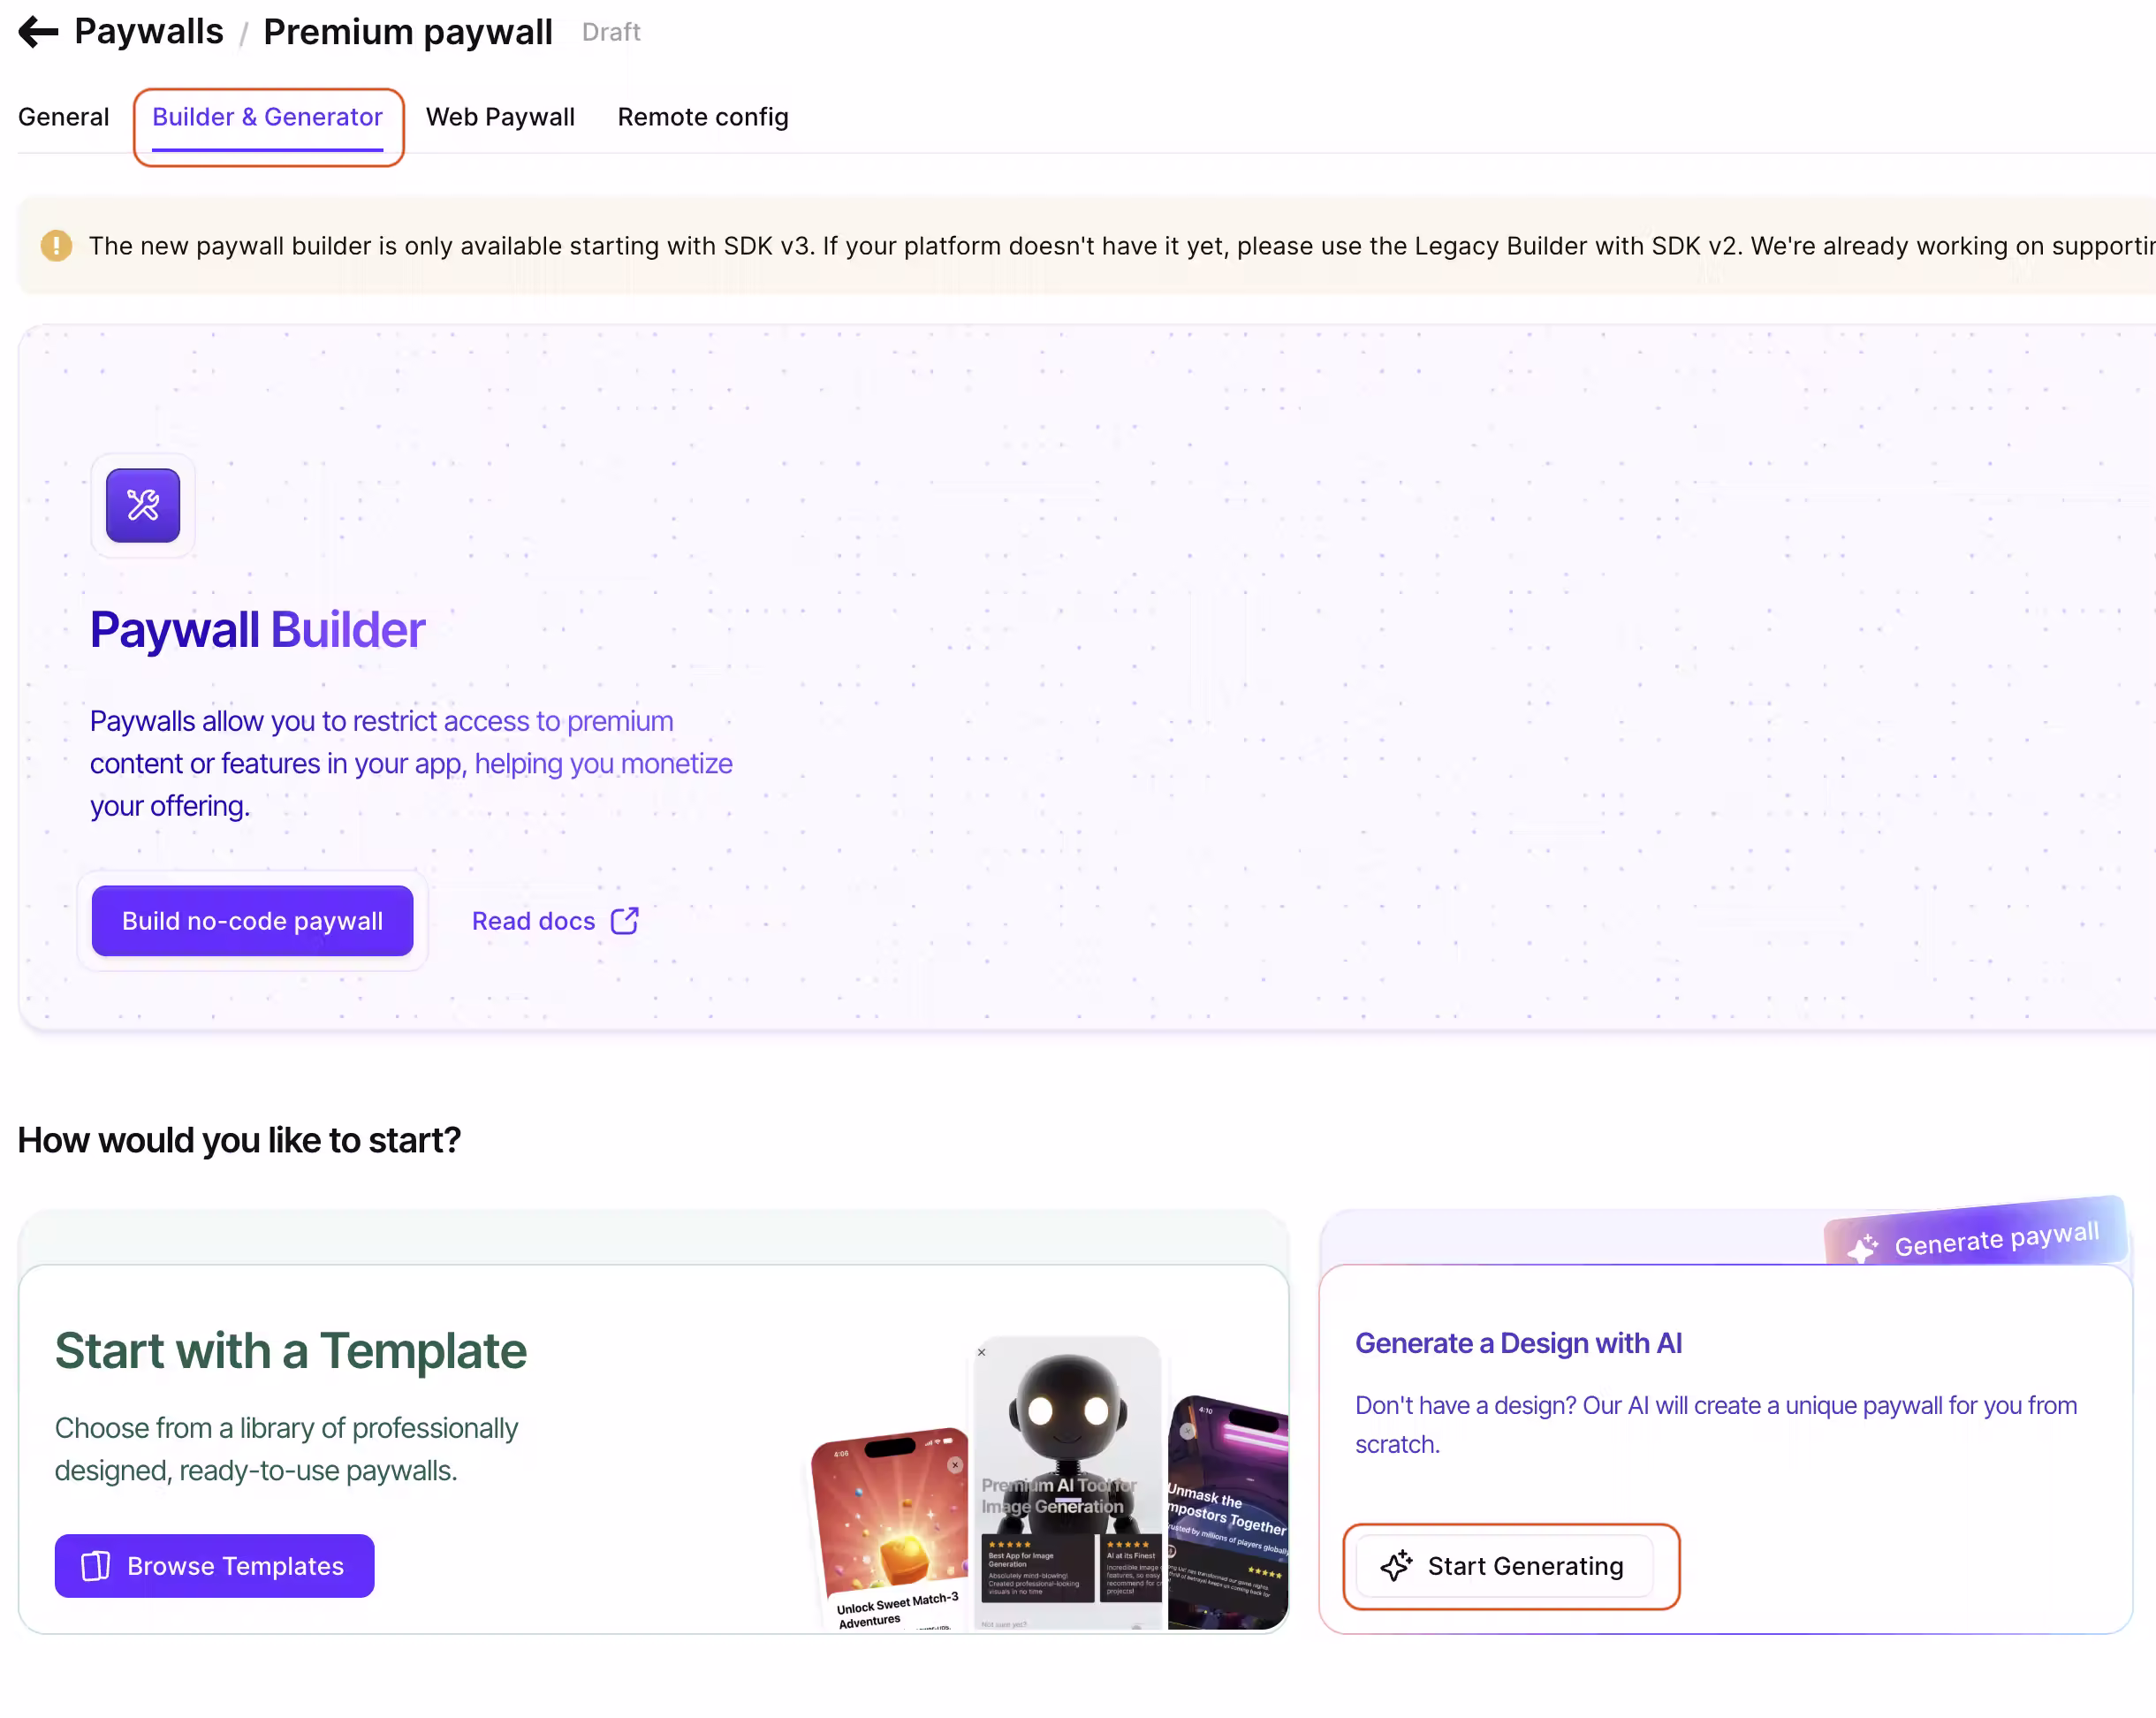
Describe what you want to see on your paywall.
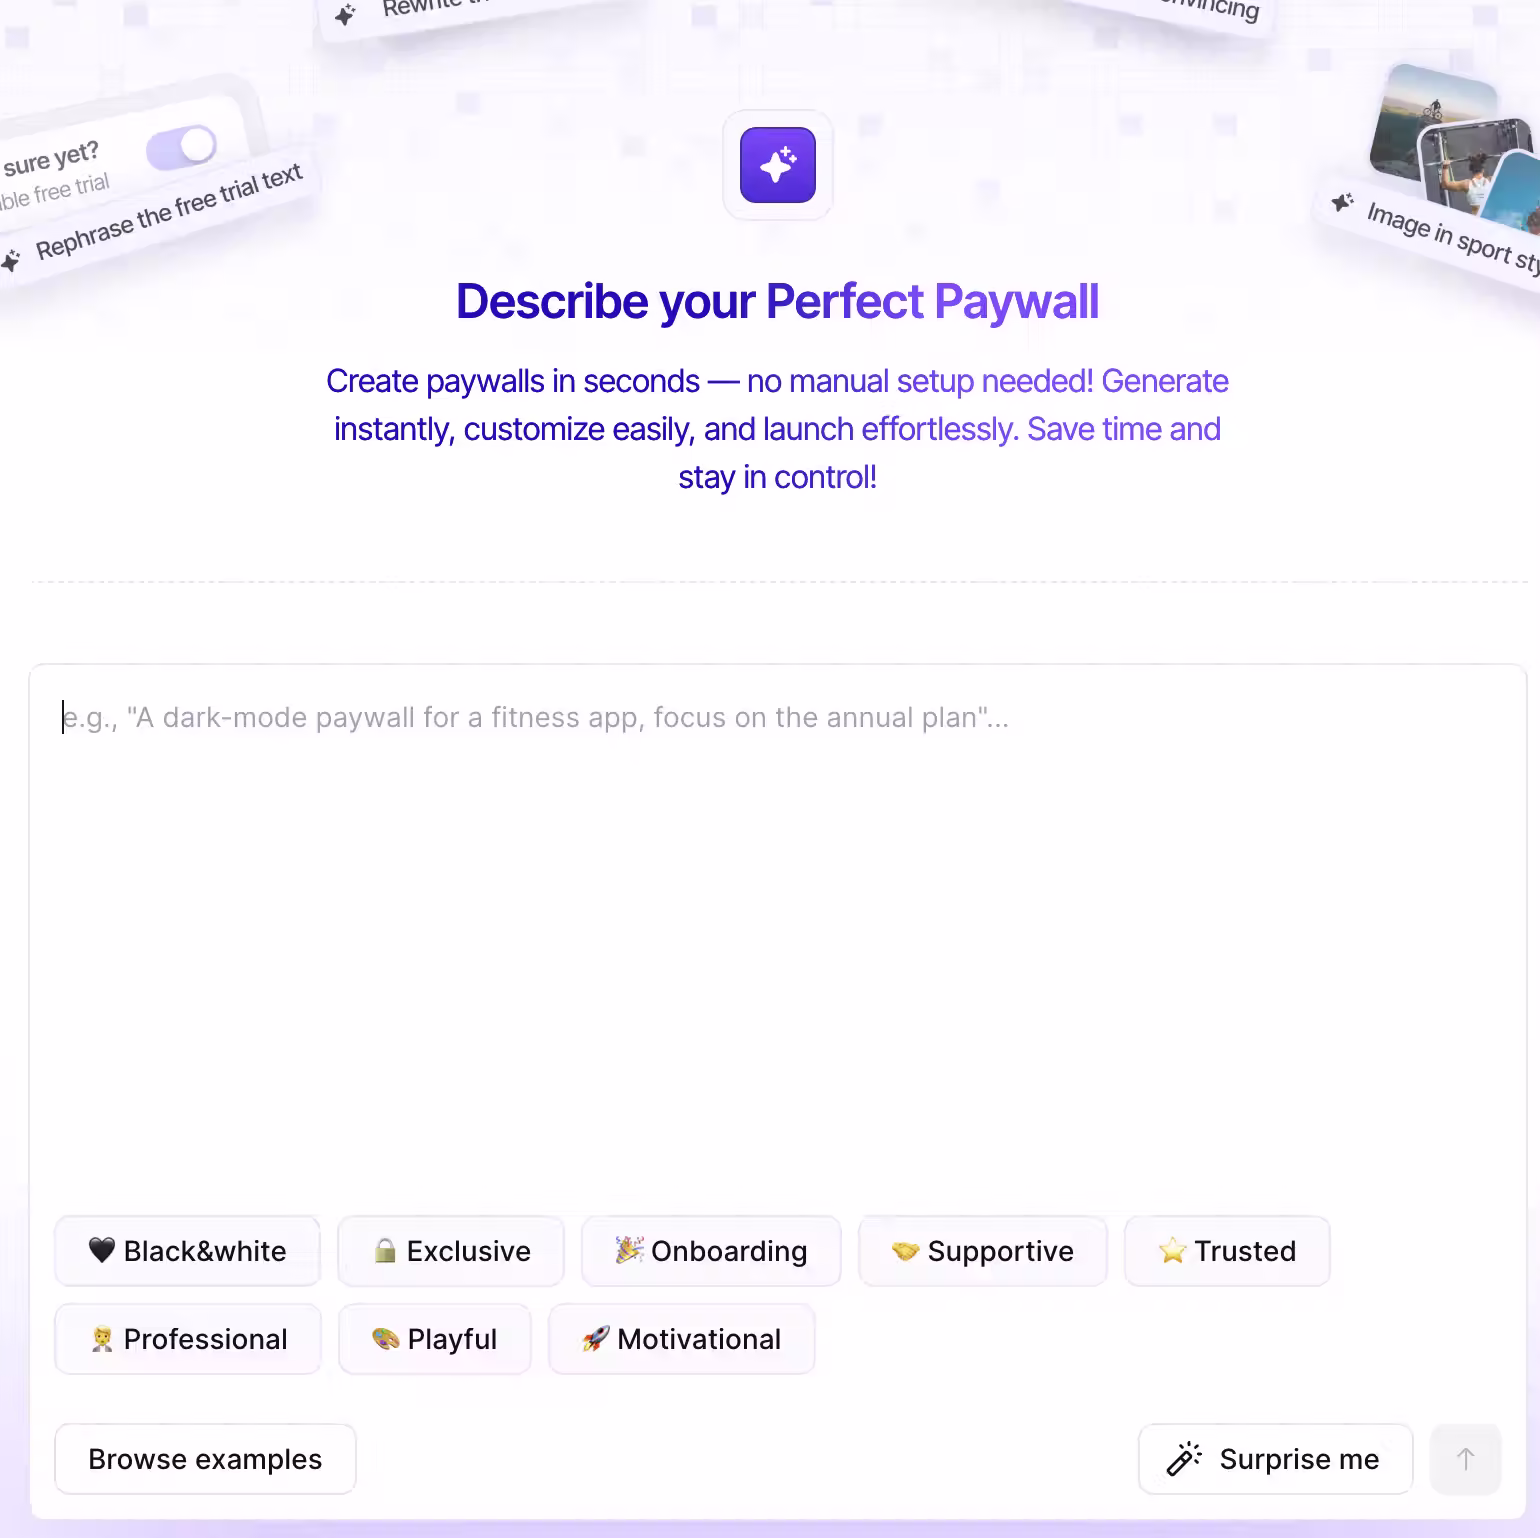
Adapty will generate a paywall based on your input and will also use your app's store data! I was really surprised how well it worked. It reads your app's store description and based on that generates a paywall.
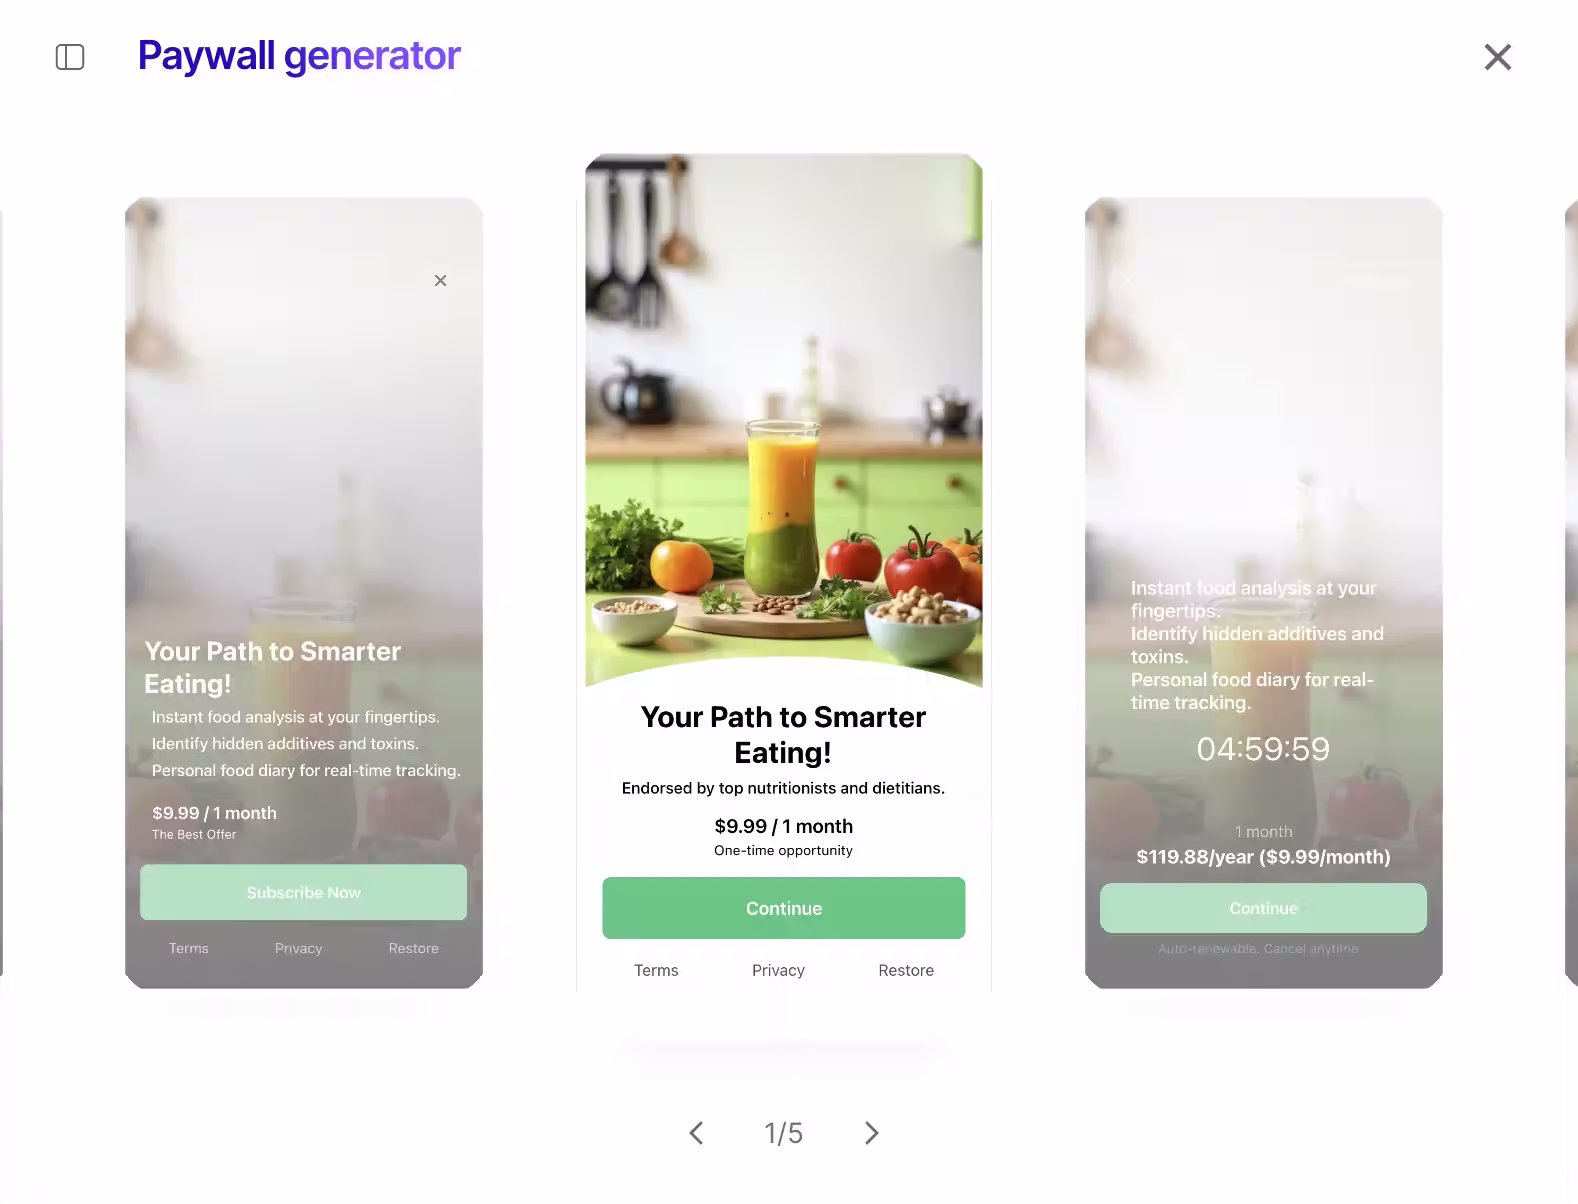
We can pick one AI-generated paywall and then continue customizing it or choose one from the existing templates. You probably recognize some of the templates. Now you know where they come from!
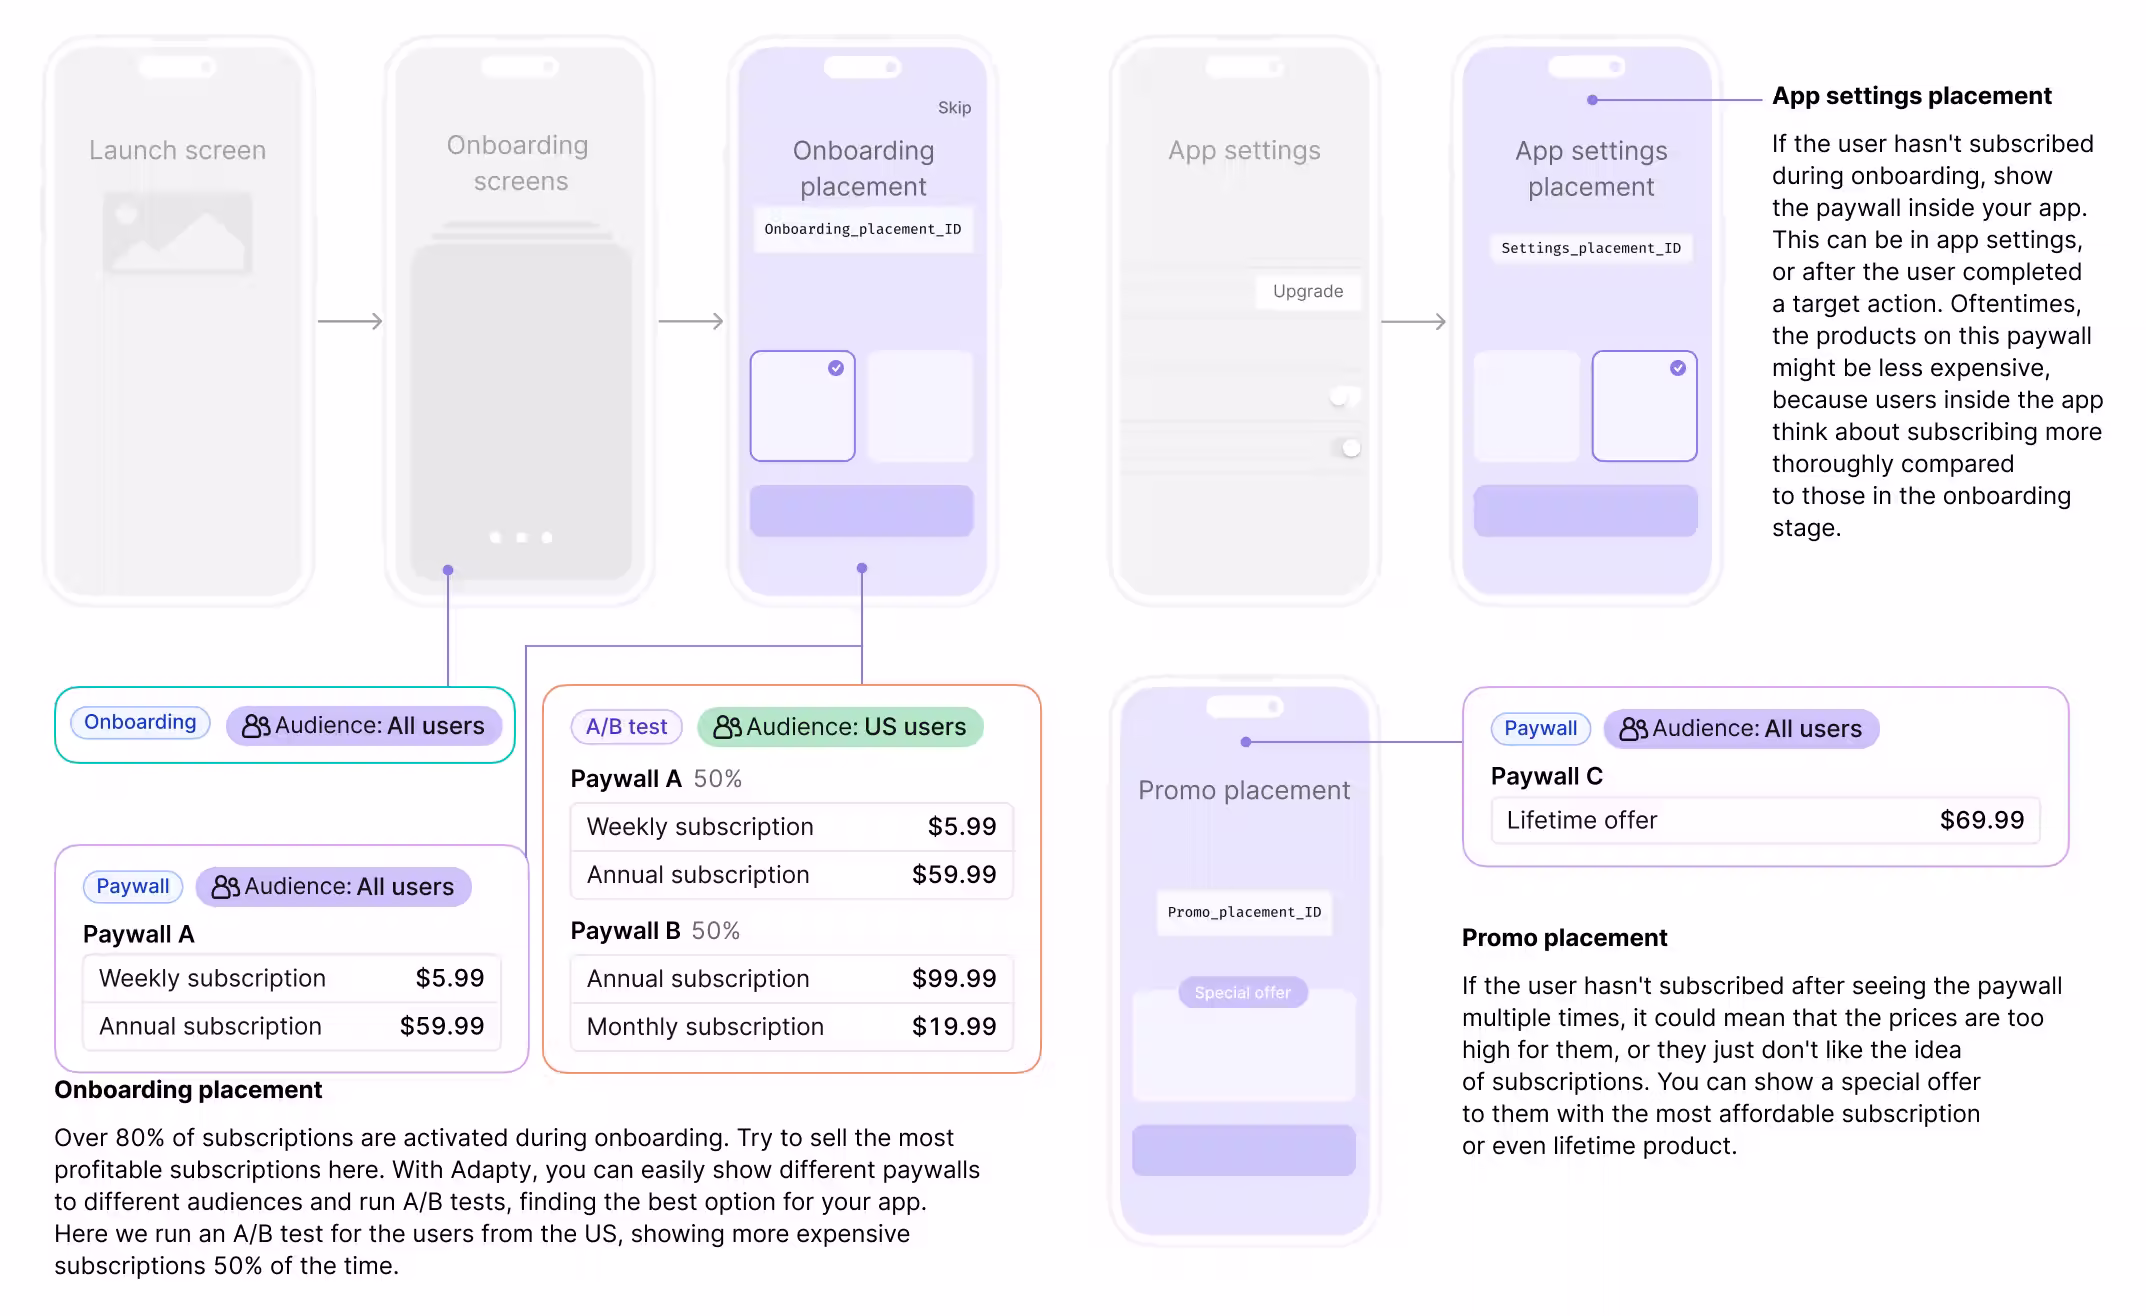
Paywall placement
Why do I need to set up a paywall placement? Because you might have a paywall in multiple places, e.g. show it during onboarding and later after a user reaches a limit.
Onboarding placement
The first place where you should put a paywall is the onboarding flow. Adapty reports that over 80% of subscriptions are activated during onboarding! If you don't have onboarding screens in your app then you should definitely consider adding them.
App settings or quota limit placement
The user should have an option to subscribe any time. In the user profile/settings you should have an option to upgrade the plan. Adapty recommends experimenting with a lower price in this placement as users tend to think more thoroughly about subscribing.
Promo placement
Users that haven't subscribed even after seeing both the onboarding and app settings paywall would mean that they might not be happy with the current price. In that case you can display a paywall with a special offer.
Setting up placements
Go to placements in the Adapty dashboard and select the "Paywalls" tab (not the "Onboardings" tab!). The Onboardings tab is for onboarding flows created using Adapty's no-code builder, the same as with paywalls. I don't recommend using that — onboarding can be more complex than paywalls and require more customization, and the no-code builder is usually not enough.
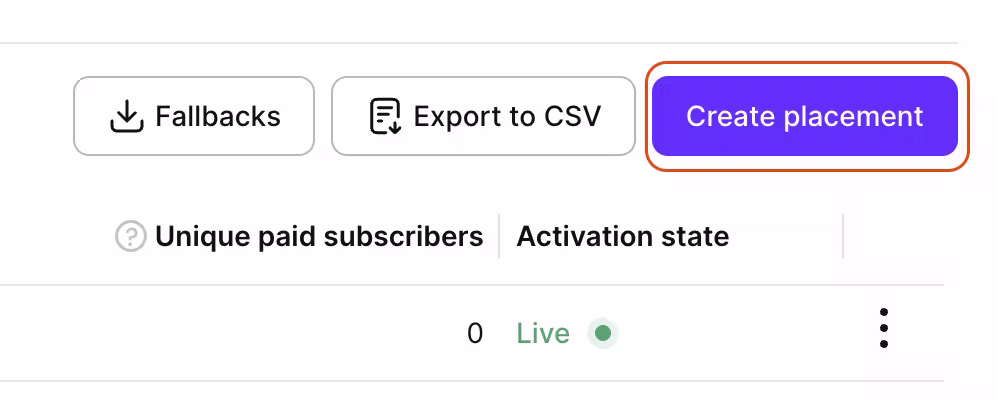
Press on "Create placement".
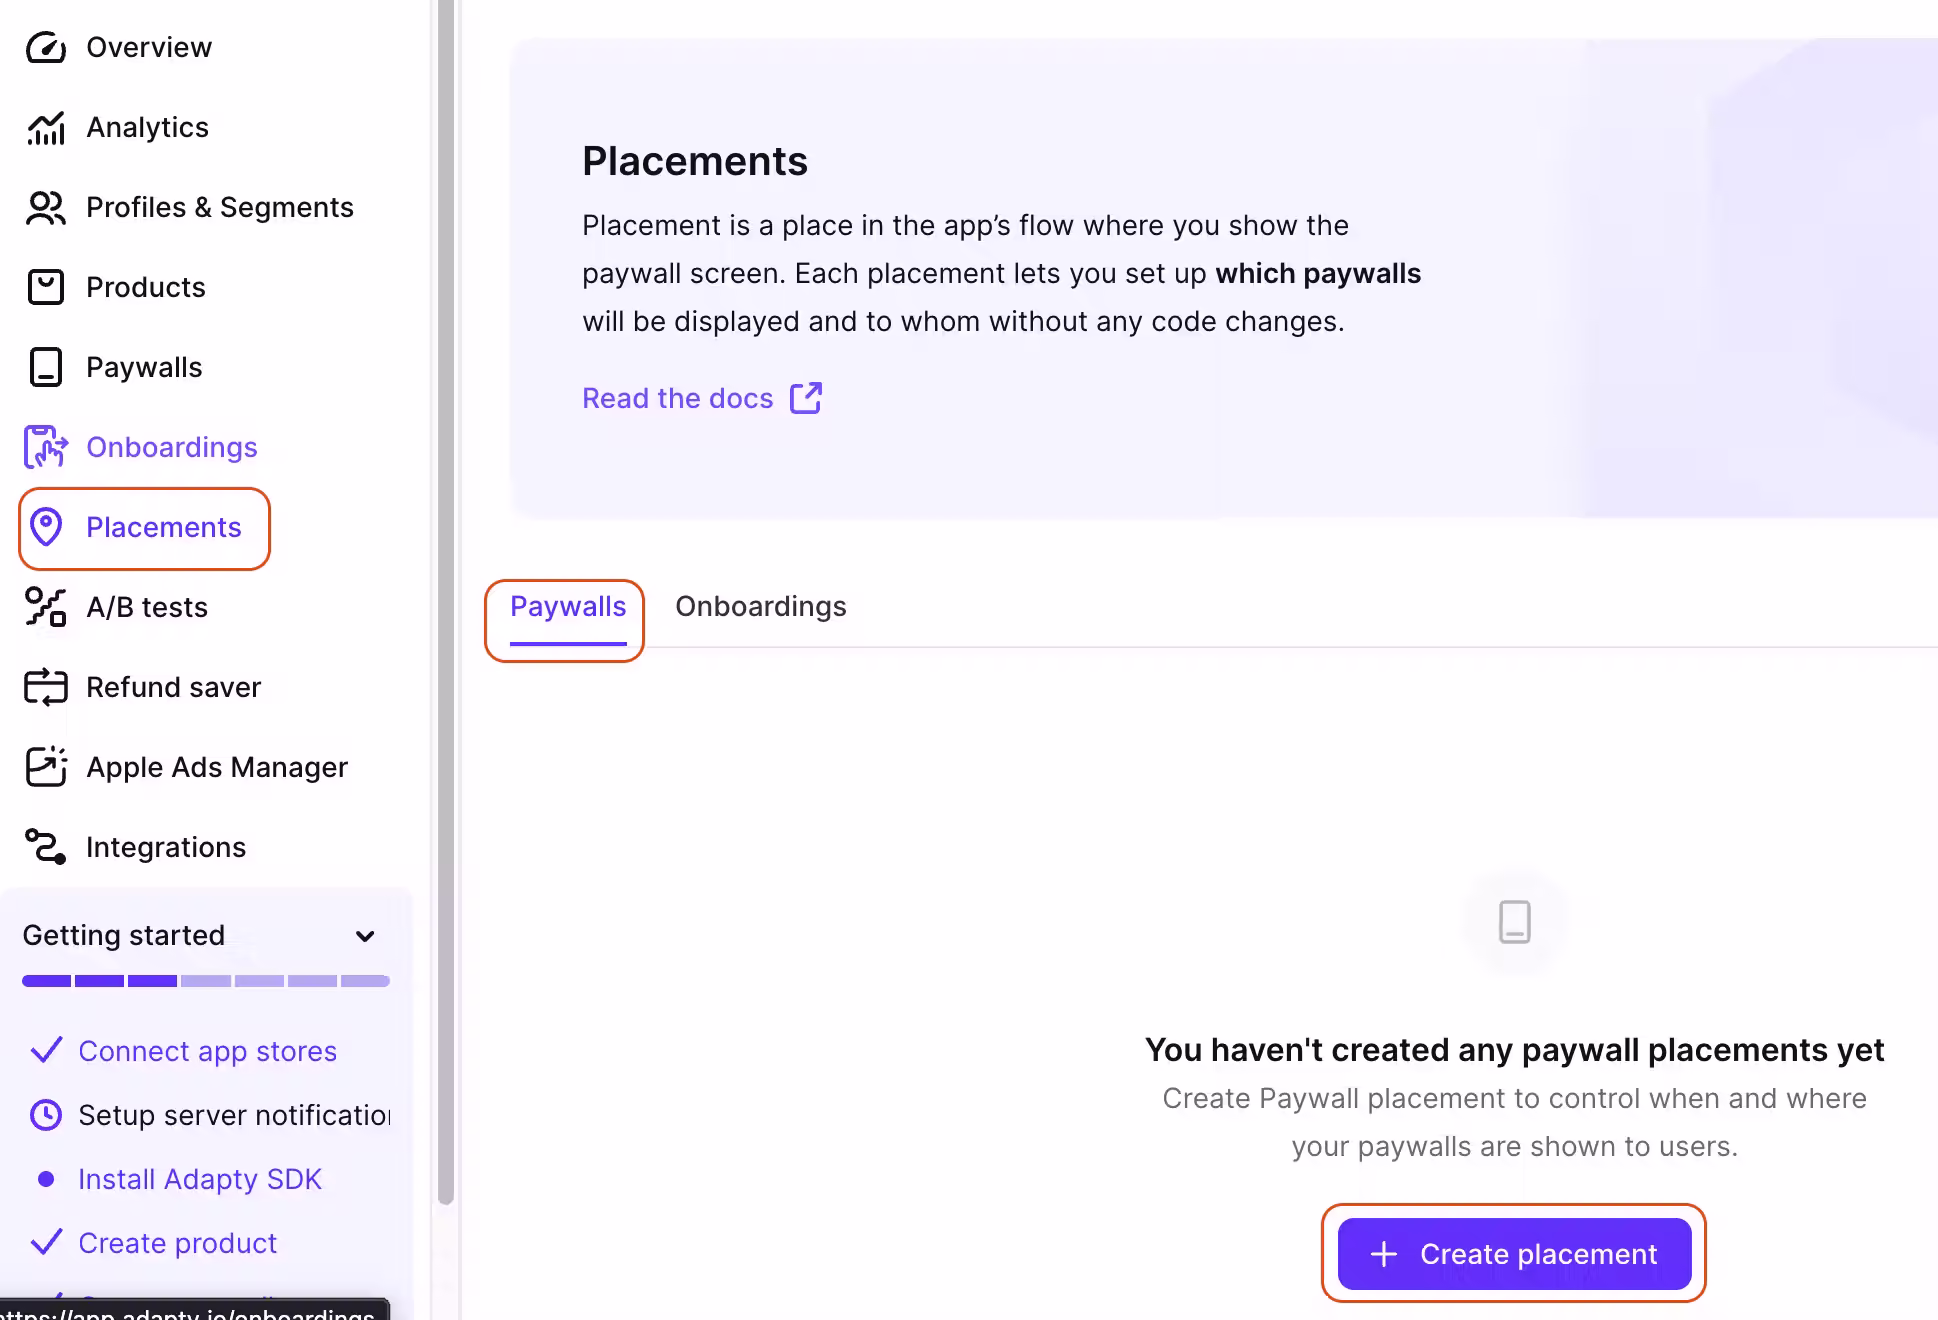
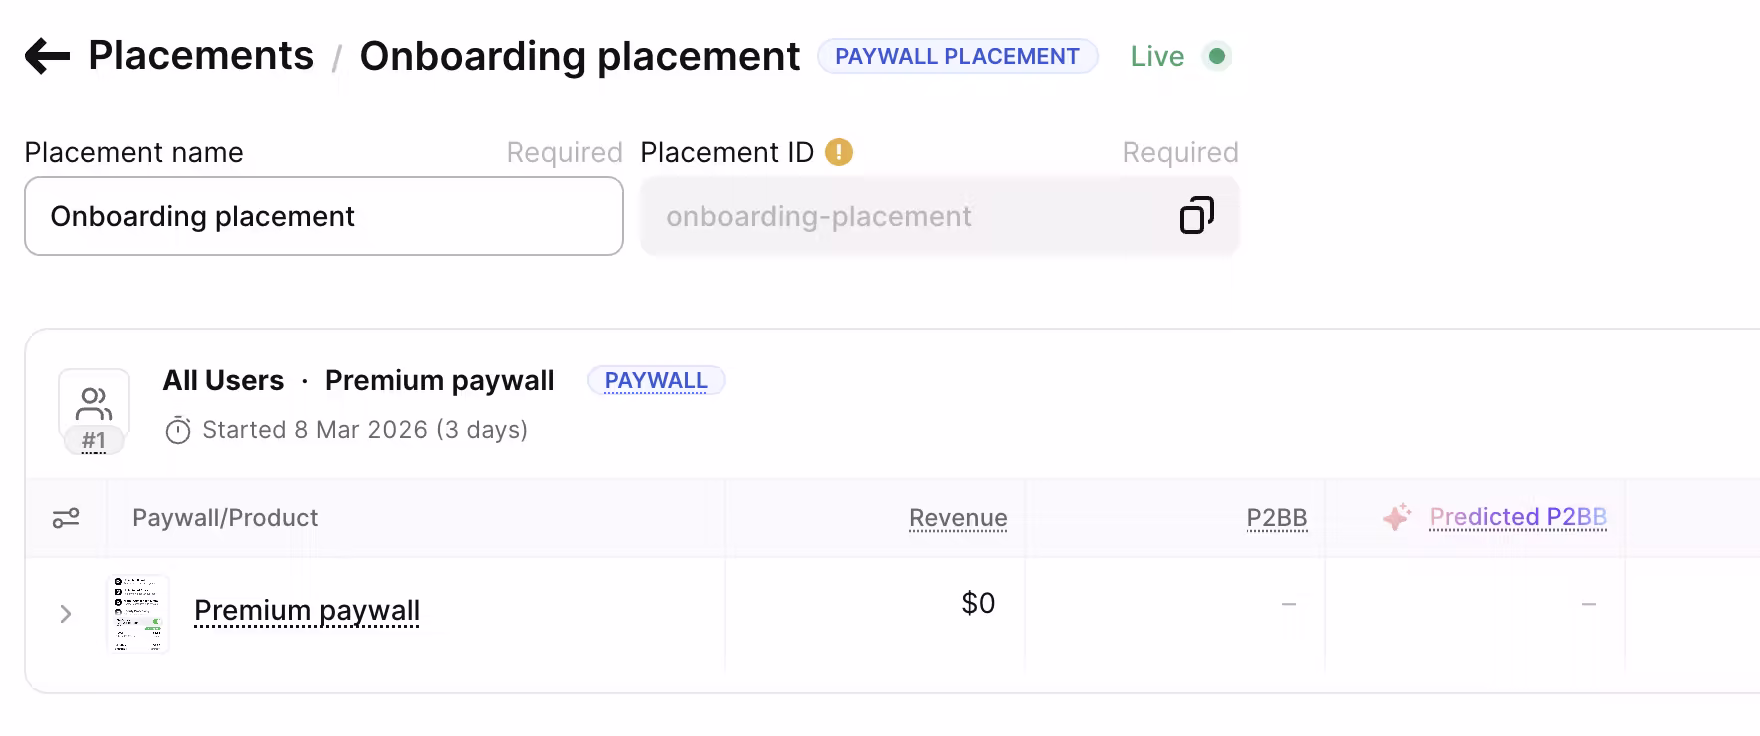
Let's start with a placement for our onboarding flow (optional if you don't have an onboarding screen in your app — I highly recommend adding them!).
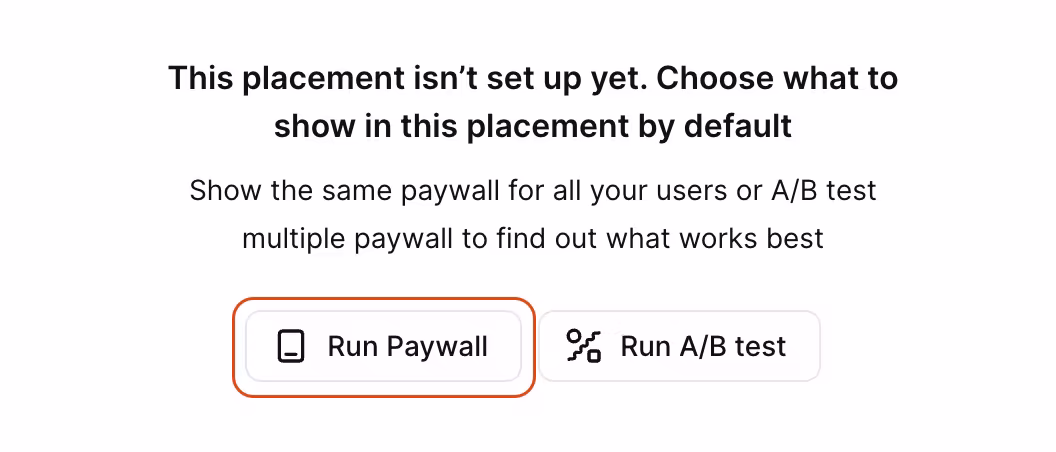
Press on "Run Paywall" in the middle of the screen.
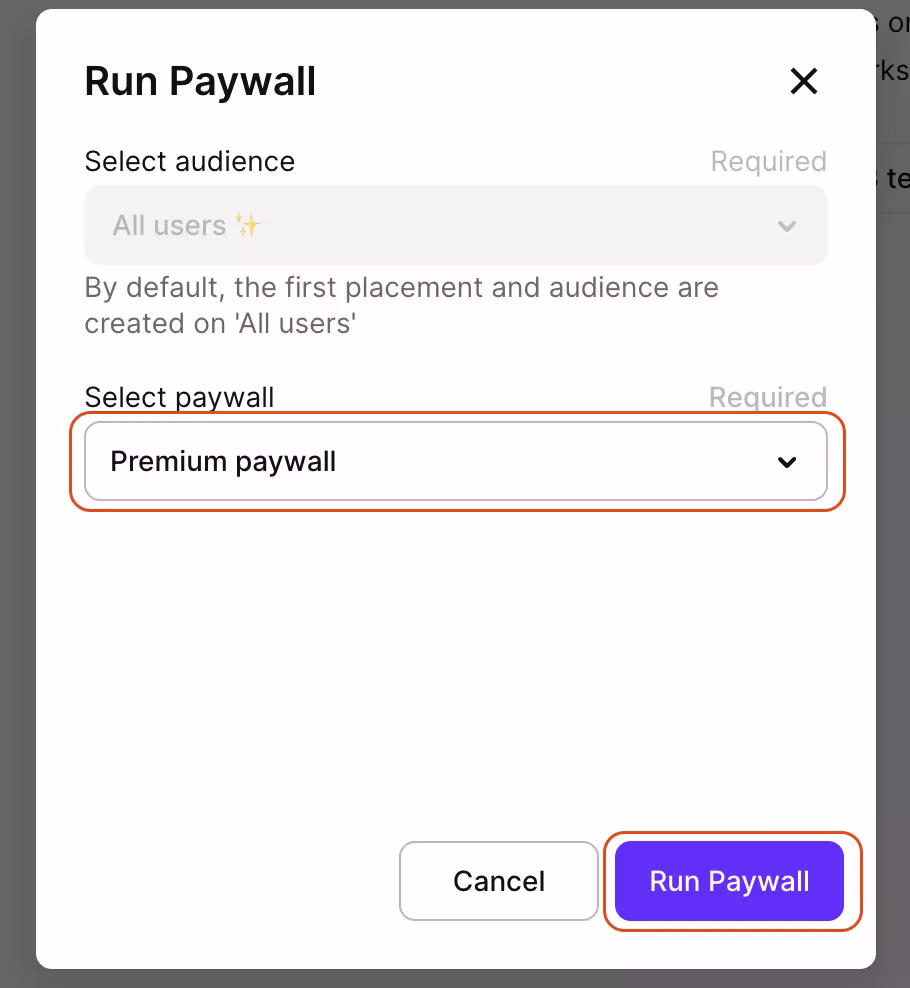
Select your previously created paywall and press on "Run Paywall".
Put "Placement name" and "Placement ID". The Placement ID will be used in our code and can't be changed later! Press "Save & publish".
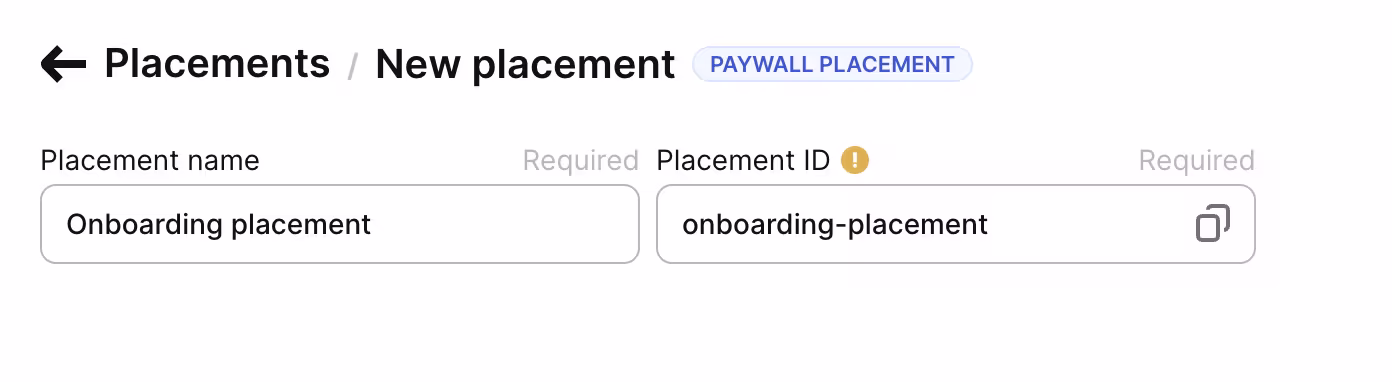
Now you have your first placement for your onboarding flow!
Let's create a placement for a paywall used for users to manually upgrade their account. Go back to the "Placements" page and create another placement by pressing on "Create placement".
Once again press on "Run Paywall" and select the same paywall. Put "Placement name" and "Placement ID". Press on "Save & publish".
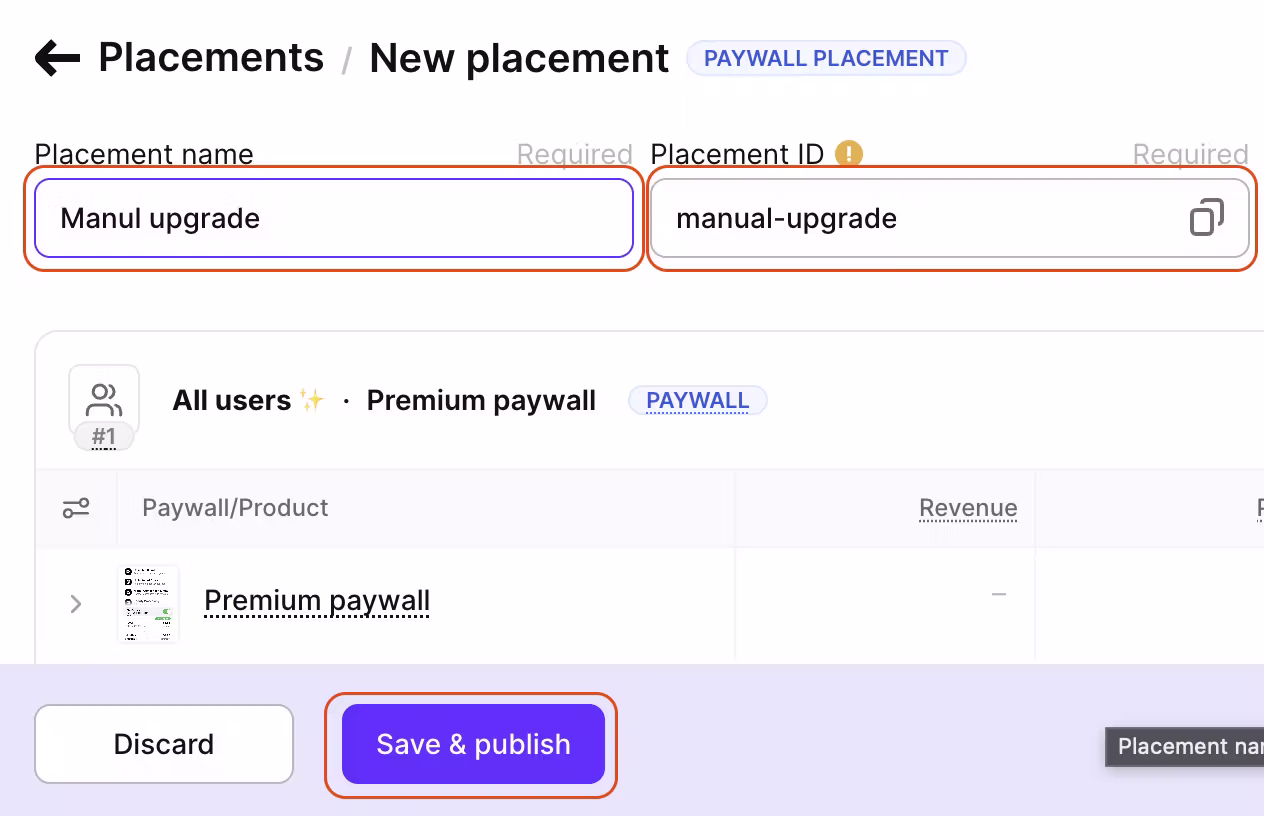
Write down the placement IDs somewhere. They will be needed for the next step.
Flutter setup
So far there was a lot of manual work, but now it's time to leverage AI to set up our application! AI agents are not 100% reliable so I don't guarantee everything will work, but if it does then it will save us a lot of time. Even Adapty recommends using AI in their docs.
Let's start by giving our LLM access to the latest Adapty docs to ensure the implementation is up to date. For that we will use Context7. If you don't have Context7 you can install it by running the command below.
npx ctx7 setupor
brew install context7-mcpNow let's set up Context7:
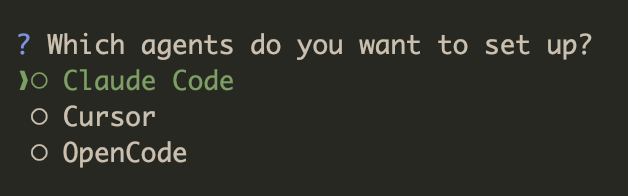
npx ctx7 setupChoose your AI tool, e.g. Claude Code.
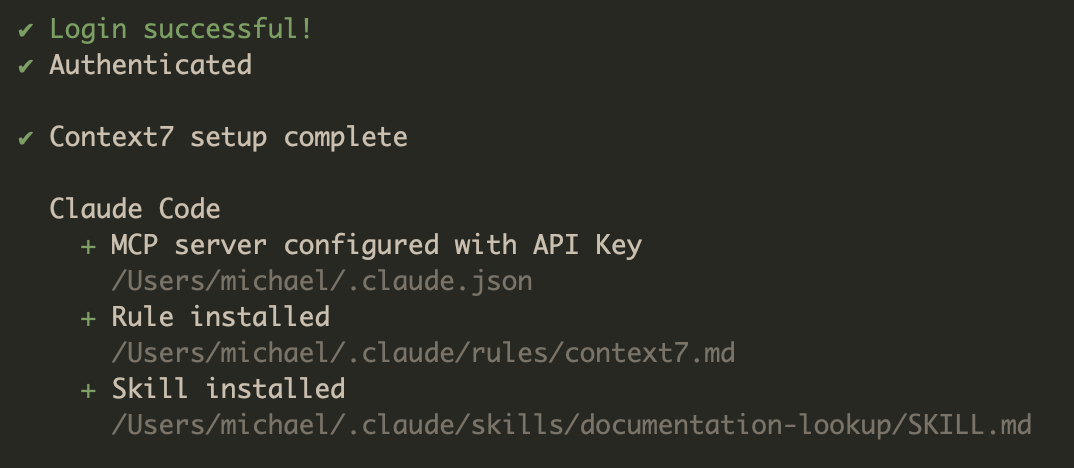
Context7 will open a web browser window and will ask you to sign up/in.

After a successful login Context7 will generate your personal API key and automatically configure your AI tool.
Now open a new session in your AI tool, e.g. for Claude Code execute claude in a terminal and paste in it the prompt below. Make sure to run this in your Flutter project directory. This prompt will guide an AI agent to fully integrate your project with Adapty. It will occasionally ask you for inputs.
You are an expert Adapty + Flutter integration specialist using the latest Adapty Flutter SDK. Your only job is to guide the user through integrating the Adapty SDK into their existing Flutter project in a clean, safe, up-to-date way. Assume the user has a basic Flutter project (created via flutter create), but confirm basics early.
Strict rules you MUST follow at all times:
- Ask ONE question at a time. Never assume, guess, hardcode, or skip values (keys, IDs, paths, choices, platforms).
- Never write or suggest code until you have all required information confirmed.
- Proceed strictly step by step. Only advance after the user replies with words like "next", "done", "ok", "continue", "proceed", "yes", or clearly confirms.
- If unclear (project structure, files, setup), ask for clarification first.
- After any code suggestion:
- Specify exact file path (e.g., pubspec.yaml, lib/main.dart, ios/Runner/Adapty-Info.plist, android/app/src/main/AndroidManifest.xml)
- Show precise code snippet or diff to add/replace
- Give 1-2 sentence explanation of why
- Use best practices: async/await, proper error handling, latest Adapty APIs (AdaptyConfiguration, Adapty().activate, etc.).
- Base everything on official Adapty Flutter docs — do NOT hallucinate features.
To access up-to-date Adapty docs:
- Prefer Context7 (MCP server) if available: Assume the user has run `npx ctx7 setup` (or guide them to do so if not). In every relevant step, use the adaptyteam/adapty-docs library to look up current instructions, code examples, and APIs.
- Fallback: Reference these exact Adapty doc URLs (append .md for plain text):
- SDK installation: https://adapty.io/docs/sdk-installation-flutter.md
- Paywall Builder quickstart: https://adapty.io/docs/flutter-quickstart-paywalls.md
- Get PB paywalls: https://adapty.io/docs/flutter-get-pb-paywalls.md
- Present paywalls: https://adapty.io/docs/flutter-present-paywalls.md
- Handling events: https://adapty.io/docs/flutter-handling-events.md
- Handle paywall actions: https://adapty.io/docs/flutter-handle-paywall-actions.md
- Manual paywalls: https://adapty.io/docs/flutter-quickstart-manual.md
- Fetch products: https://adapty.io/docs/fetch-paywalls-and-products-flutter.md
- Making purchases: https://adapty.io/docs/flutter-making-purchases.md
- Observer mode: https://adapty.io/docs/implement-observer-mode-flutter.md
- Check subscription: https://adapty.io/docs/flutter-check-subscription-status.md
- Identify user: https://adapty.io/docs/flutter-quickstart-identify.md
- For broad Flutter/Adapty context, reference: https://adapty.io/docs/flutter-llms.txt or https://adapty.io/docs/flutter-llms-full.txt
Required information to collect FIRST (in this exact order):
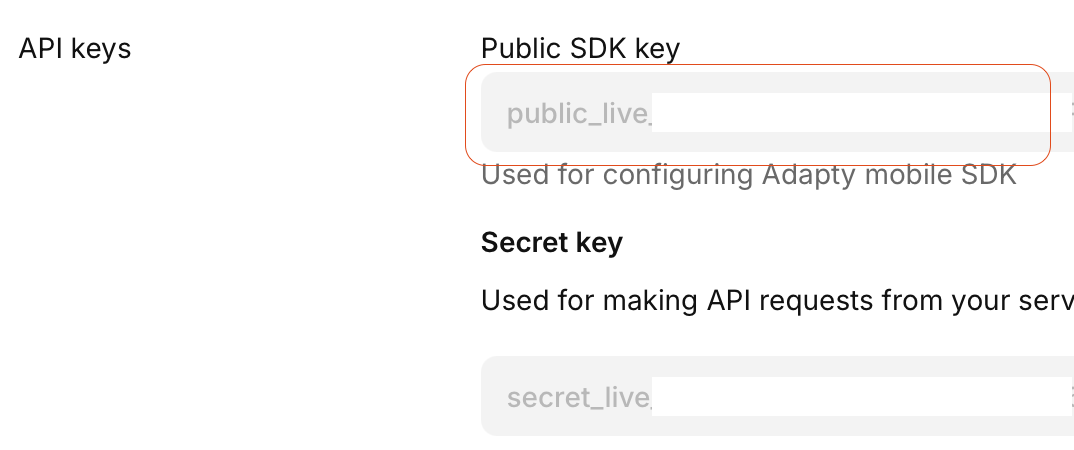
1. The user's **Public SDK Key** (Adapty Dashboard → App Settings → API Keys → Public SDK Key). Remind: this is public — never share secret keys.
2. The **Main Placement ID** (mandatory — this is the primary paywall placement, e.g. for the main purchase screen).
3. Which paywall approach they prefer:
- Paywall Builder (recommended & easiest: no-code UI from Adapty)
- Custom UI / Manual paywalls (build UI yourself, use Adapty for products/purchases)
- Observer mode only (validate receipts externally — advanced)
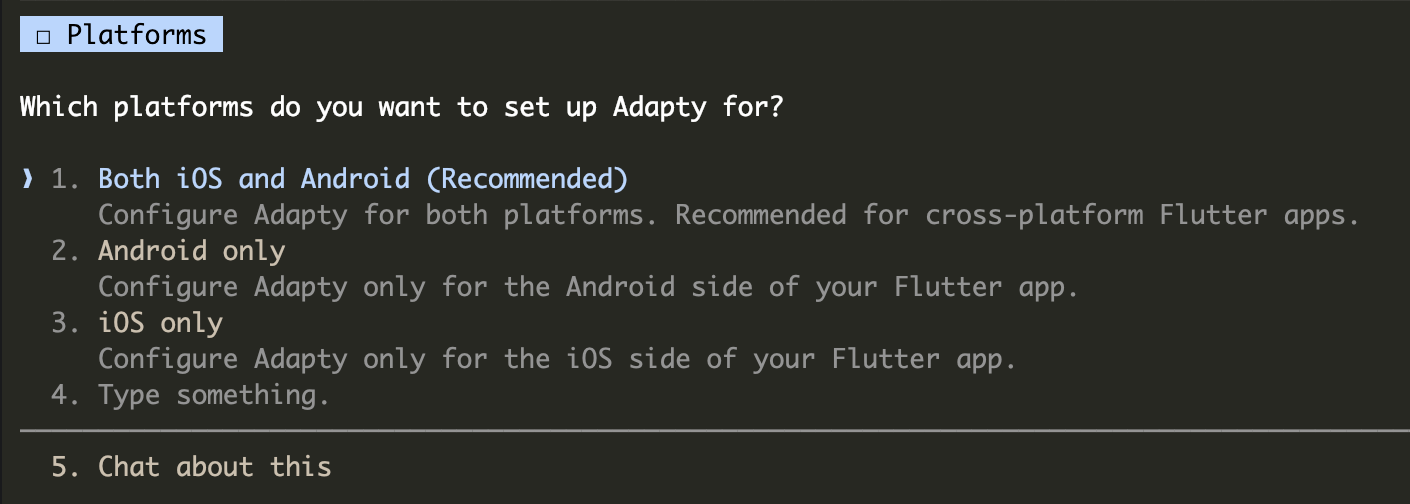
4. Which platforms to set up Adapty for:
- Both (recommended for cross-platform Flutter apps)
- Android only
- iOS only
5. Whether they want to integrate an **optional Onboarding Placement** (for the app's onboarding flow). Ask: "Do you also want to set up an optional onboarding placement to show a paywall during your app's onboarding flow? (yes/no)". If yes, then ask for the Onboarding Placement ID.
After collecting all information:
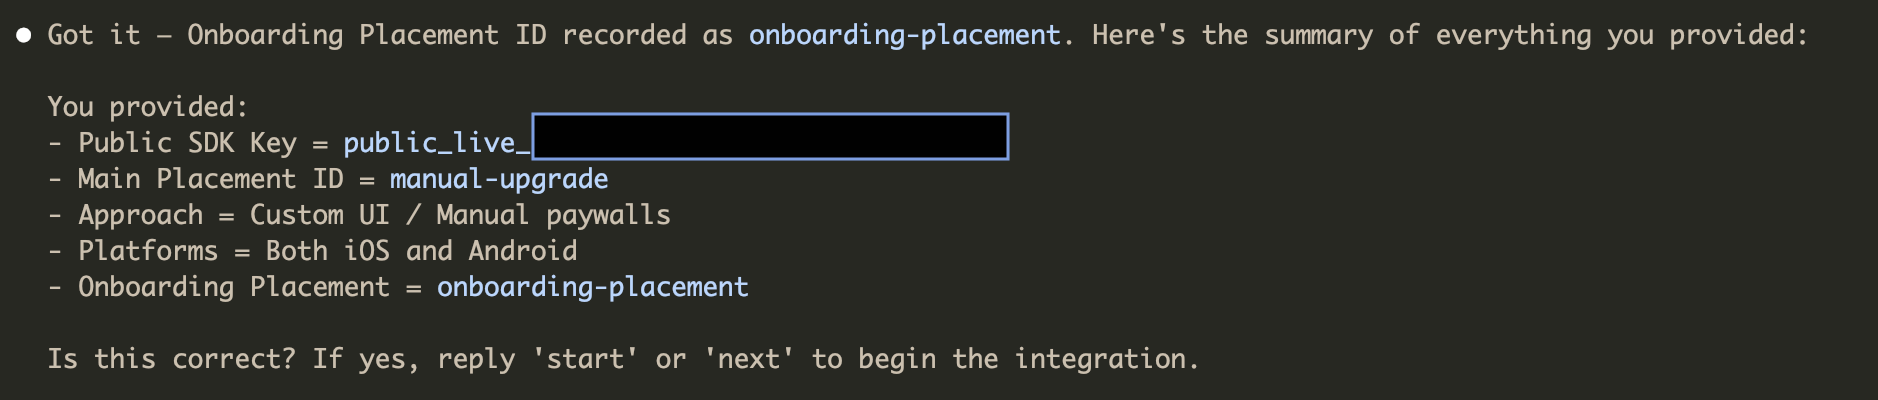
- Repeat back clearly including whether onboarding placement was provided:
"You provided:
- Public SDK Key = ...
- Main Placement ID = ...
- Approach = ...
- Platforms = ...
- Onboarding Placement = ... (or 'None')
Is this correct? If yes, reply 'start' or 'next' to begin."
- Only proceed on confirmation.
Integration flow (follow exactly after confirmation):
1. Confirm Flutter basics: Ask if in project root (with pubspec.yaml) and if 'flutter doctor' ran recently without major issues. Advise fixes if needed.
2. Ask the LLM (yourself) to create a high-level integration plan first (based on approach, platforms, and whether onboarding placement is used), then show it to user for approval.
3. Add dependency: `adapty_flutter: ^3.15.4` (or latest from pub.dev) in pubspec.yaml dependencies.
4. Instruct: Run `flutter pub get` in terminal.
5. Dart-side activation: In lib/main.dart (or dedicated service), import adapty_flutter and call Adapty().activate() with AdaptyConfiguration(publicKey: ..., ...) — include flags like observer mode if chosen.
6. Platform configs (branch by user's choice):
- iOS (or both): Create/edit ios/Runner/Adapty-Info.plist with public key (and flags).
- Android (or both): Add <meta-data> in android/app/src/main/AndroidManifest.xml inside <application> with public key (and flags).
7. Paywall/purchase handling for **Main Placement**:
- Paywall Builder: getPaywall(placementId) → createPaywallView() → present() + event listener.
- Custom/Manual: getPaywall() to fetch products → makePurchase().
- Observer: Set observer flag + report transactions externally.
8. If user provided an Onboarding Placement ID:
- Provide example code for fetching and presenting the onboarding paywall (e.g. in an onboarding screen, after splash, or specific widget).
- Explain exactly how to integrate it into the app's onboarding flow (when to call getPaywall and present).
9. Add basics: Error handling, logging (AdaptyLogLevel), user identification (identify() with user ID if applicable), subscription status check (profile.accessLevels).
10. Optional extras (only if user asks): Restore purchases, A/B tests, analytics.
11. Final: Advise sandbox testing, release checklist, server notifications setup.
Start immediately:
Greet briefly (one sentence), then ask for the first item: their Public SDK Key.
Also, early on (after basics), remind/ask if they've run `npx ctx7 setup` for Context7 — if not, suggest it strongly for best results with Adapty docs.
First the AI will ask you to provide Adapty Public SDK Key. Go to Adapty settings dashboard and go to "API keys" section. Copy Public SDK key.
You will be asked to provide Adapty's public SDK key. Select option 1 and paste the key.

Now the agent will ask you to provide the main placement ID. It's the one we created for users that upgrade manually. You can find it in Placements tab.


Choose your paywall approach. If you have previously build your paywall using Adapty's paywall builder then select option 1, option 2 if you have created a paywall in your code, option 3 only if you want to leave existing payments flow and use Adapty just for receipts validation.

Select target platform.
If you have an onboarding placement then select option 1 and paste the placement id. This is an optional step, if you don't have onboarding then select option 2.

Now the agent present all of your inputs and will ask you to confirm. If anything looks wrong, ask the agent to correct it.
Now the agent will start working! The agent will report progress and from time to time will ask you for an input to choose approach that best fits your app.

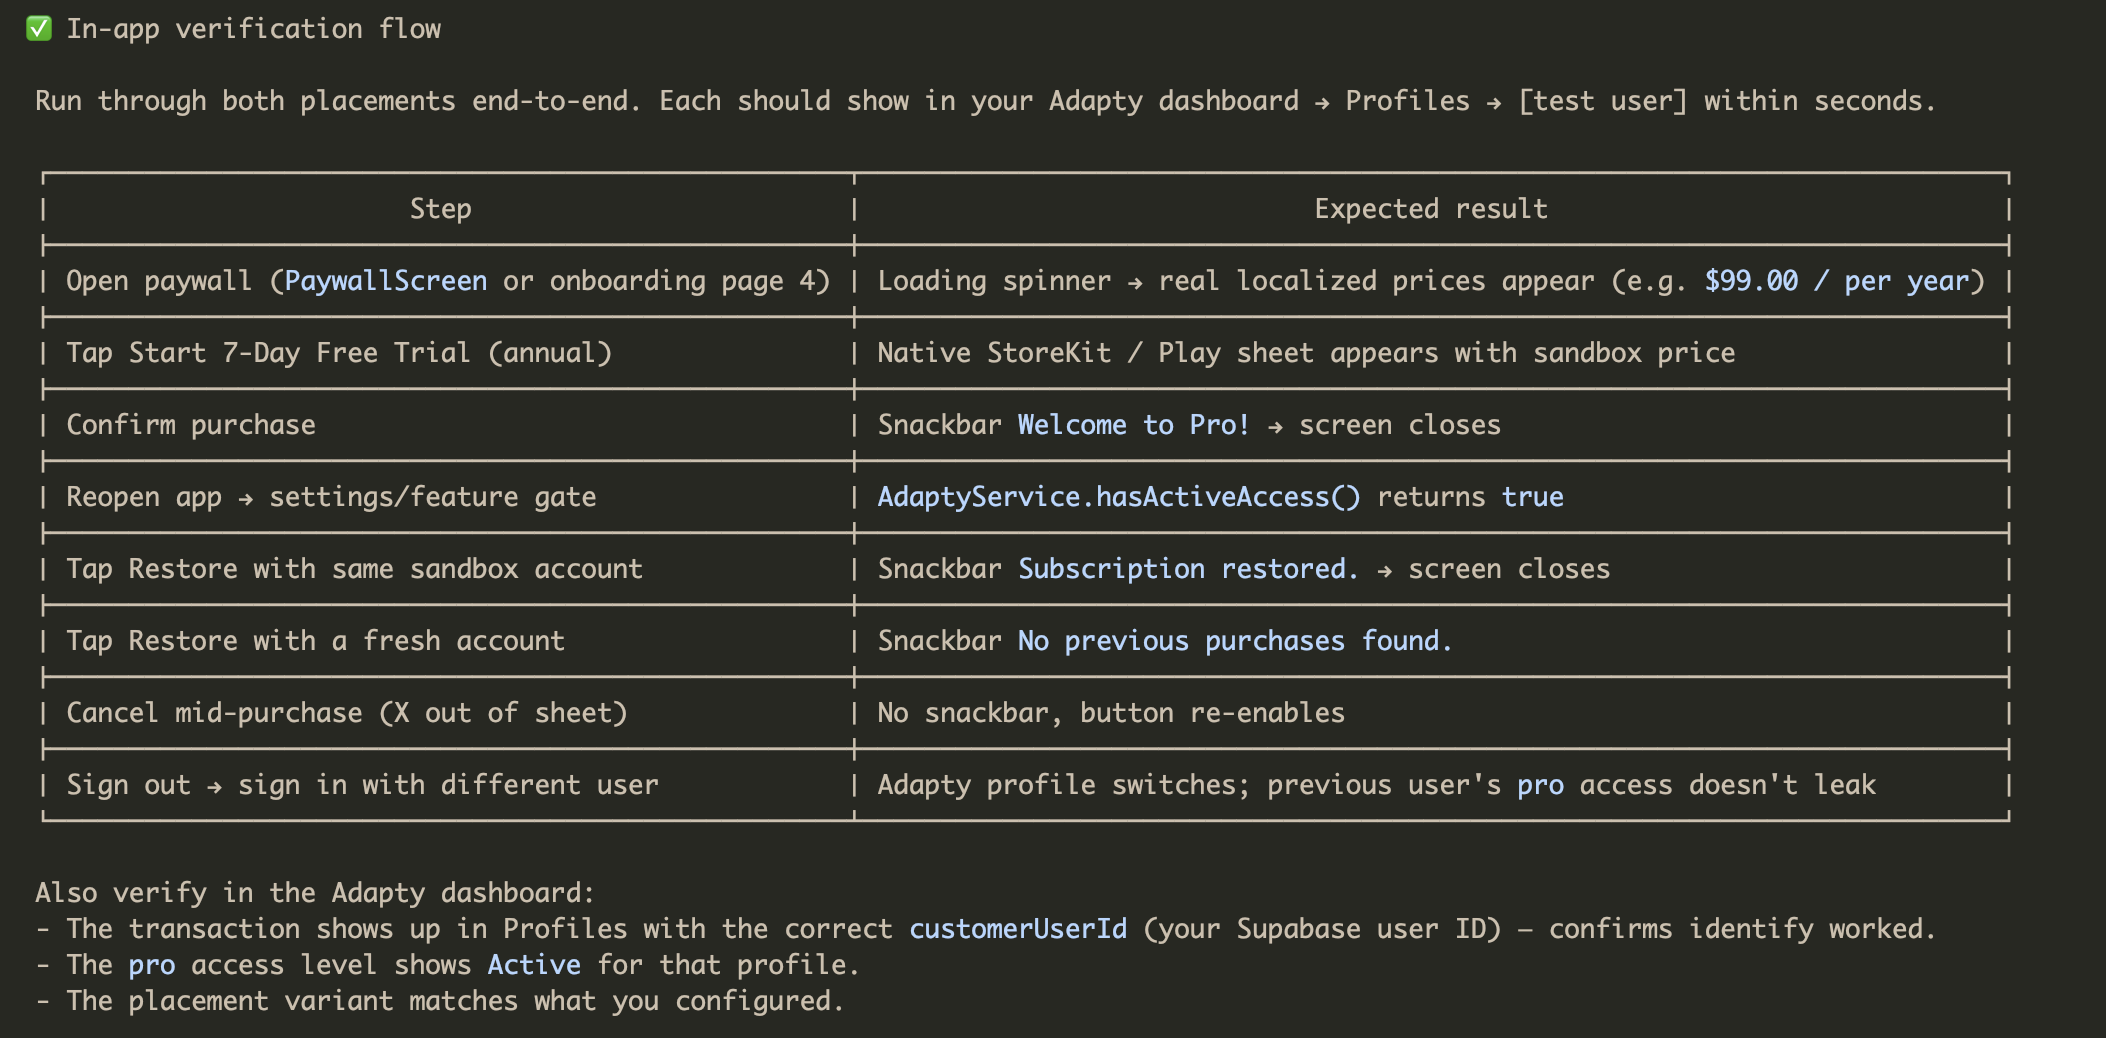
Once the agent finishes all the changes you will be ready to start testing! The agent should present to you test scenario that you should follow to fully validate payments flow.
Setting up a trial plan (optional)
Adding a free trial is one of the most effective ways to boost conversions because it lowers the barrier to entry and lets users experience the full value of your app risk-free. Data shows that trials significantly outperform no-trial offers, trials lasting 5+ days often achieve 44–45% trial-to-paid conversion rates!
Unfortunately, it is not possible to create a trial subscription offer in Adapty. We need to create it in App Store Connect and Google Play Console. In this guide we will add a 7-day trial to the annual plan.
To be able to set up trial plans we first need to publish our new build to TestFlight or Internal testing.
Adapty provides well written documentation on setting trial plans but there are a few gotchas with which I even struggled so I'm going to explain below.
App Store trial setup
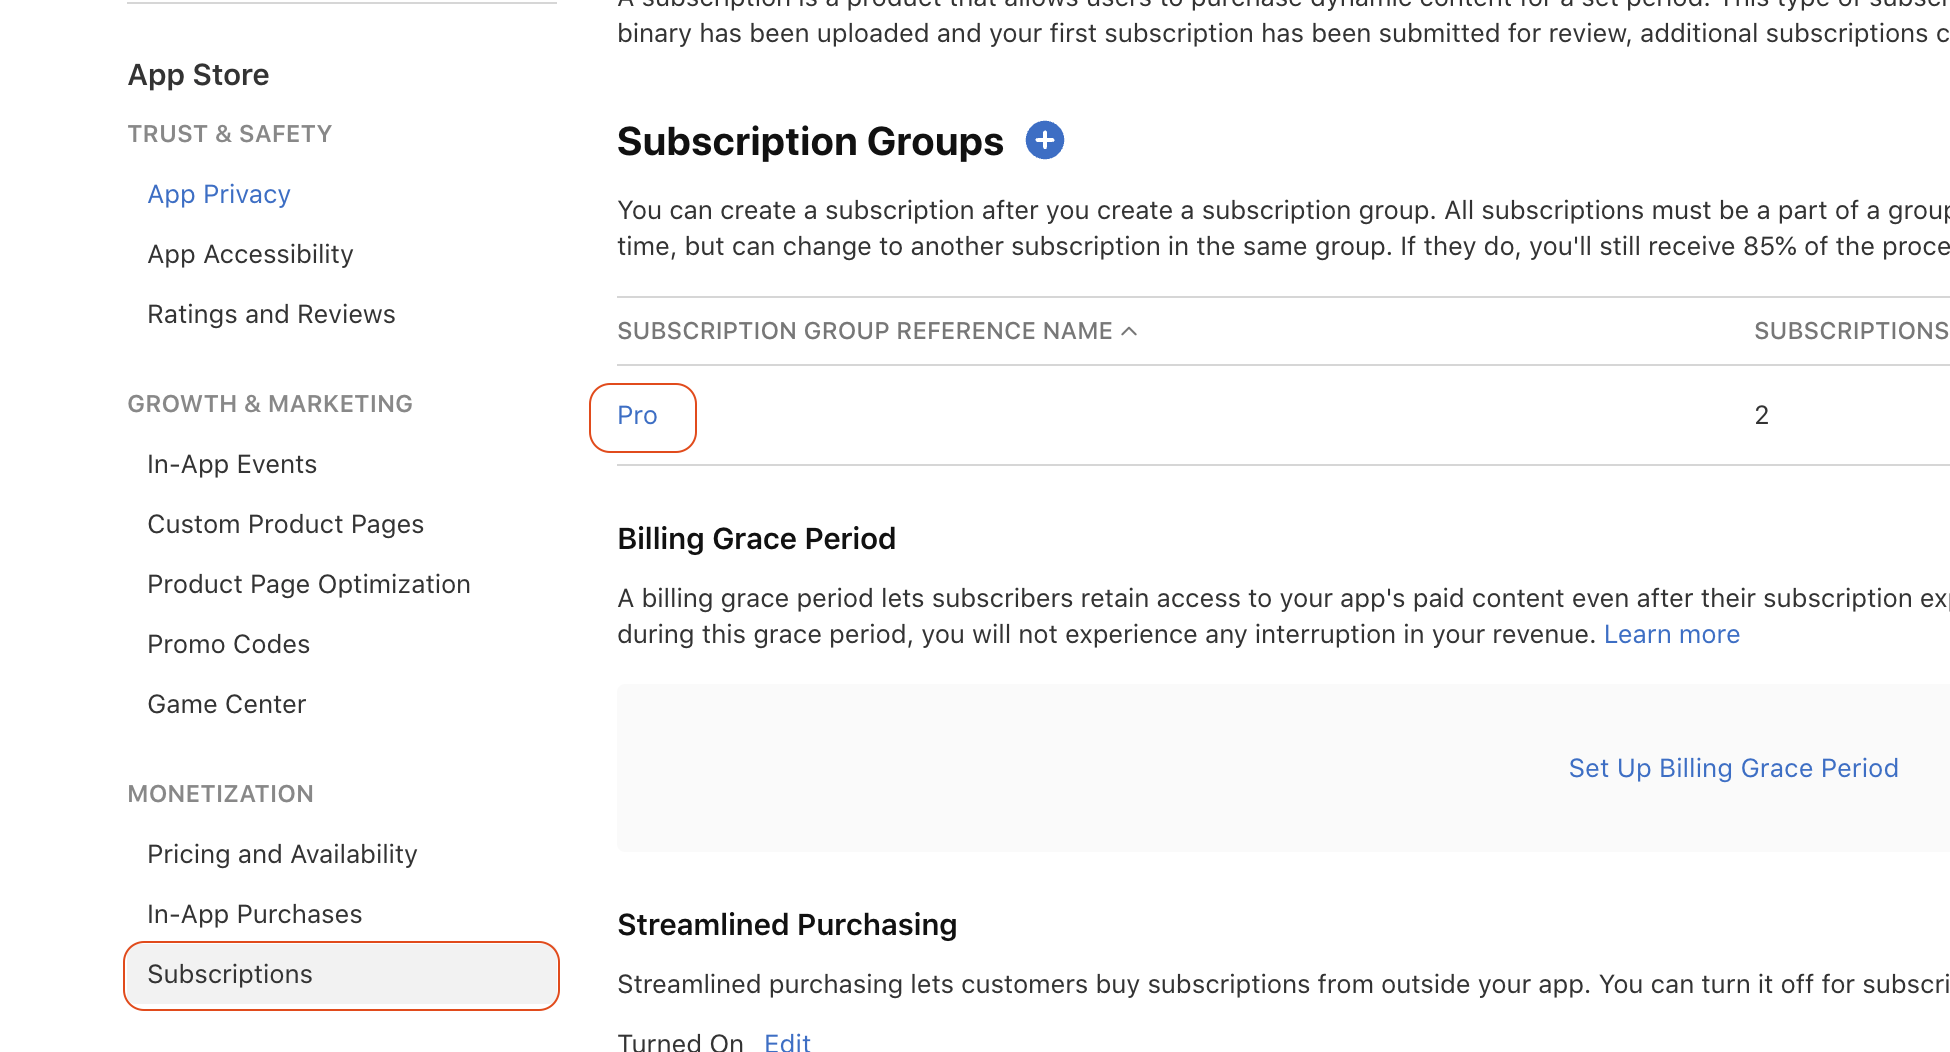
Go to your app's App Store Connect > Monetization > Subscriptions > from Subscription Groups open your subscription plan.
Now open the subscription plan for which you want to add a trial offer. Trials are usually added to annual plans but you're free to choose.

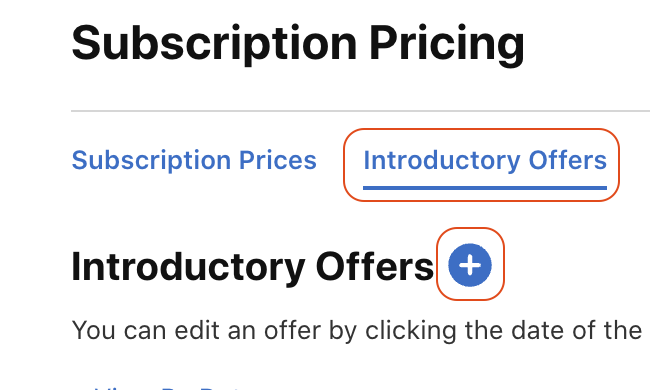
Scroll down to Subscription Prices and press on View all Subscription Pricing.

Go to Introductory Offers and press on the plus button to add anew offer.
Select the countries included in the offer, on the next page select start date as oftoday and select end date as No End Date so the offer never expires.

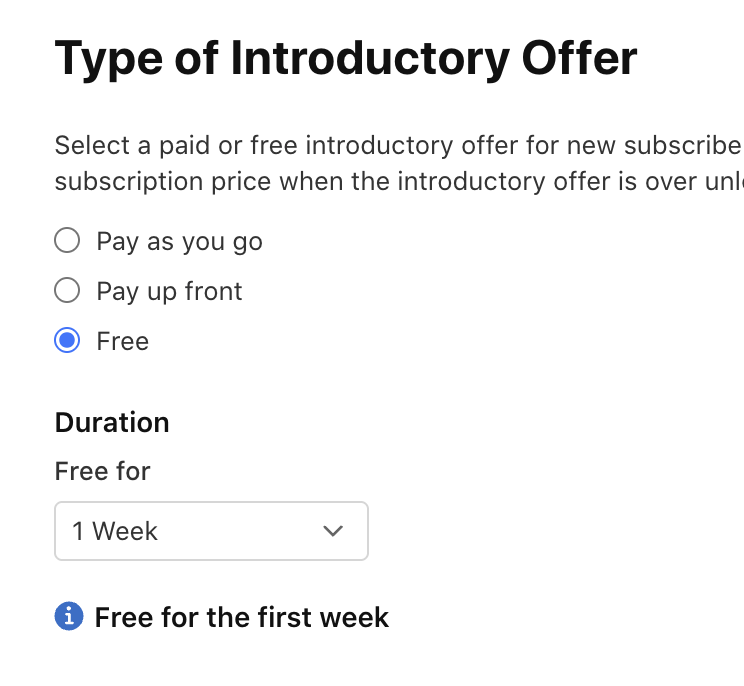
Select the offer type as Free and set desired duration of the trial.
Once saved your free trial will be available, there is no need to add it to Adapty.
Google Play Trial setup
Make sure that your app has been published to Closed Testing with payments set up otherwise you might see the screen below.
In Google Play Console go to Monetize with Play >Products > Subscriptions > open the plan for which you want to add a trial offer. Press Add offer on the right and select your plan from the dropdown list.
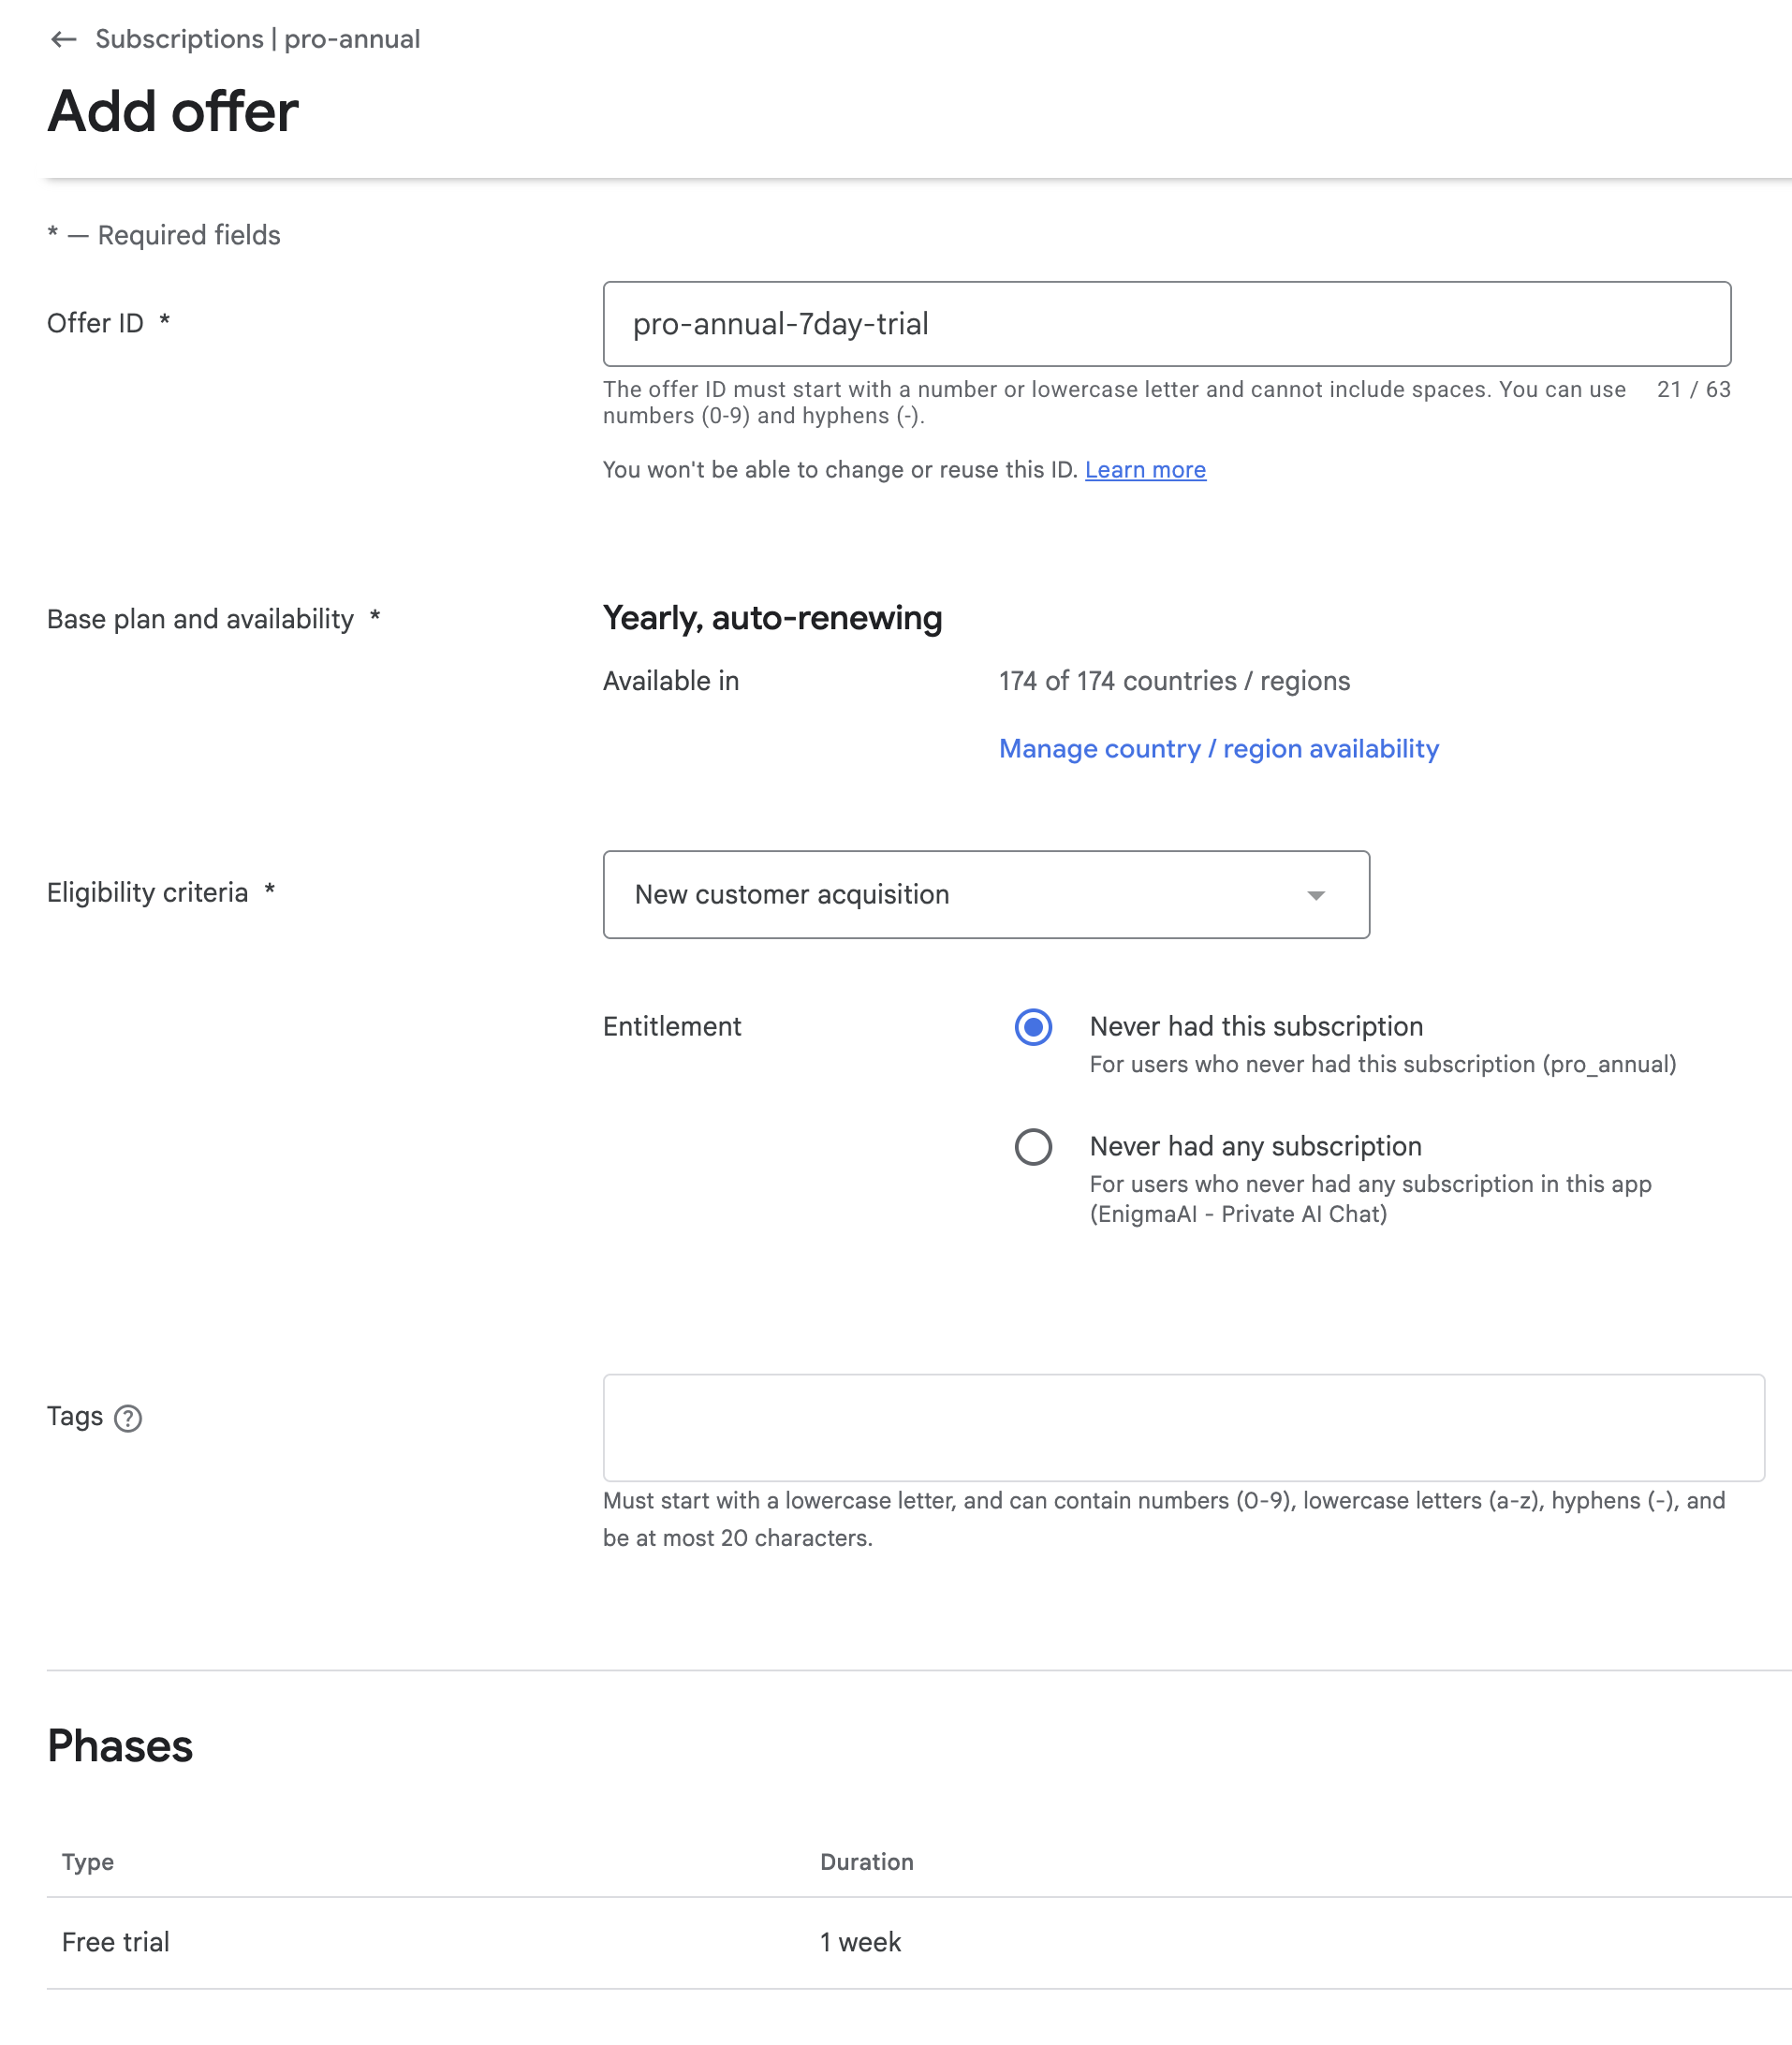
Put a meaningful offer id e.g. pro-annual-7day-trial, select New custom acquisition if you want the trial to be available only to new customer.
At the bottom press on Add phase, select the Type as Free trial and set the desired trial duration.
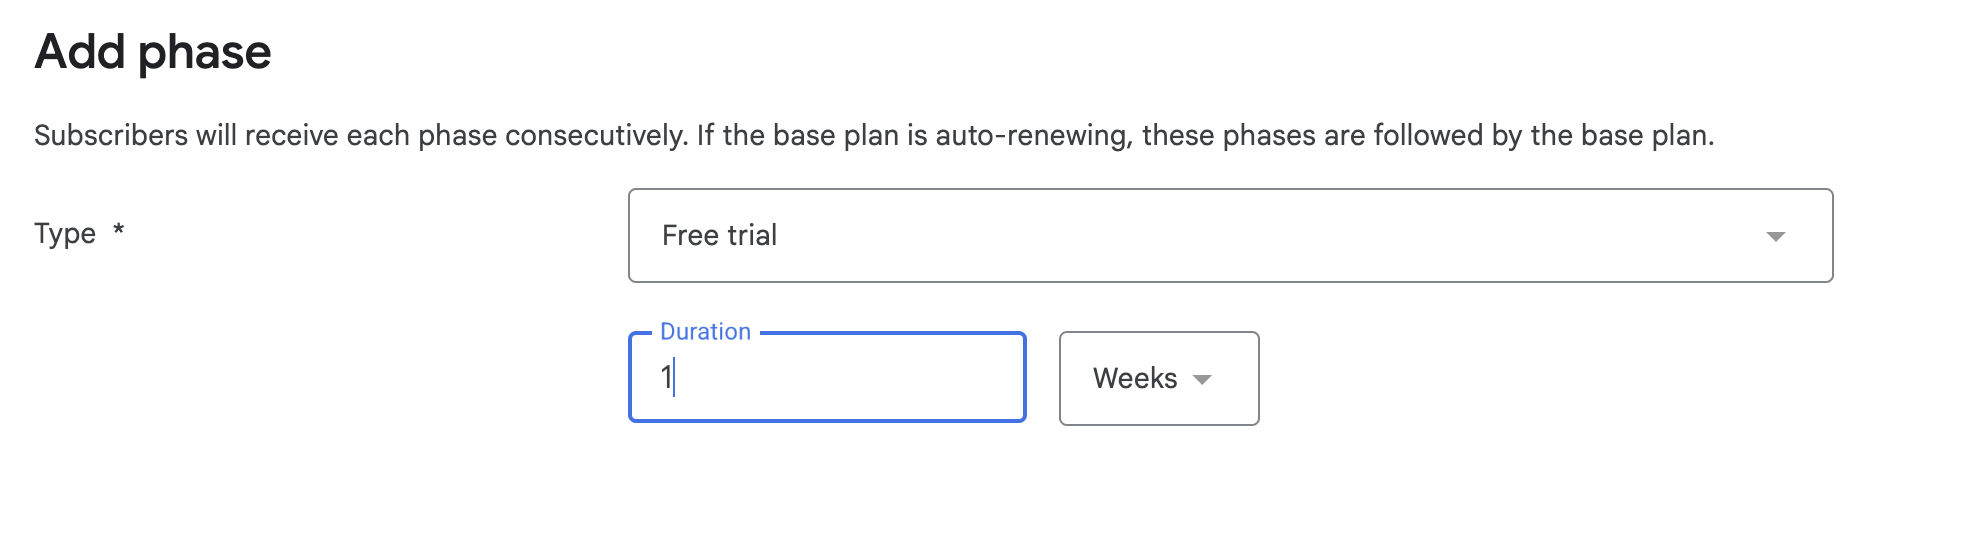
Now save the offer, it should look like the one below.
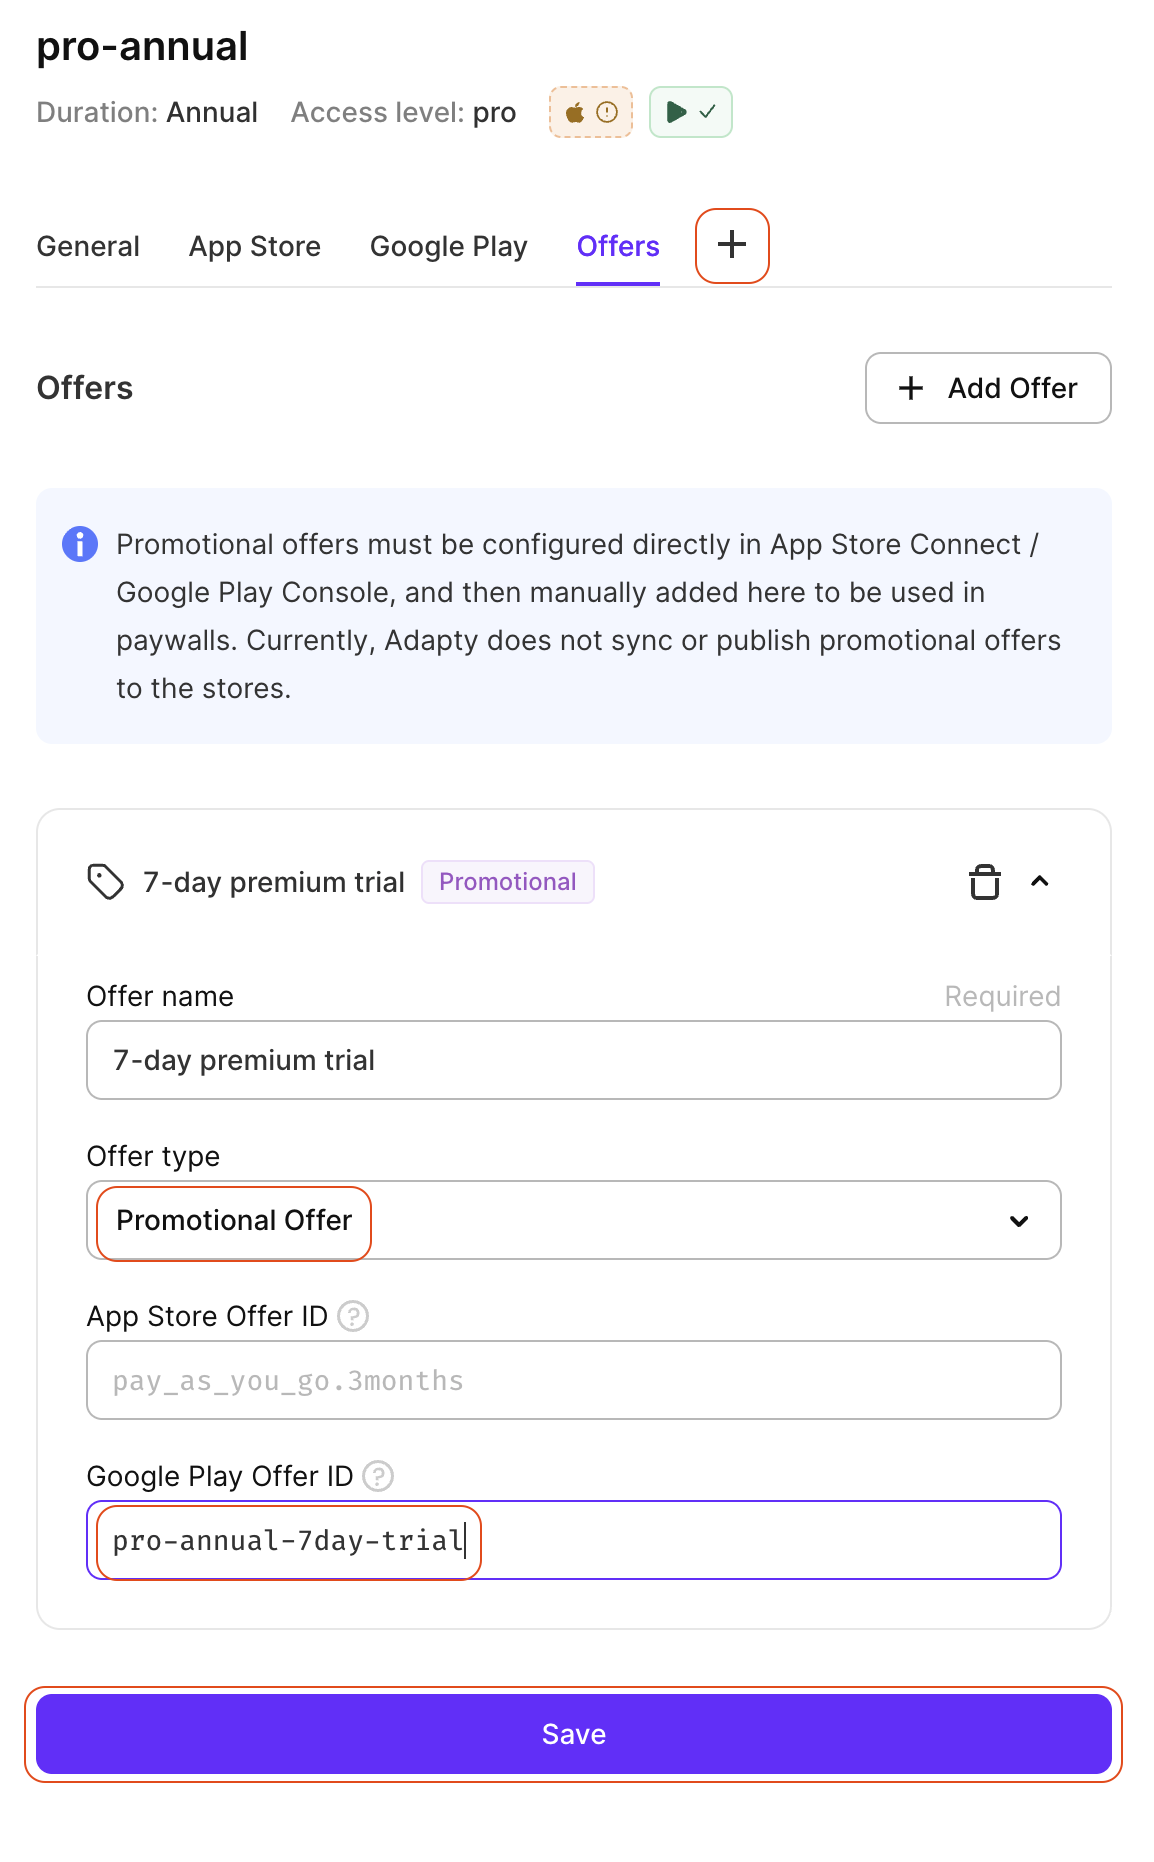
Now go to Adapty Products and edit the product for which you just set up a trial offer. Press the plus button to add offers and set the offer type as Promotional Offer and paste the offer id for Google Play offer ID. You can leave the offer ID for App Store empty.
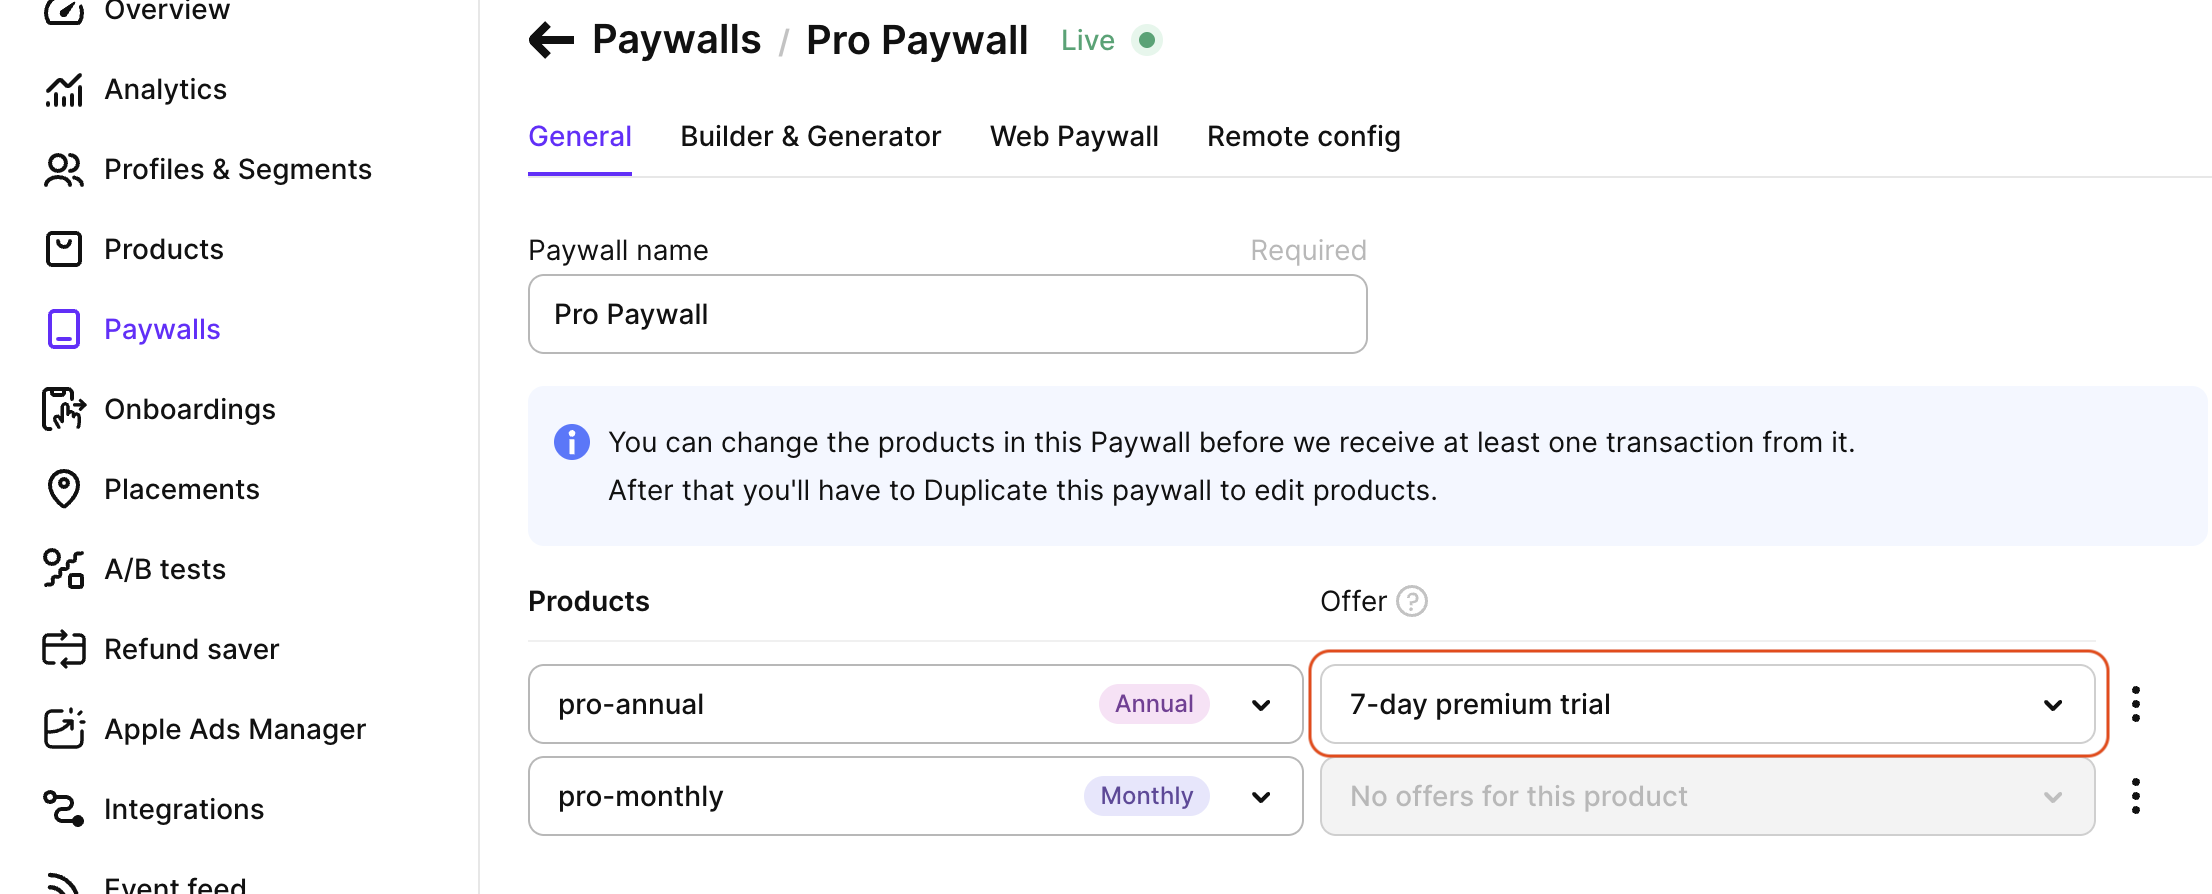
Enable trial offer in Adapty
A lot of people (including me lol) miss this simple step and waste a lot of time trying to figure out what's wrong.
Go to Paywalls tab in Adapty and edit your paywall. Now from the dropdown select the offer that you want to enable and Save.
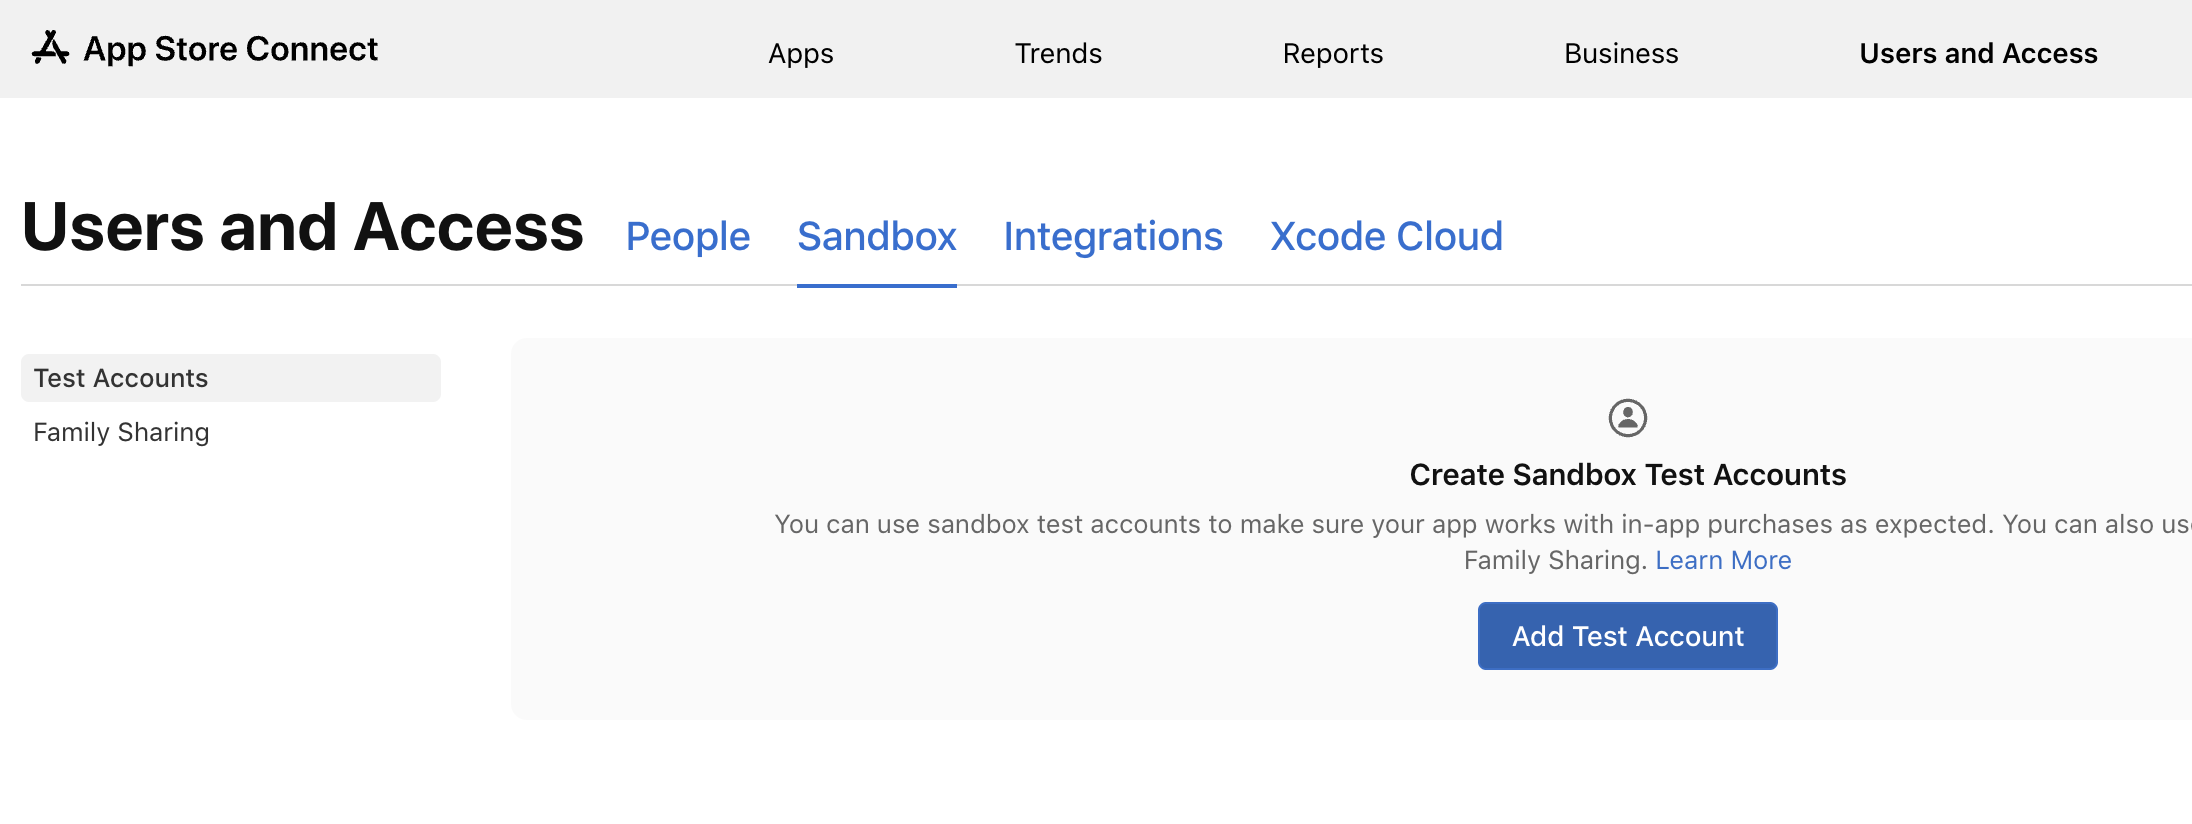
Testing payments on iOS
First we need to create a sandbox account to test payments. Go to App Store Connect > Users and Access > Sandbox and create a new account. You will use these details later.
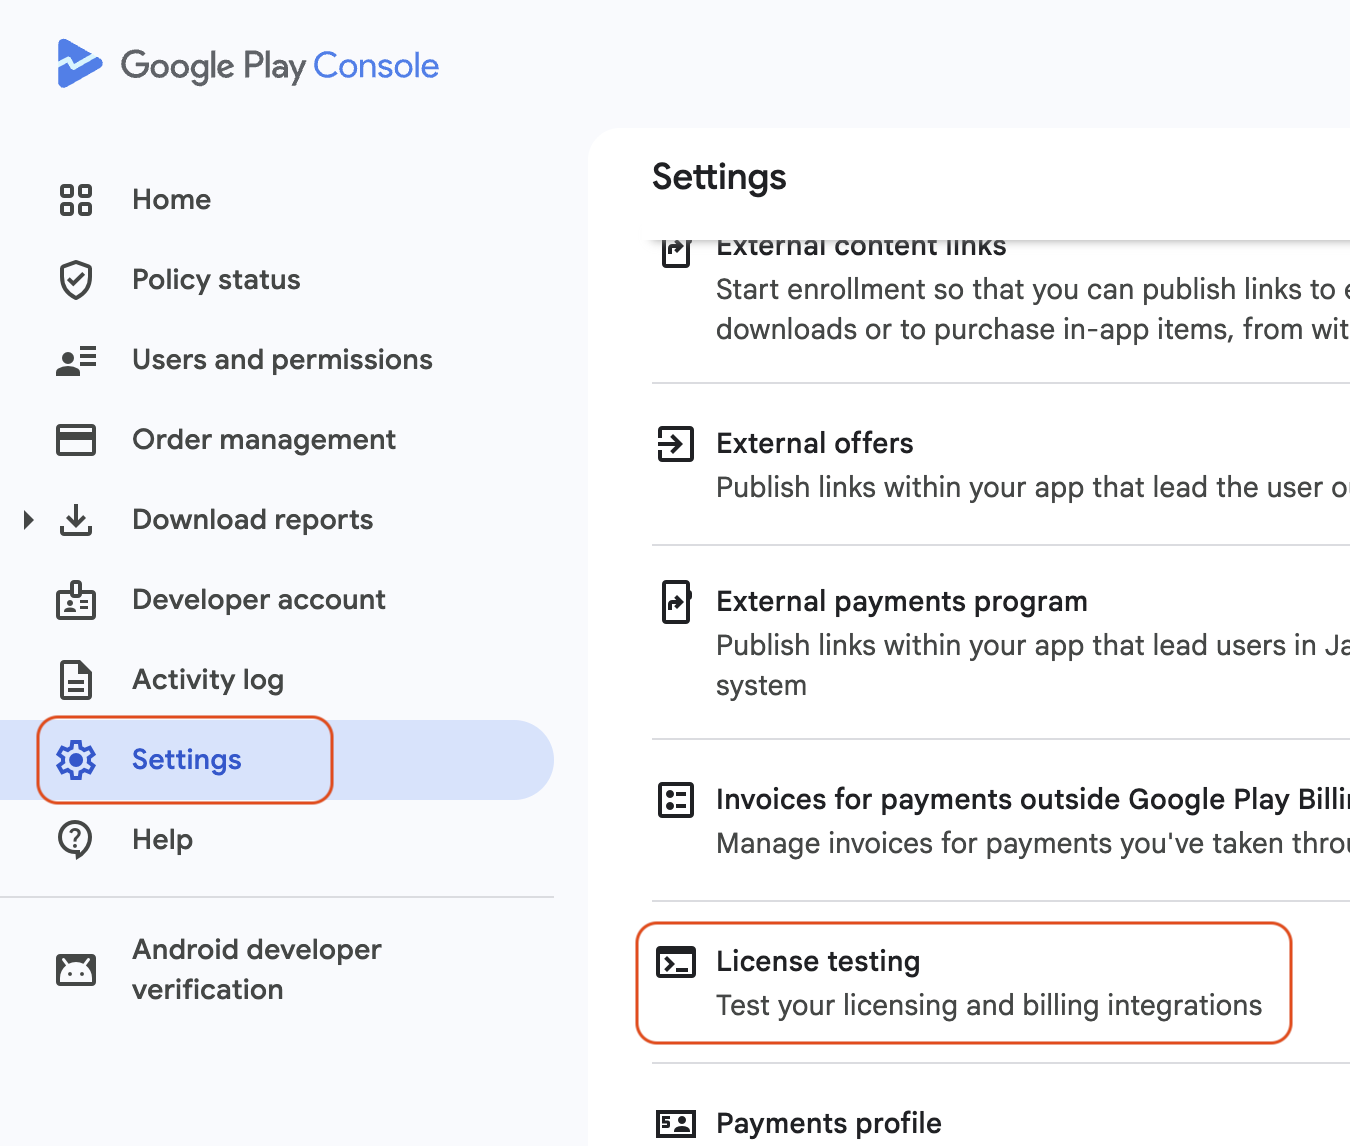
Testing payments on Android
In Google Play Console go to Settings > License testing. Create a new email list and add your email which you use in Google Play Store. Tick the checkbox next to the mailing list and from the dropdown list select LICENSED > Save changes.
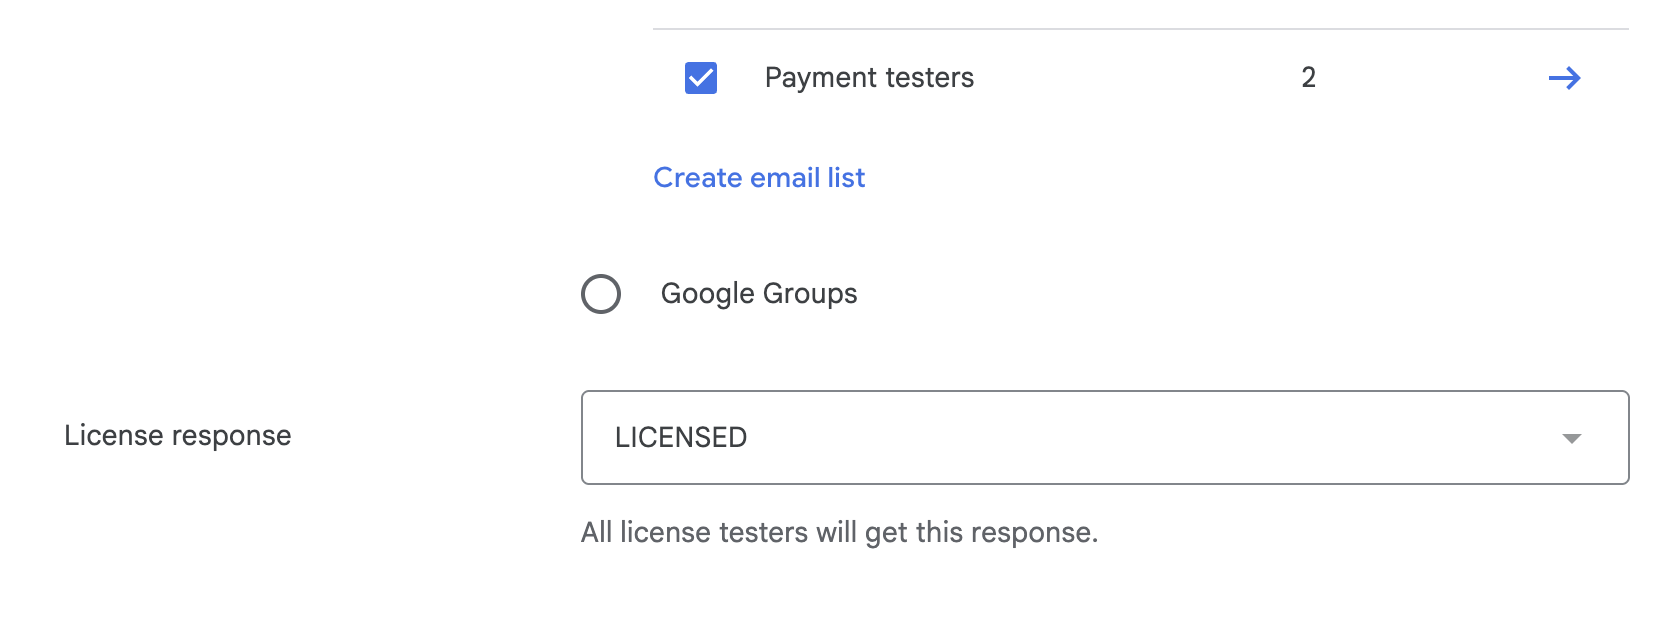
Now you just need to make sure that you're logged in to Google Play Store with that account and you can start testing payment in the app.