TL;DR // summary
Backend errors are trivial. SSH in, check CloudWatch, Kibana, whatever. Done.
Client-side errors in a mobile app? That's where it gets painful. You don't ship full logs (bandwidth and cost would murder you), and 90%+ of production issues are non-fatal garbage that never crashes the app. Vague UI toasts like "Something went wrong" tell you nothing. You need stack traces, context, and metadata without turning your app into a data hose.
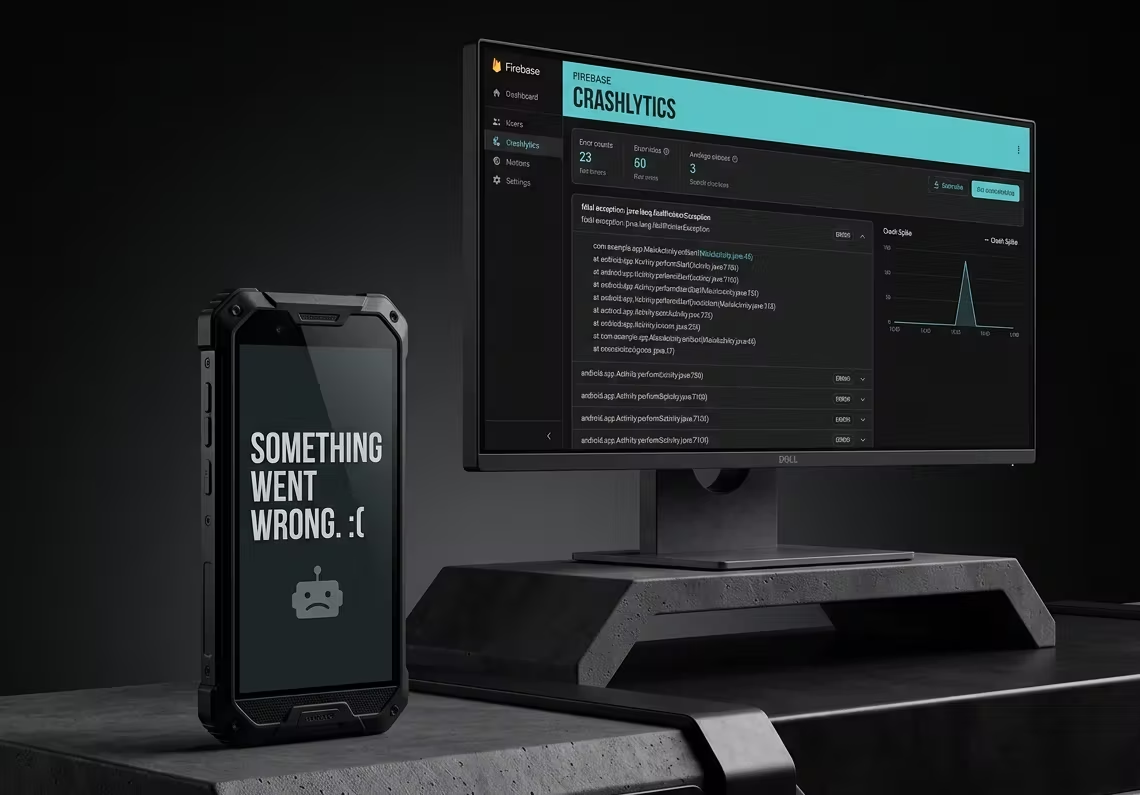
In this guide I will show you how to move from this vague UI side exception like this:
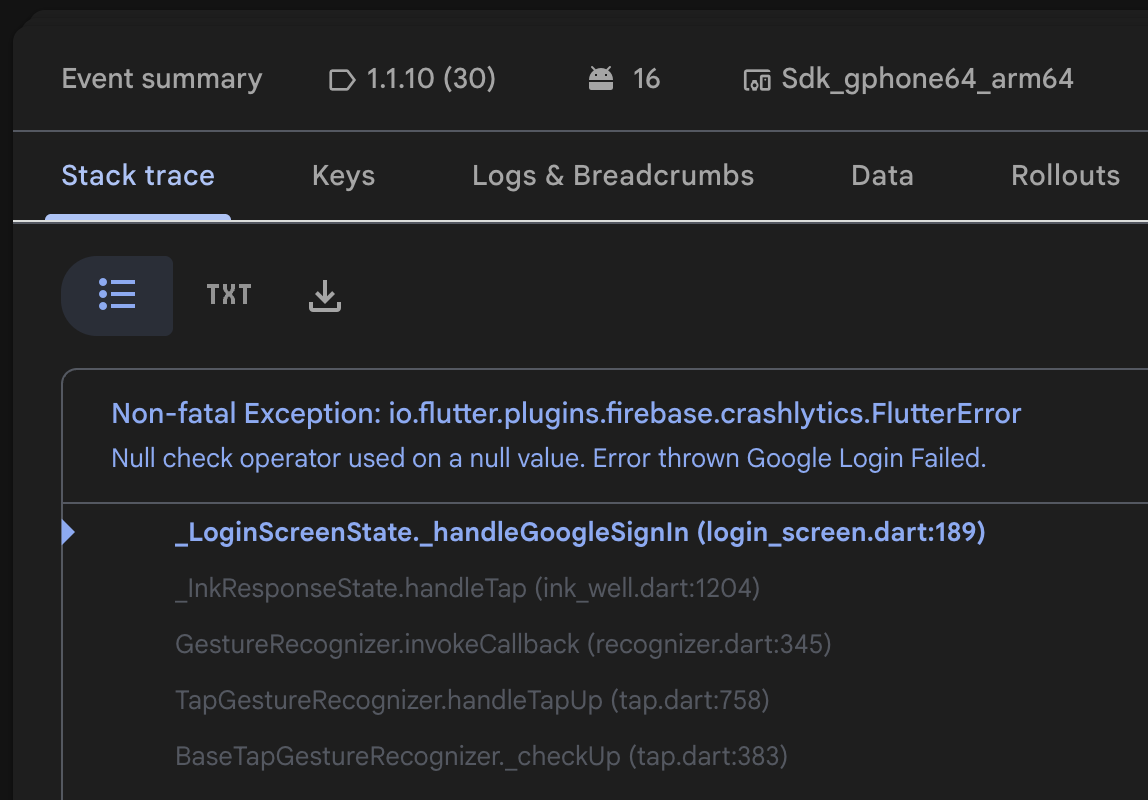
To a detailed error message with stack trace and metadata.
The Problem in Production
You don't publish every client-side log. That would cost a fortune and kill battery/network. Crash reports catch the big ones, but non-critical errors? They slip through and cause support tickets, bad reviews, and lost users.
Multiple approaches exist for client-side logging (Sentry, Bugsnag, custom logging to your own backend, etc.). They all have trade-offs on cost, privacy, and setup pain. Firebase Crashlytics is free for most use cases, integrates cleanly with Flutter, and gives you what you need without the enterprise pricing headache. That's what this guide covers end-to-end.
Step 1: Create a Firebase Project
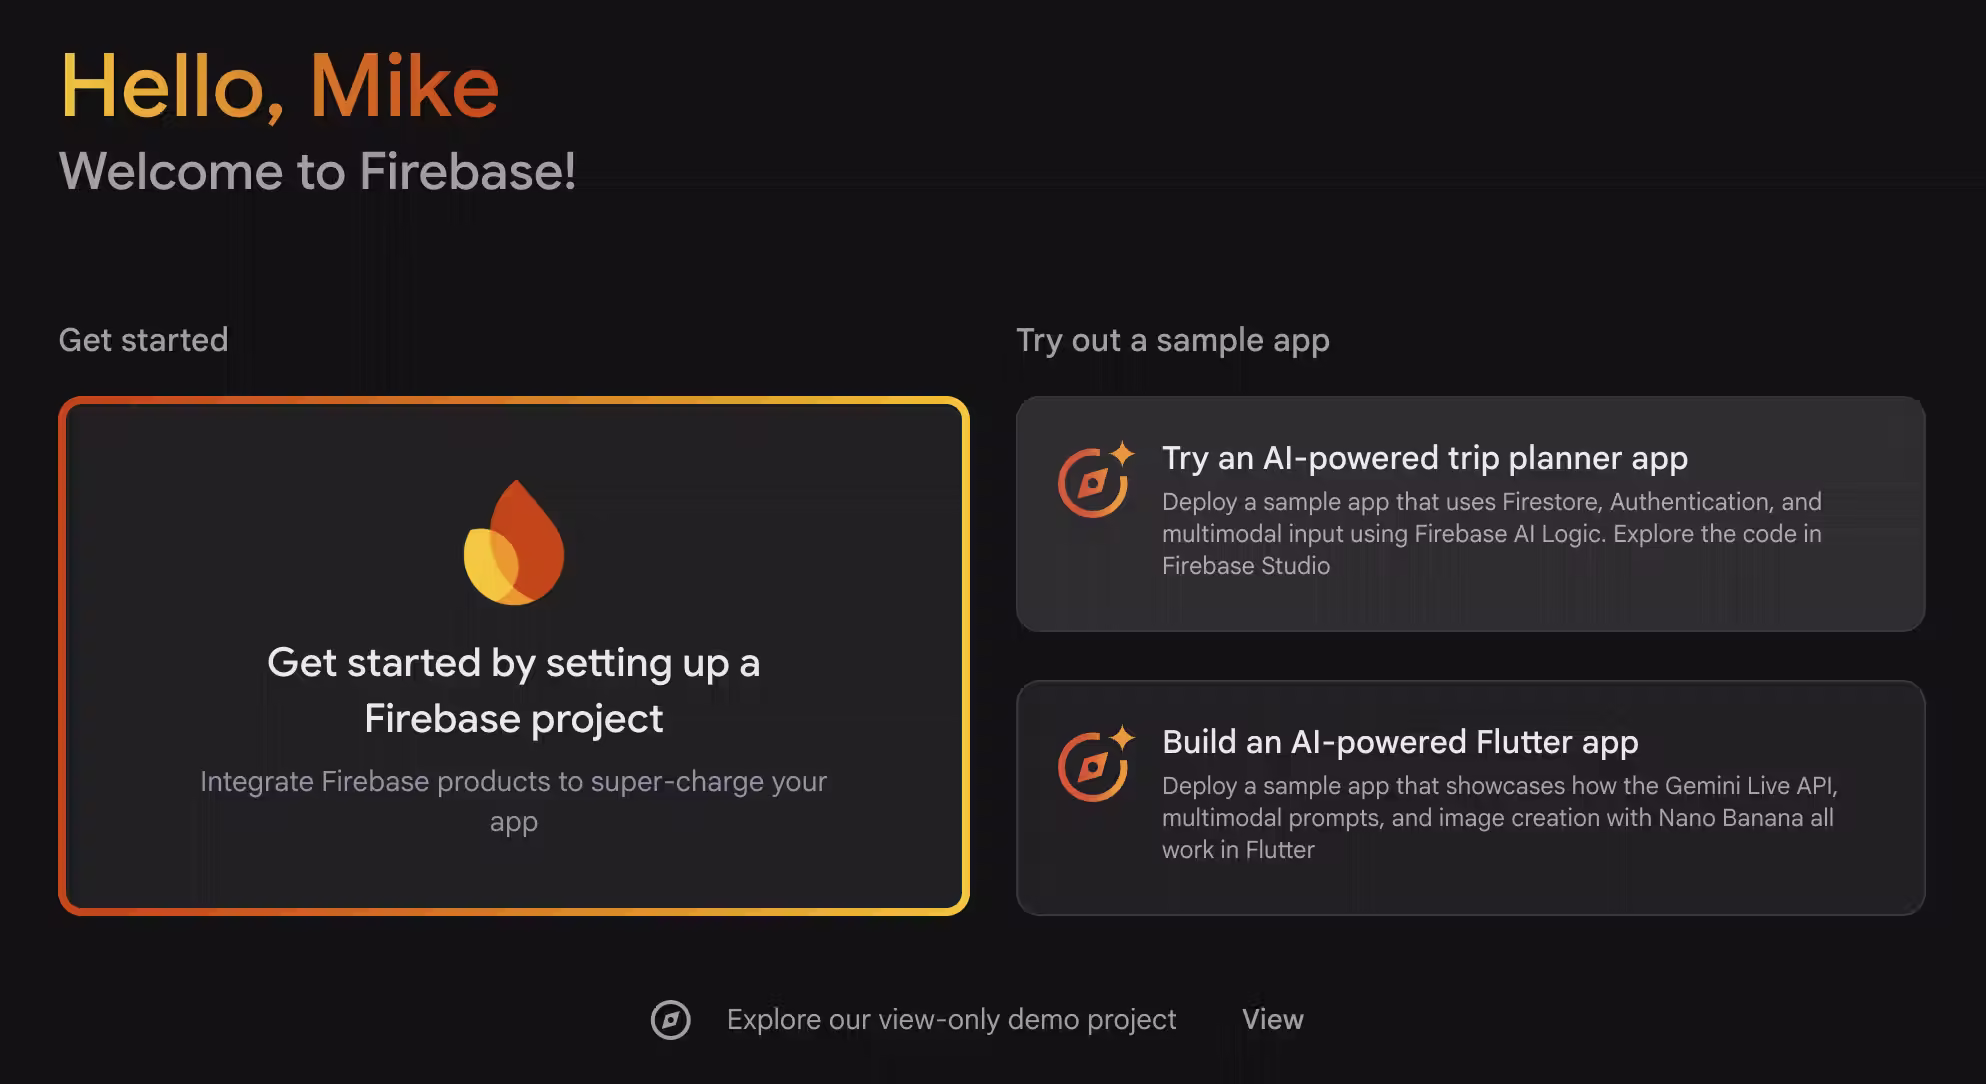
Go to https://firebase.google.com/ and click Get started in console.
You'll need a Google account (use the same one as your Google Cloud if you're already there). Make sure you're using the right Google account!

Choose Get started by setting up a Firebase project.
Name it something clear (e.g., myapp-prod).

Create the project.
If you have multiple mobile apps: Create a separate Firebase project for each one. Mixing them turns your Crashlytics dashboard into an unreadable mess.
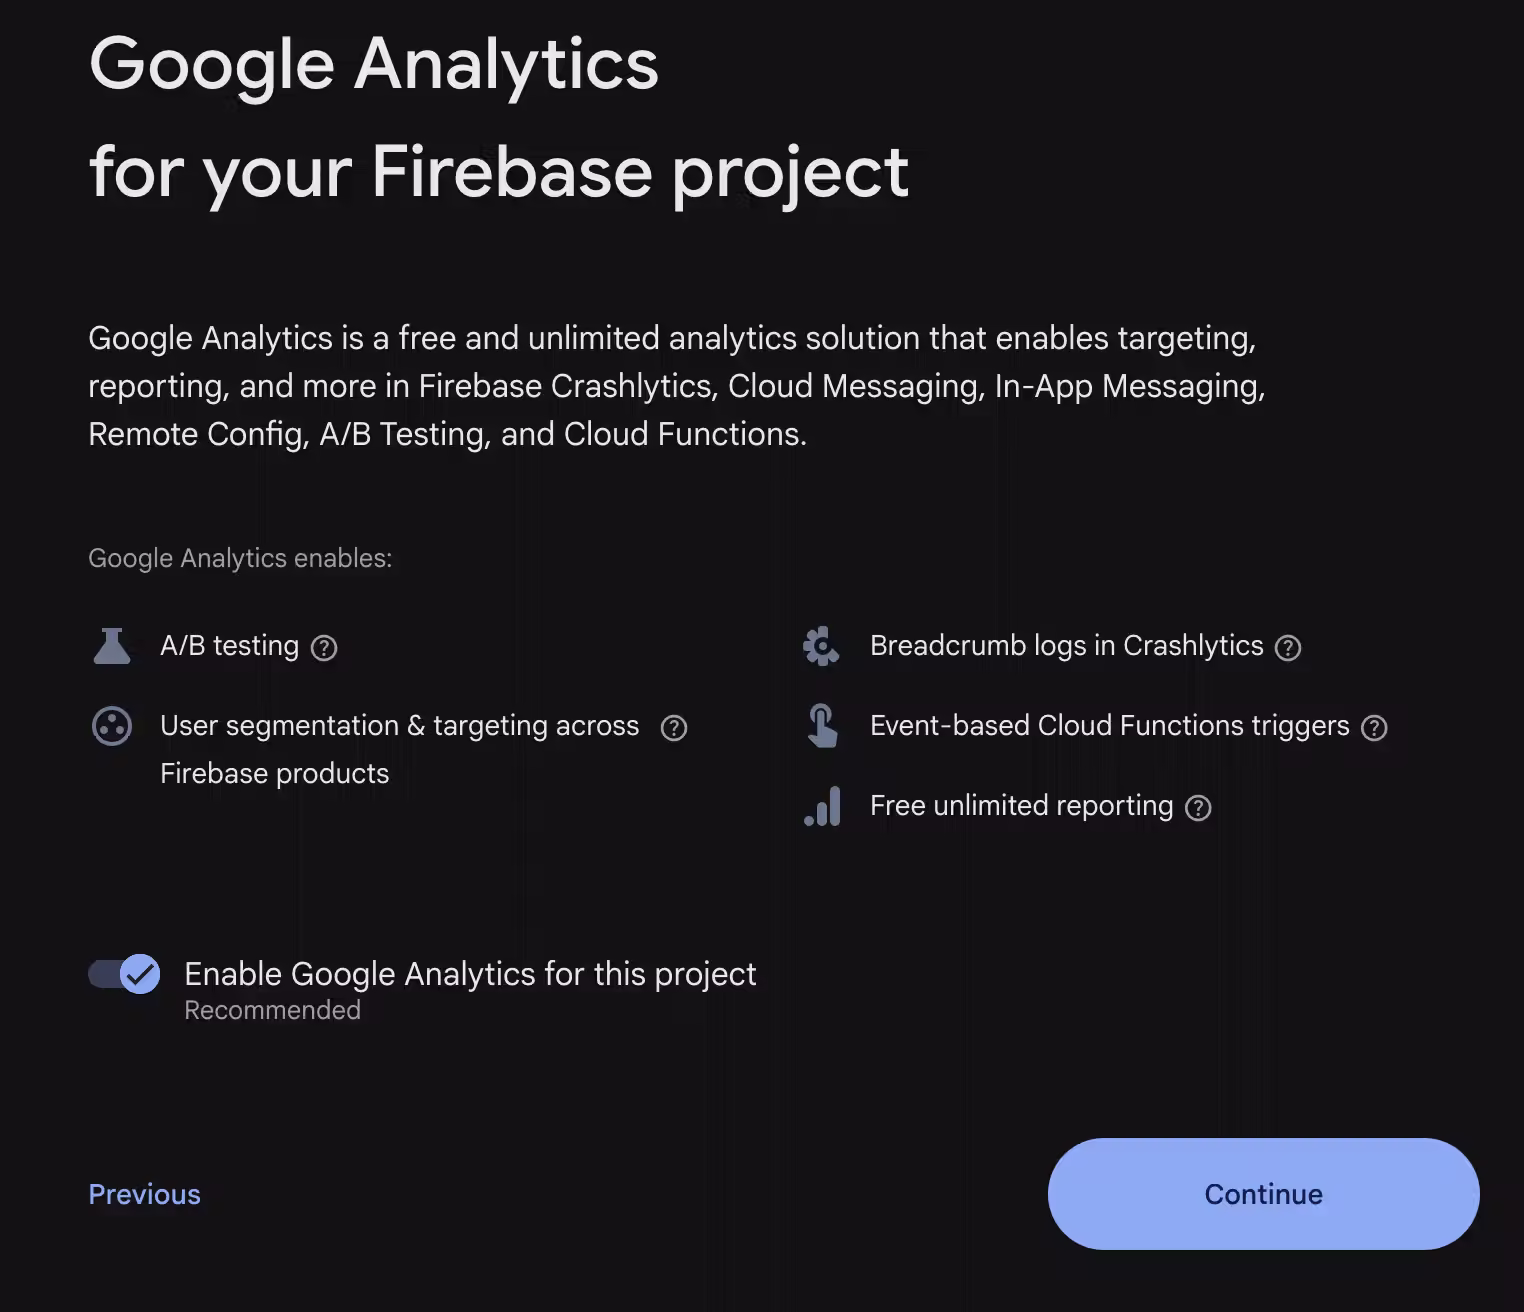
Enable Google Analytics when prompted, the extra breadcrumb data makes errors actually understandable.
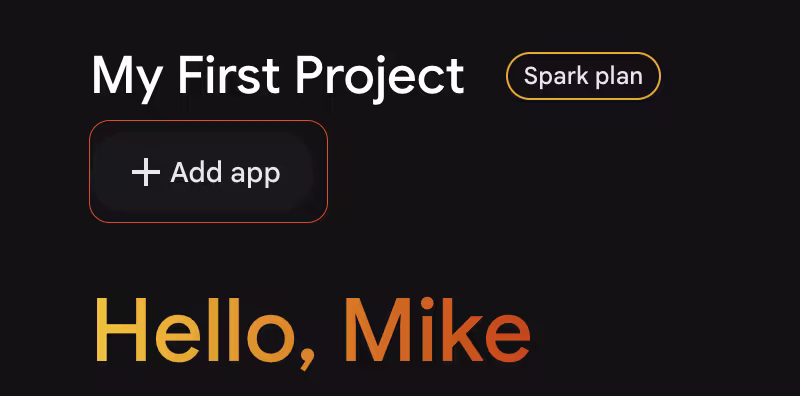
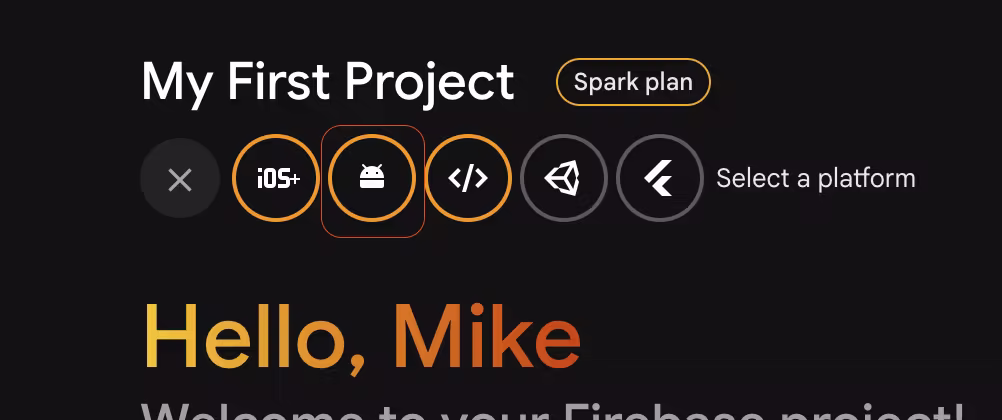
Step 2: Add Your Apps to the Firebase Project
Press on Add app.
Firebase gives us 5 platforms including Flutter. Firebase talks to the native Android and iOS layers. The "Flutter" option in the console is just a tutorial helper, it doesn't register the real platform apps you need for production Crashlytics and Analytics.
Register both an Android app and an iOS app in the same Firebase project.
Android Setup
In the Firebase console, click the Android icon.
Find your Android package name in android/app/build.gradle.kts under applicationId (or android/app/src/main/AndroidManifest.xml).
Enter the package name, and optionally nickname and debug SHA-1 (not required for Crashlytics).
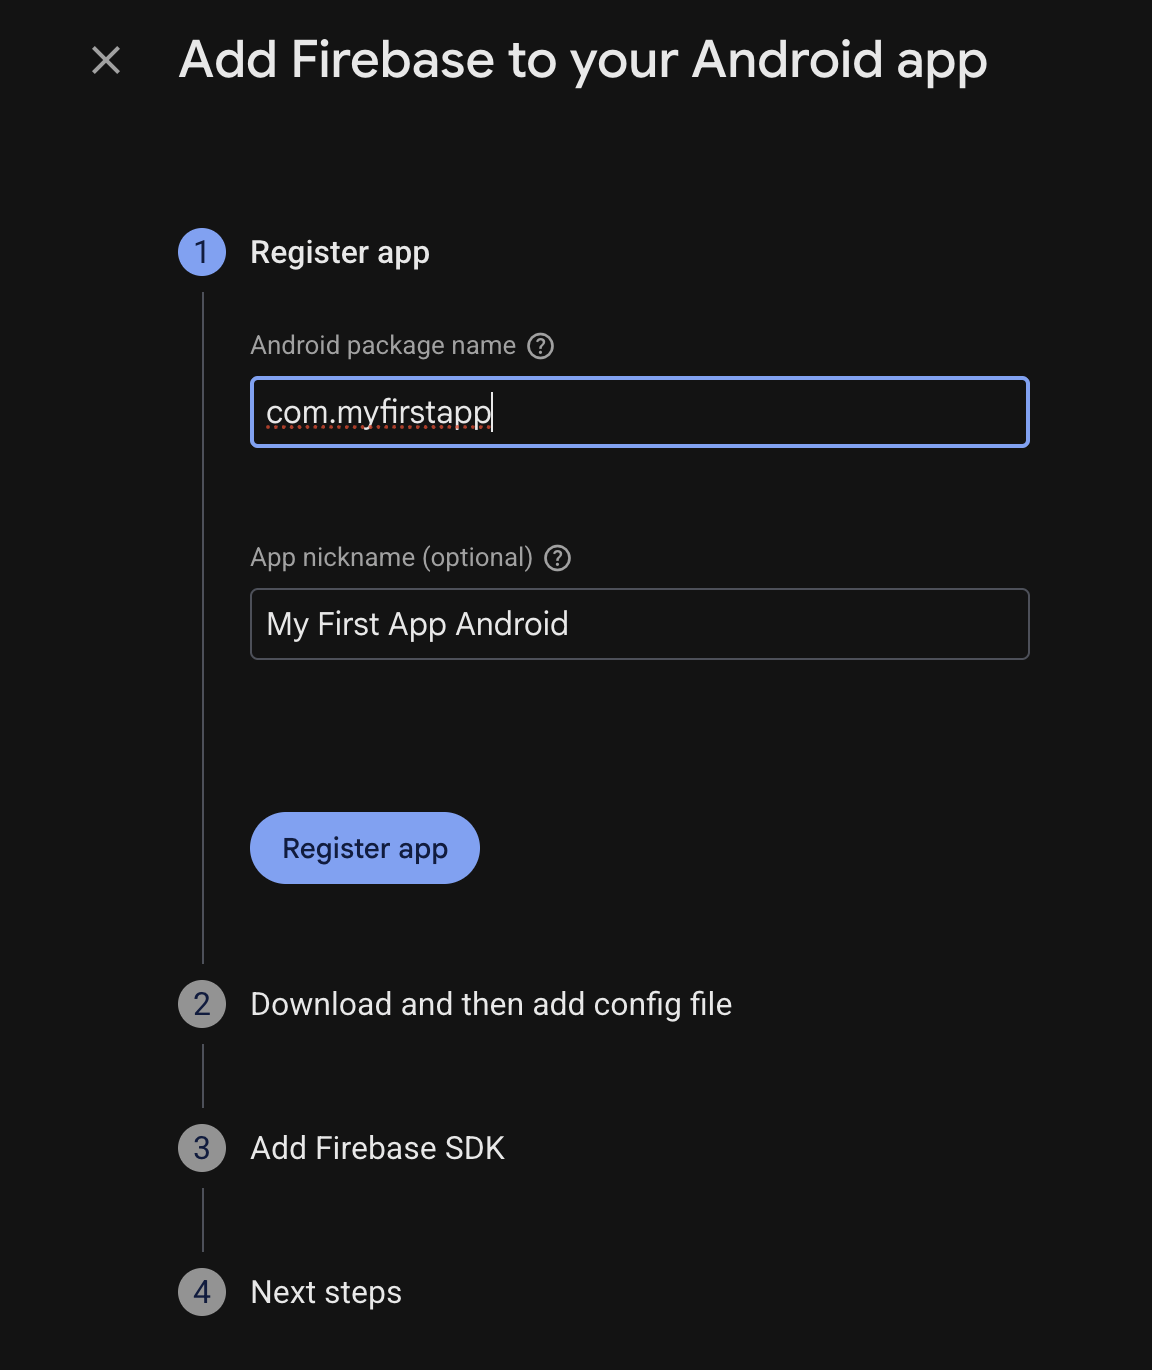
Download google-services.json and drop it into android/app/.
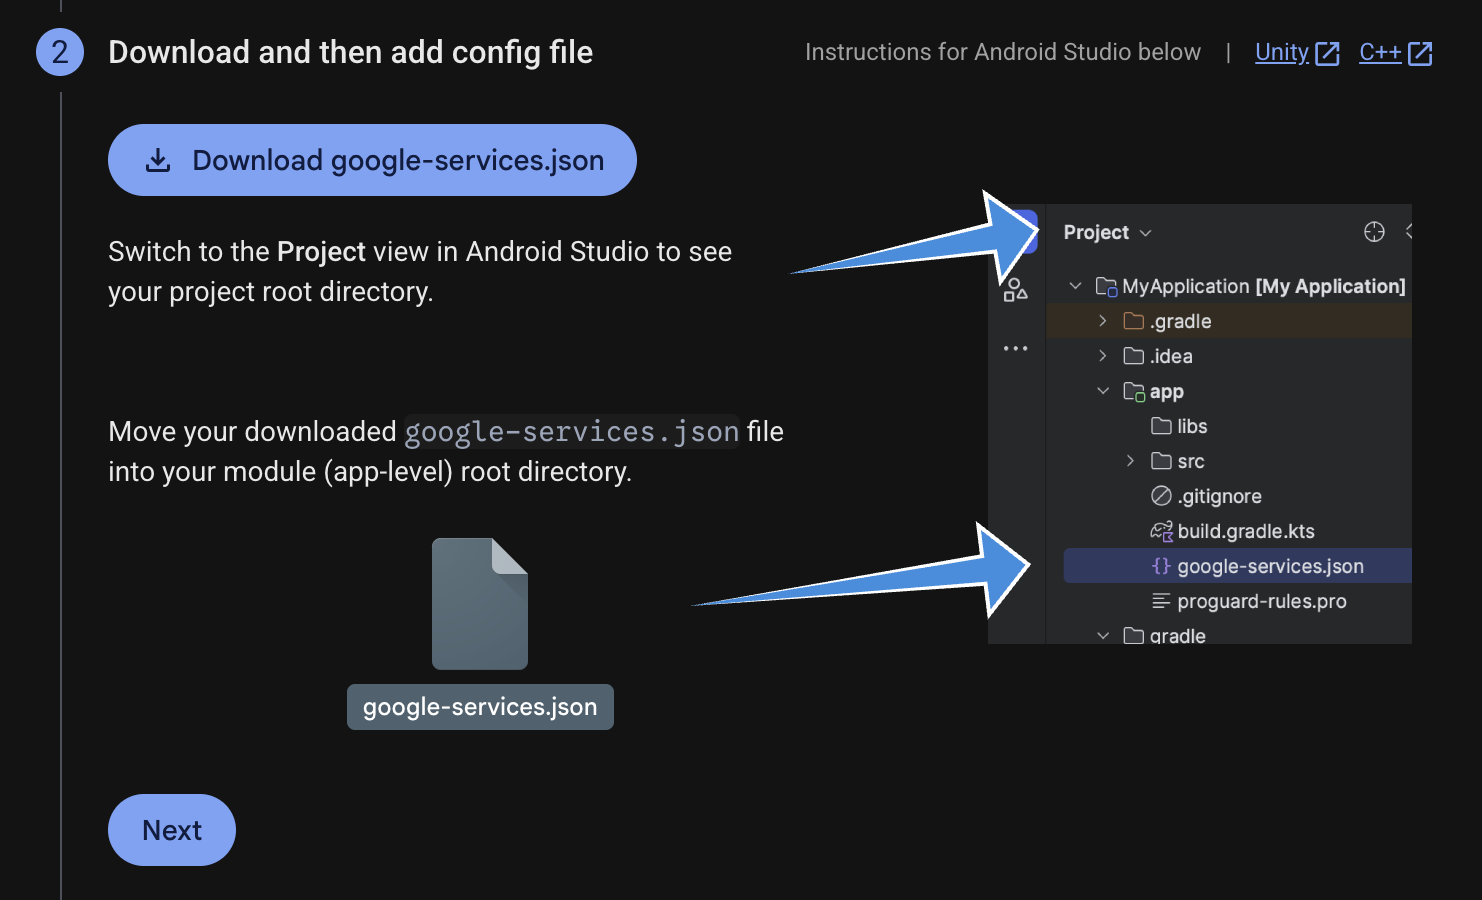
Skip the "Add Firebase SDK" section in the console, we'll handle that properly below.
iOS Setup
In the console, click the iOS icon.
Enter your Apple Bundle ID (same as in Xcode → Runner target → General → Bundle Identifier). It must match exactly.
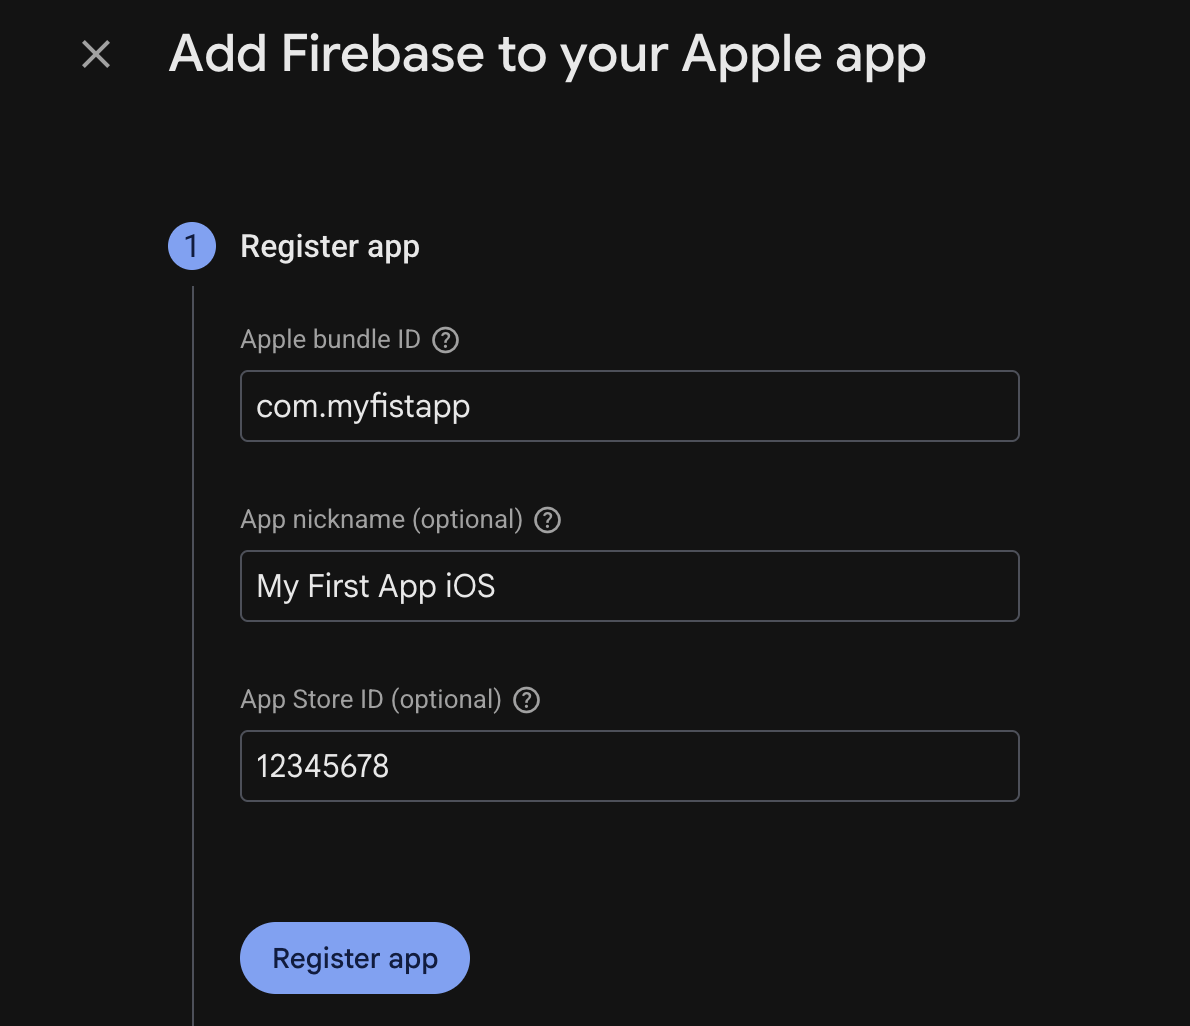
Optionally add App Name and App Store ID (only if your app is live or in TestFlight).
Download GoogleService-Info.plist and place it in ios/Runner/.
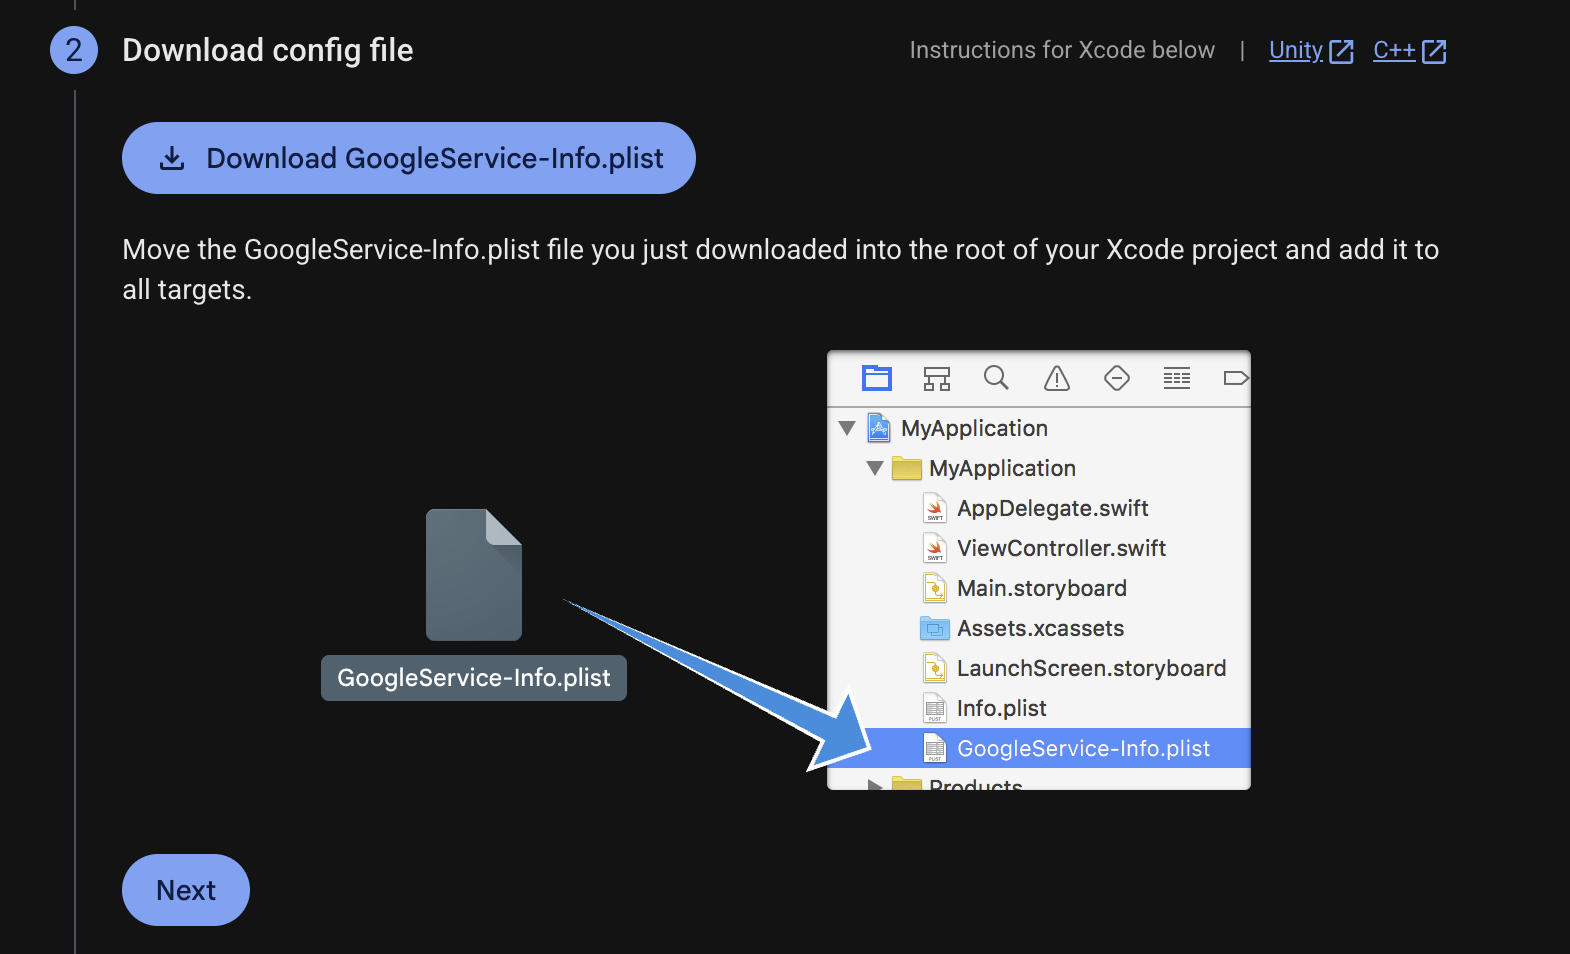
In Xcode:
- Open
ios/Runner.xcworkspace - Right click on Runner folder and select "Add Files to "Runner"..
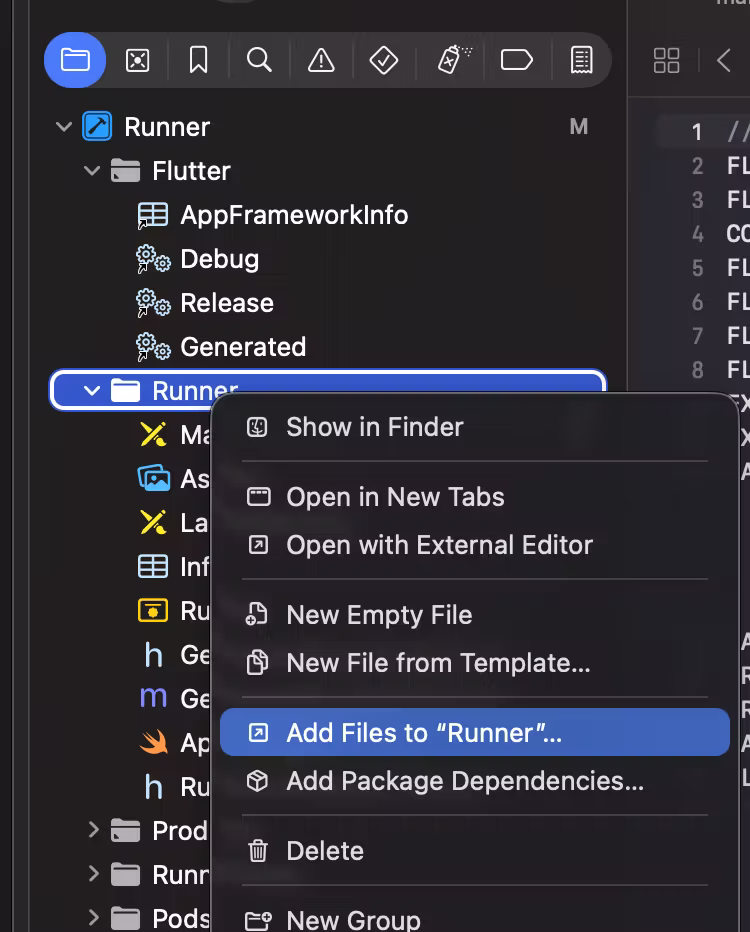
- Select downloaded GoogleService-Info.plist
- Select Runner target → Build Phases
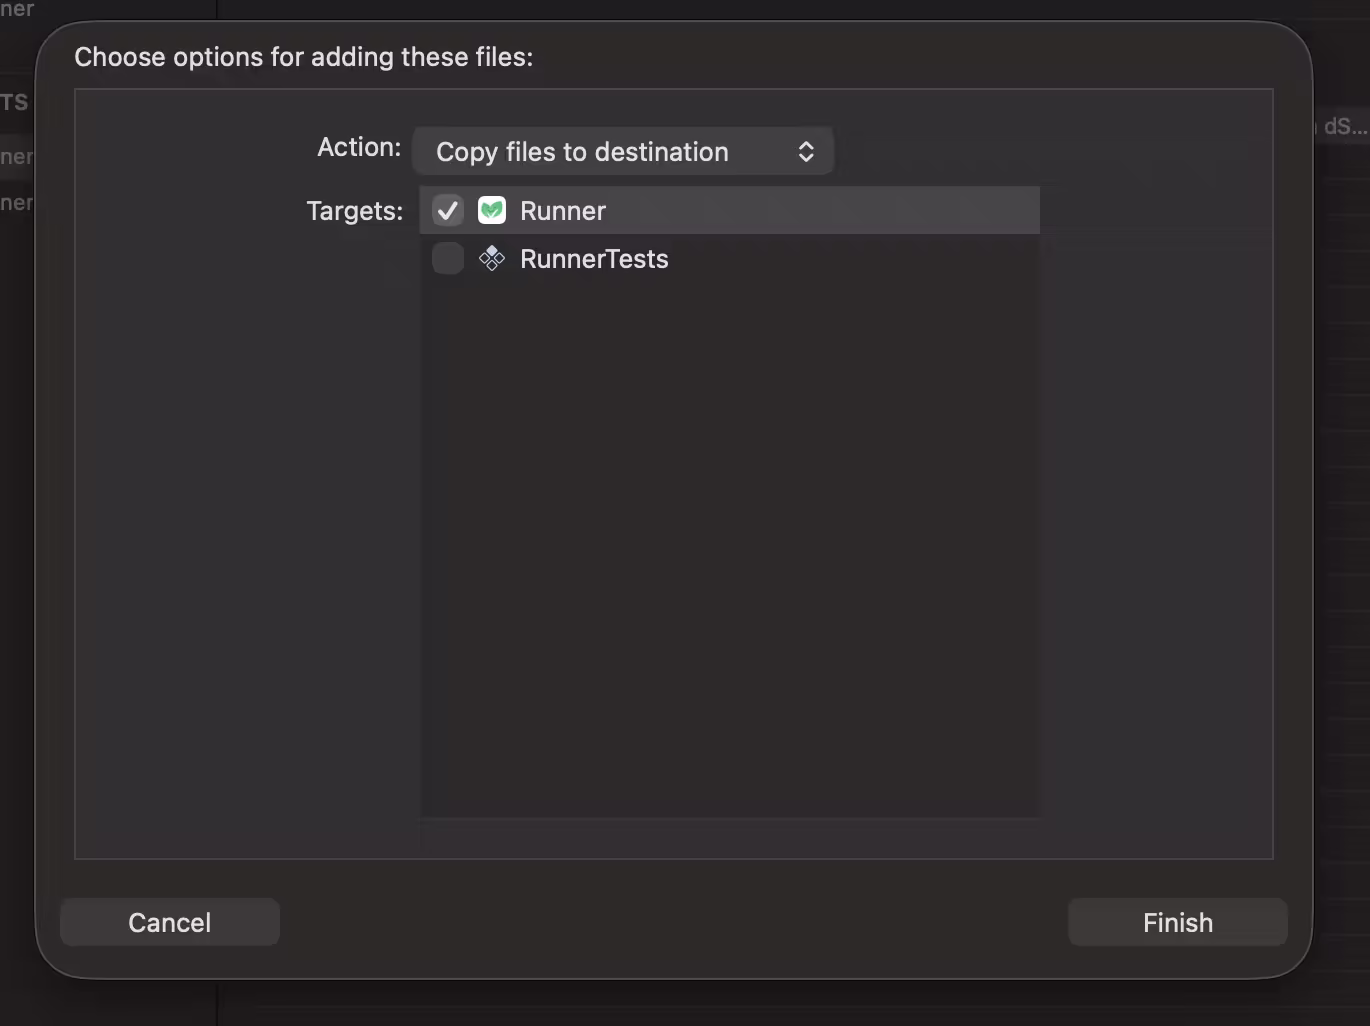
- Only select the Runner target when adding the plist
- Finish
Skip steps 3, 4, and 5 in the console wizard.
Step 3: iOS Native Setup (Xcode)
Open Xcode (Runner.xcworkspace).
Go to Runner target → Build Phases.
Click the + button → New Run Script Phase.

Drag it so it sits below "Embed Frameworks".
Name it "Firebase Crashlytics" (double-click the phase name).
Paste this exact script:
${PODS_ROOT}/FirebaseCrashlytics/run
(If using CocoaPods with the newer Firebase SDK layout, the official script is now sometimes "${BUILD_DIR%/Build/*}/SourcePackages/checkouts/firebase-ios-sdk/Crashlytics/run" — check your Pods folder if the first one fails.)
Verify Debug Symbols (Critical)
Targets → Runner → Build Settings → search "Debug Information Format".
Make sure the top row (Runner, all configurations, especially Release) is set to DWARF with dSYM File.
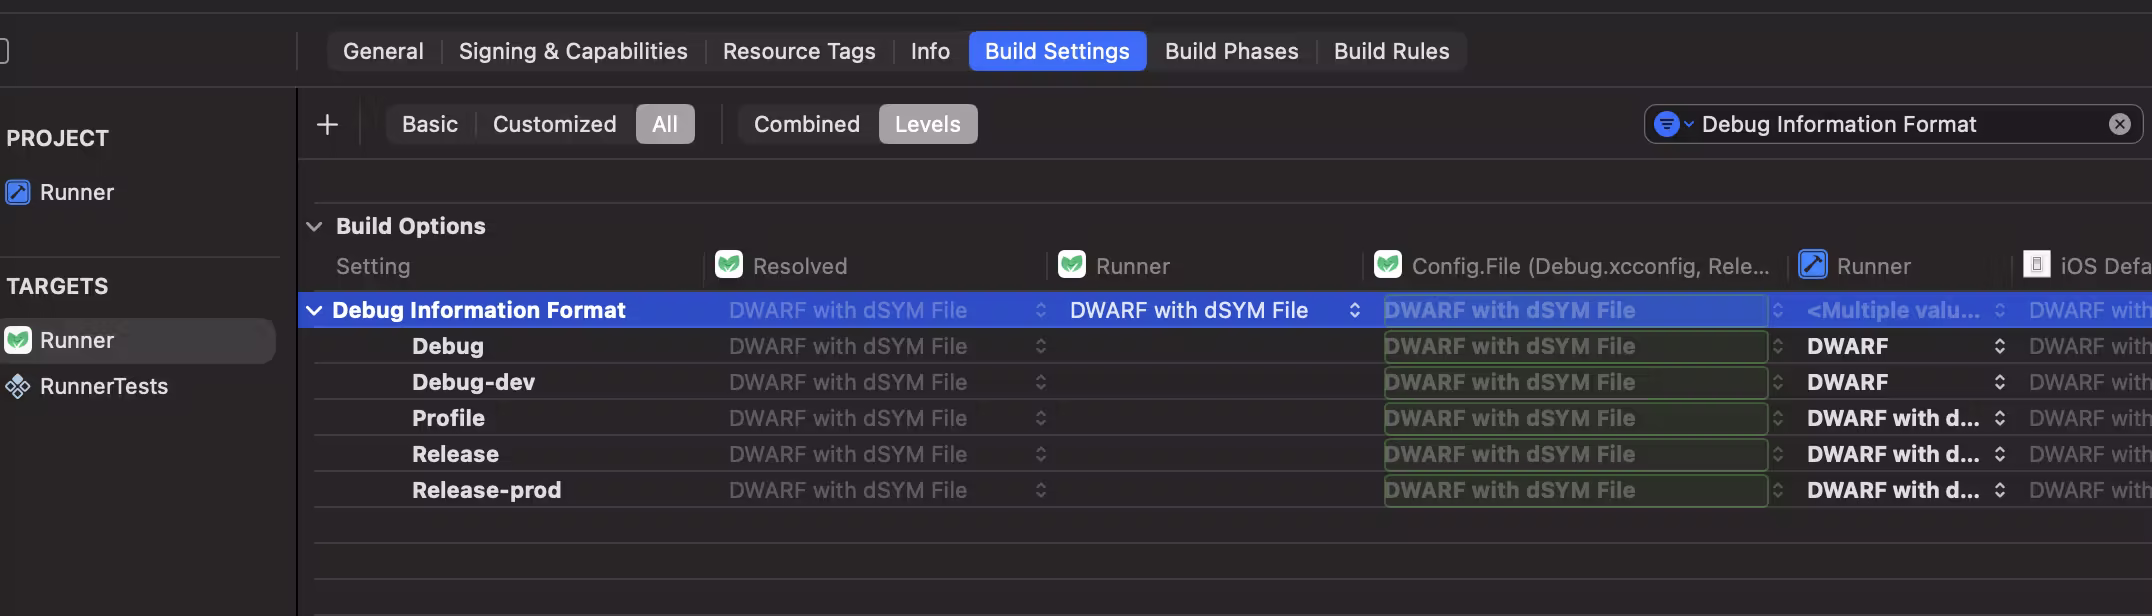
Without this, your iOS stack traces are garbage in Crashlytics.
Run cd ios && pod install (or flutter build ios which does it).
Step 4: Flutter Project Setup
First, add the dependencies (2026 versions):
flutter pub add firebase_core firebase_crashlytics firebase_analyticsStrongly recommended modern way:
Run flutterfire configure from your project root. It handles config files, Gradle plugins, and options automatically. Do this after creating the Firebase project and registering platforms.
If doing everything manually (legacy projects or you like pain):
Update Gradle (Android)
In android/build.gradle.kts (project-level), inside the allprojects or buildscript block (newer AGP uses plugins block but keep compatibility):
buildscript {
    repositories {
        google()
        mavenCentral()
    }
    dependencies {
        classpath("com.google.gms:google-services:4.4.4")  // latest 2026
        classpath("com.google.firebase:firebase-crashlytics-gradle:3.0.6")  // latest 2026
    }
}
In android/app/build.gradle.kts:
plugins {
    // ... your existing plugins (id("com.android.application"), kotlin, etc.)
    id("com.google.gms.google-services")
    id("com.google.firebase.crashlytics")
}
Rebuild: flutter clean && flutter pub get && flutter build apk (or whatever).
Step 5: Initialize in main.dart
Put this at the very start of your app (right after WidgetsFlutterBinding.ensureInitialized()):
import 'package:firebase_core/firebase_core.dart';
import 'package:firebase_crashlytics/firebase_crashlytics.dart';
import 'package:flutter/foundation.dart';
import 'package:flutter/material.dart';
import 'dart:ui';

Future<void> main() async {
  WidgetsFlutterBinding.ensureInitialized();

  await Firebase.initializeApp();

  // Only enable in release (or use your own env flag)
  await FirebaseCrashlytics.instance.setCrashlyticsCollectionEnabled(kReleaseMode);

  // Flutter framework errors
  FlutterError.onError = FirebaseCrashlytics.instance.recordFlutterFatalError;

  // Async / isolate / uncaught errors
  PlatformDispatcher.instance.onError = (error, stack) {
    FirebaseCrashlytics.instance.recordError(error, stack, fatal: true);
    return true;
  };

  runApp(const MyApp());
}
For a cleaner setup, wrap it in a class exactly like the draft wanted:
class FirebaseConfig {
  static Future<void> setUpFirebaseCrashAnalytics() async {
    await Firebase.initializeApp();

    await FirebaseCrashlytics.instance.setCrashlyticsCollectionEnabled(kReleaseMode);

    FlutterError.onError = FirebaseCrashlytics.instance.recordFlutterFatalError;

    PlatformDispatcher.instance.onError = (error, stack) {
      FirebaseCrashlytics.instance.recordError(error, stack, fatal: true);
      return true;
    };
  }
}
Then call it in main:
void main() async {
  WidgetsFlutterBinding.ensureInitialized();
  await FirebaseConfig.setUpFirebaseCrashAnalytics();
  // ... rest of your app
}
Step 6: Record Non-Fatal Errors in Your Code
Catch blocks are where the magic happens:
try {
  // your risky code
  String? nullString = null;
  nullString!.toLowerCase();  // boom
} catch (error, stackTrace) {
  await FirebaseCrashlytics.instance.recordError(
    error,
    stackTrace,
    reason: 'Google Sign-In failed',  // context
    fatal: false,
  );
}
Step 7: Add Metadata and User Context
Anywhere in your app:
final crashlytics = FirebaseCrashlytics.instance;

crashlytics.setCustomKey('env', 'prod');
crashlytics.setCustomKey('userId', currentUser?.id ?? 'anonymous');
crashlytics.setUserIdentifier(currentUser?.id ?? '');  // shows up as User ID in console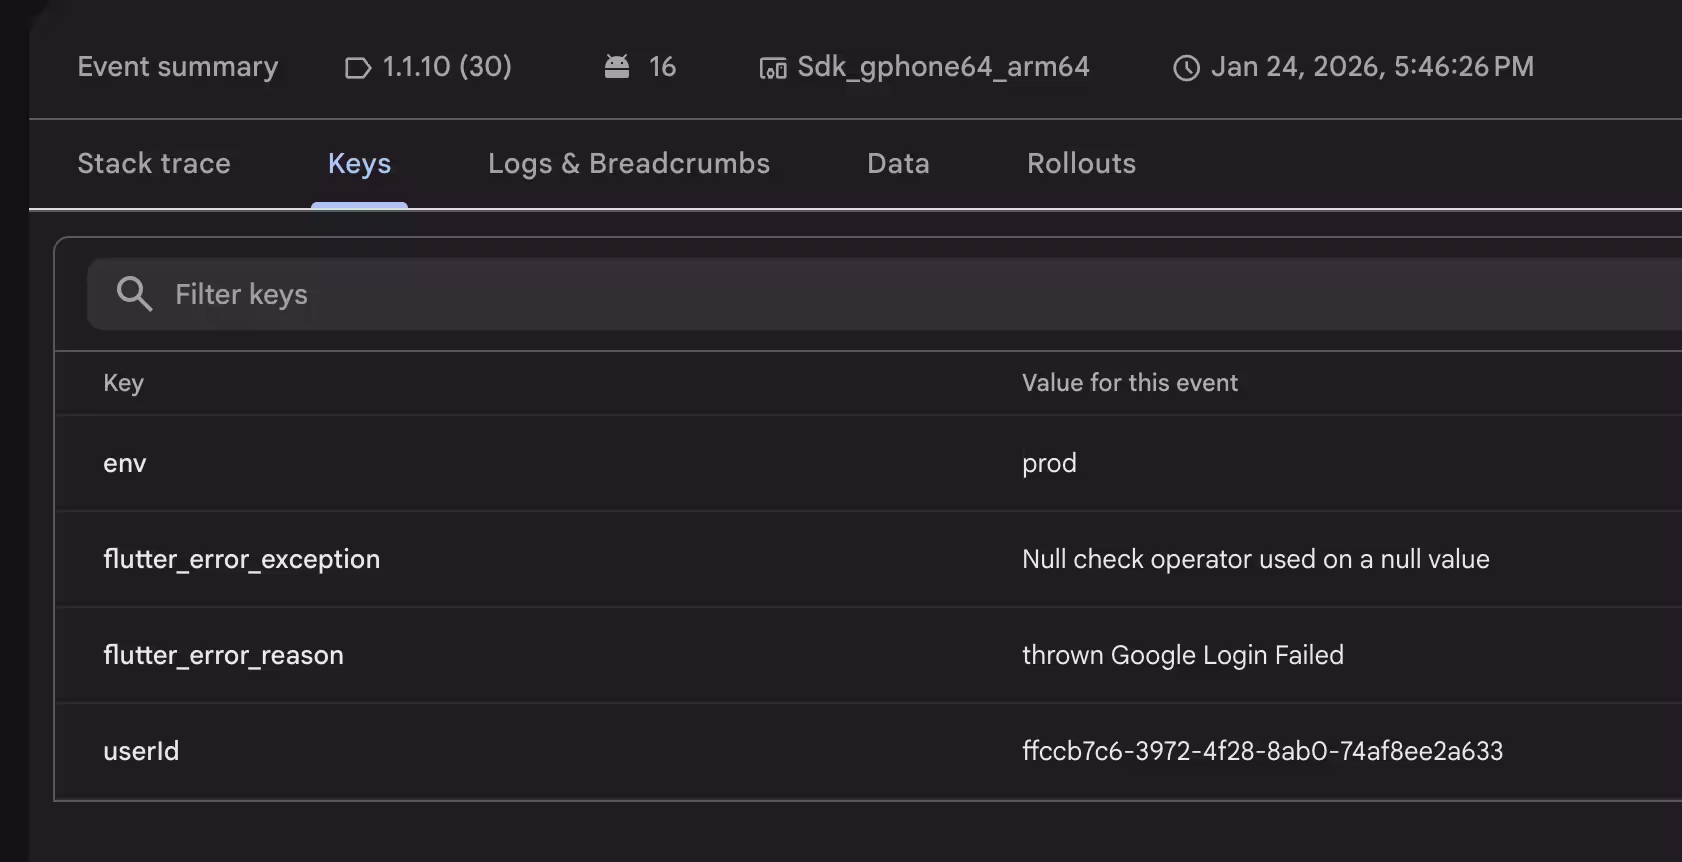
Step 8: Testing It
Important: By default, Crashlytics only sends data from release builds. For debug testing, temporarily add:
await FirebaseCrashlytics.instance.setCrashlyticsCollectionEnabled(true);Force a test error (null check, throw Exception, etc.).
Events are buffered on device and uploaded in batches when the app goes to background, restarts, or after a delay. This is intentional — it saves battery and network. Re-open the app a couple times if it doesn't appear instantly.
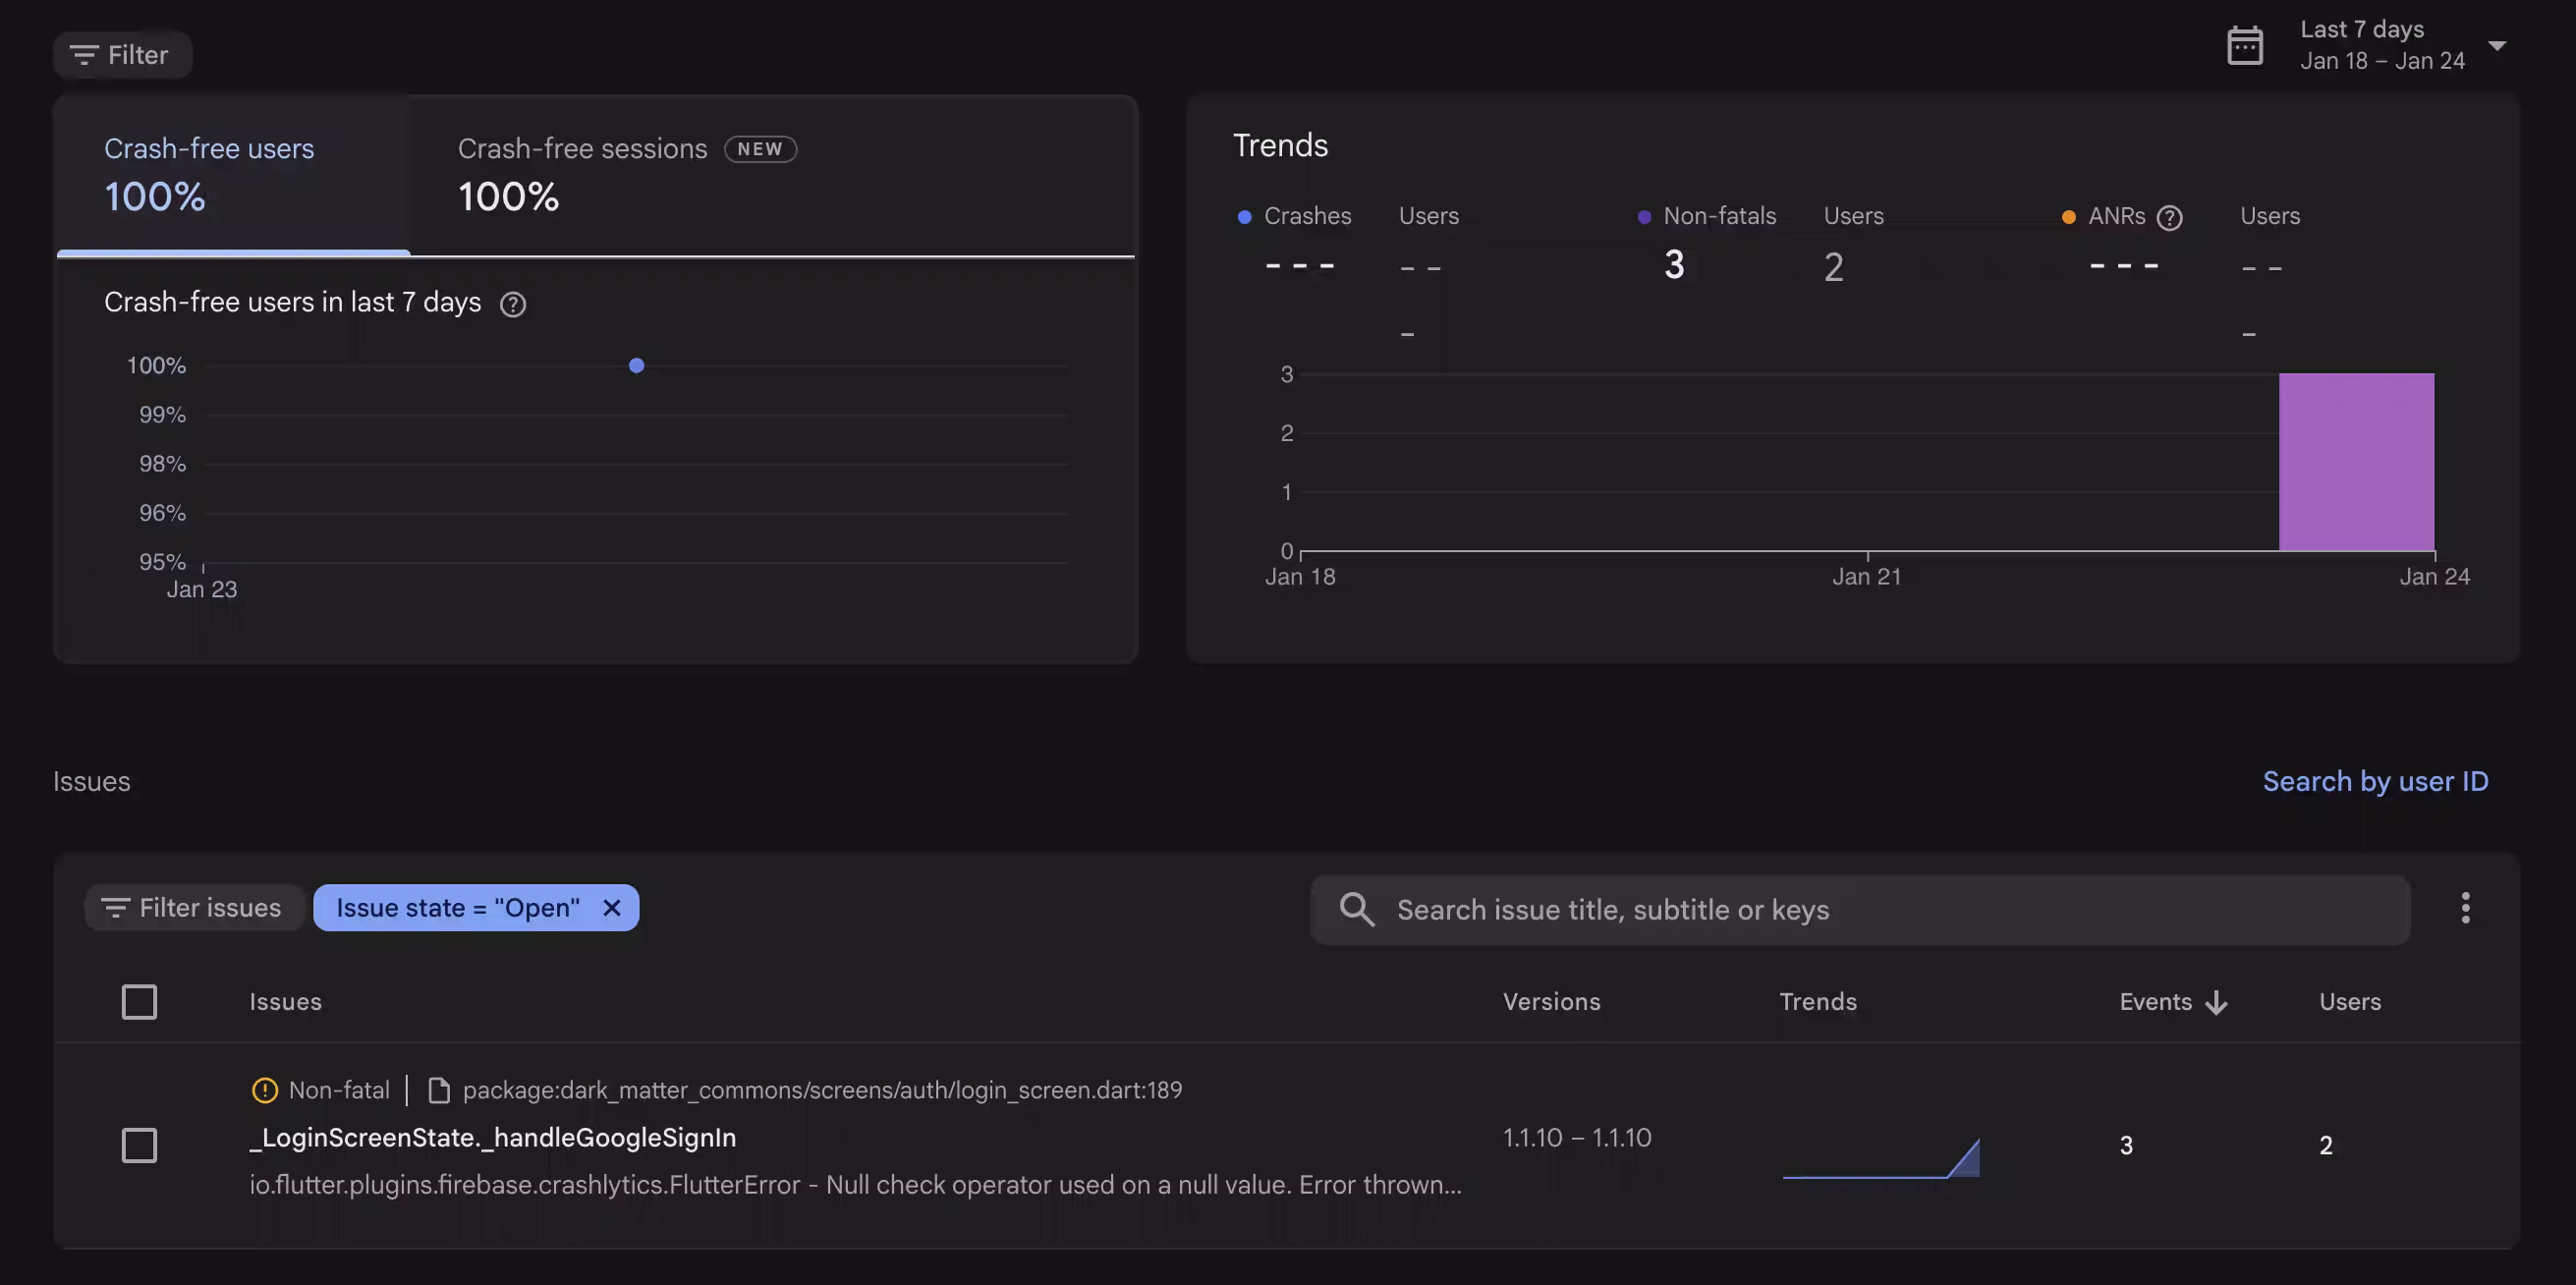
Step 9: View in Firebase Console
Go to your project → Crashlytics (under Run or left menu).

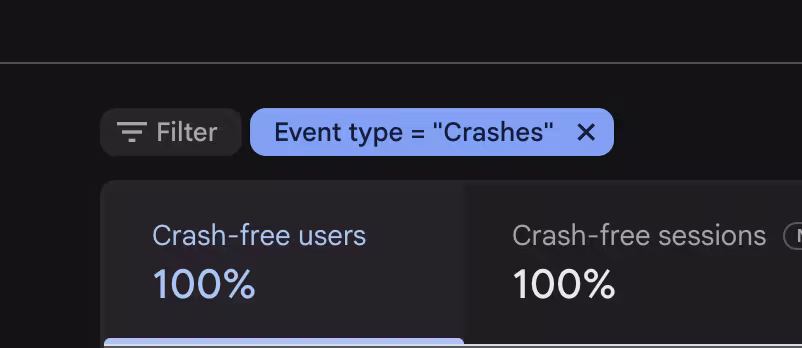
Filter out "Crashes" to see non-fatal errors.
You'll see:
- Full stack trace
- App version
- Device/OS details
- Custom keys (env, userId, etc.)
- Breadcrumbs from Analytics
Tada — no more guessing.
Common Gotchas That Will Bite You
- "Could not get GOOGLE_APP_ID" in Xcode: Plist not added to Runner target, wrong location, or didn't run pod install. Clean, pod install, rebuild.
- Unreadable stack traces: Missing dSYM (iOS) or ProGuard/R8 mapping (Android obfuscated builds).
- Nothing appears in console: Collection not enabled, no internet, or you didn't re-open the app after the error.
- Simulator iOS: total waste of time.
This exact setup has run in production apps I've shipped. It catches the errors that actually matter without the overhead. Follow it step-by-step and you'll stop guessing why users see blank screens.
Ship it. Fix real bugs instead of playing detective.